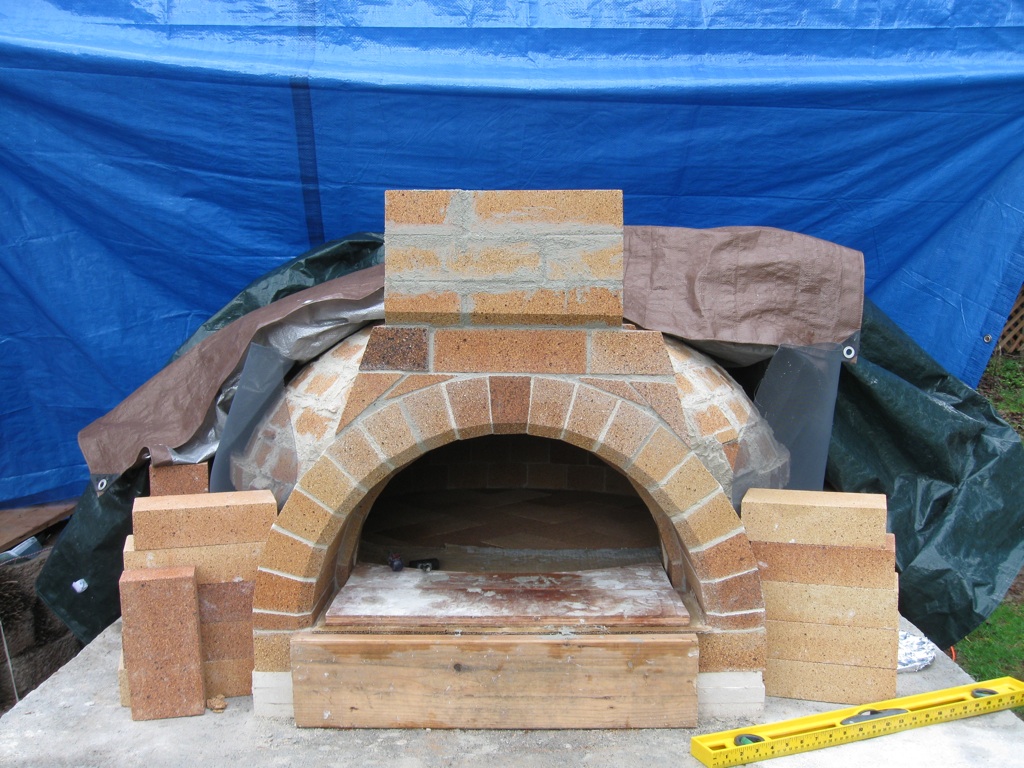
Brick Pizza Oven Models and Photos
This webpage contains not only numerous images, both models and photos, but also quite a lot of description. Click the thumbnails to view larger images and read descriptive notes in the captions.
Schematic Designs
All model renderings shown here were constructed with Meshwork. Click individual images to see larger versions.
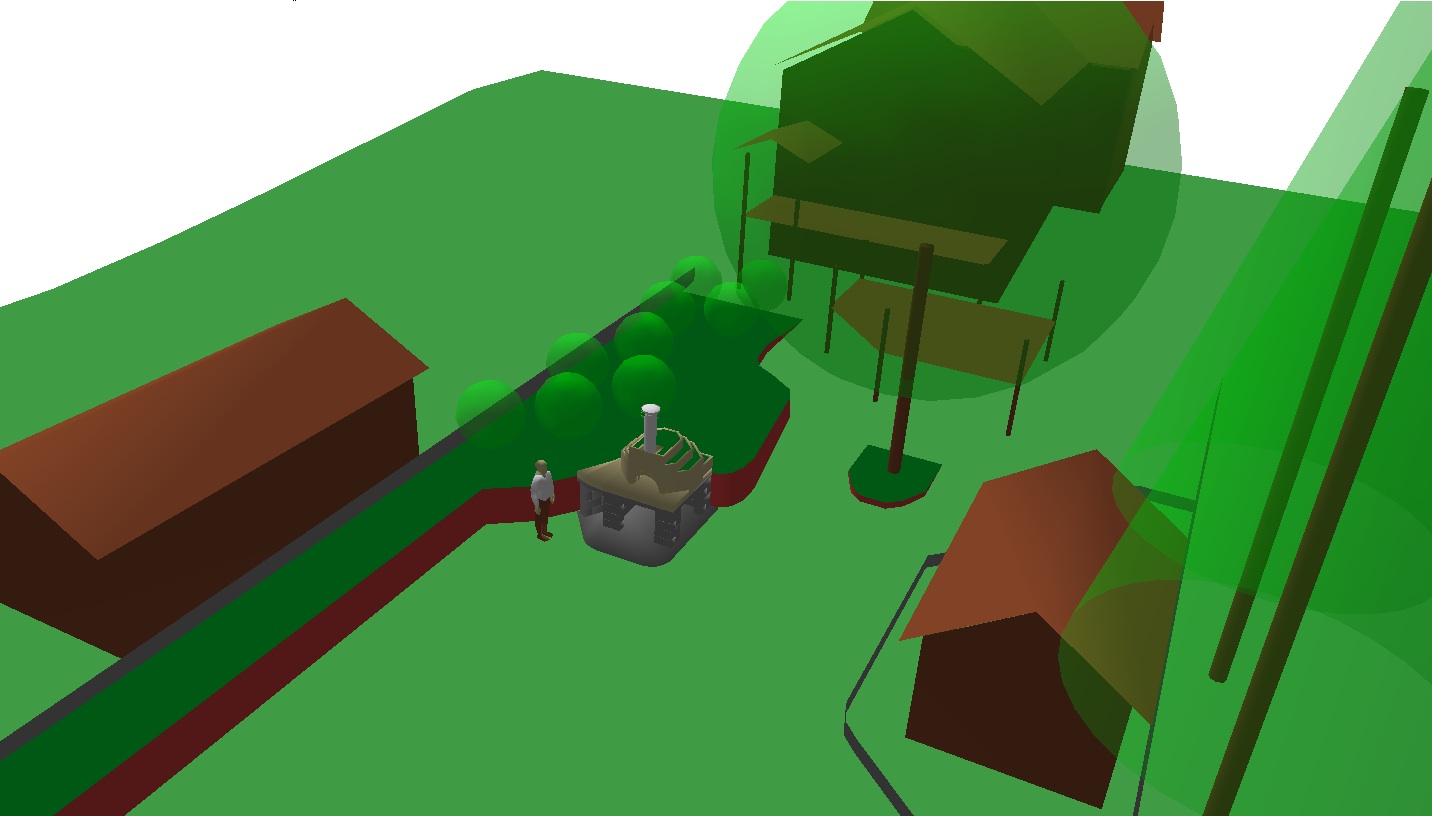
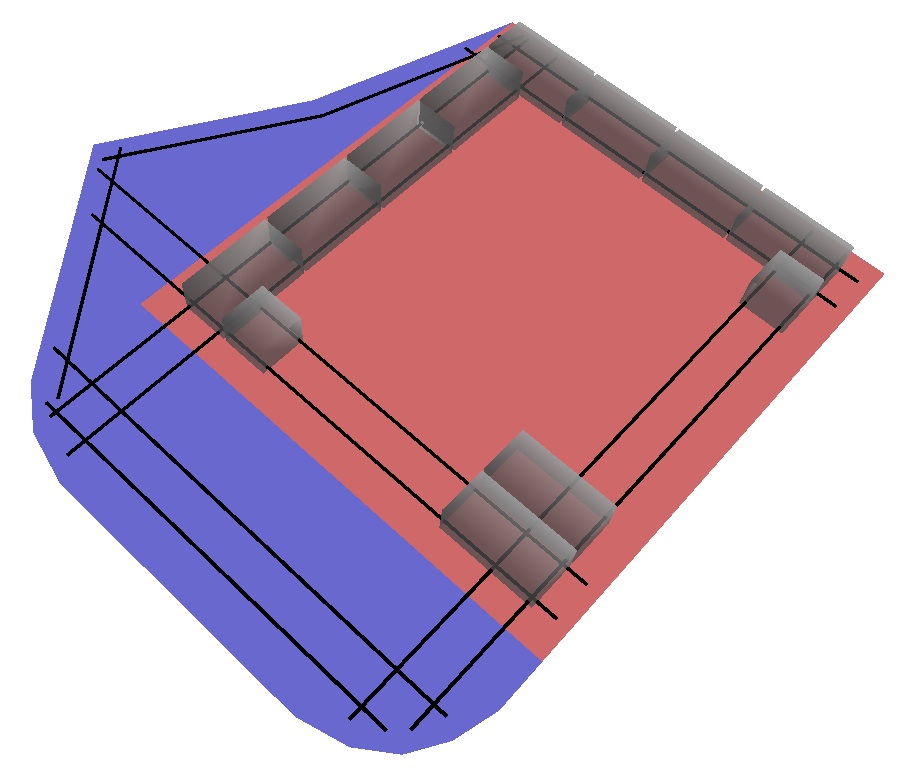
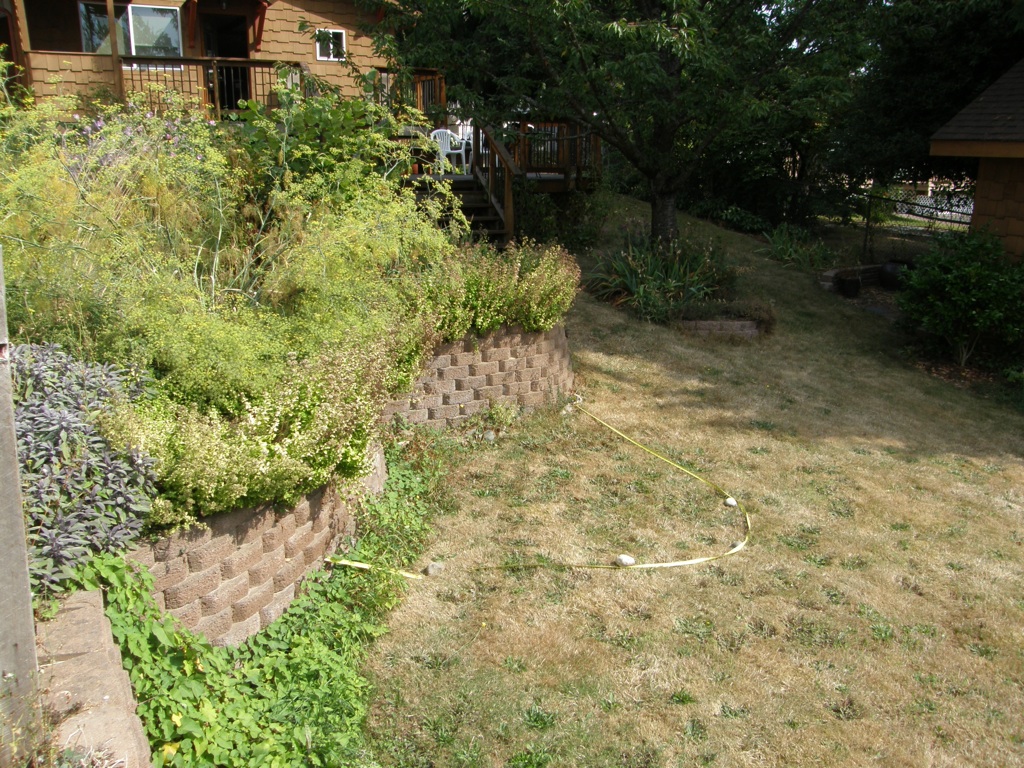
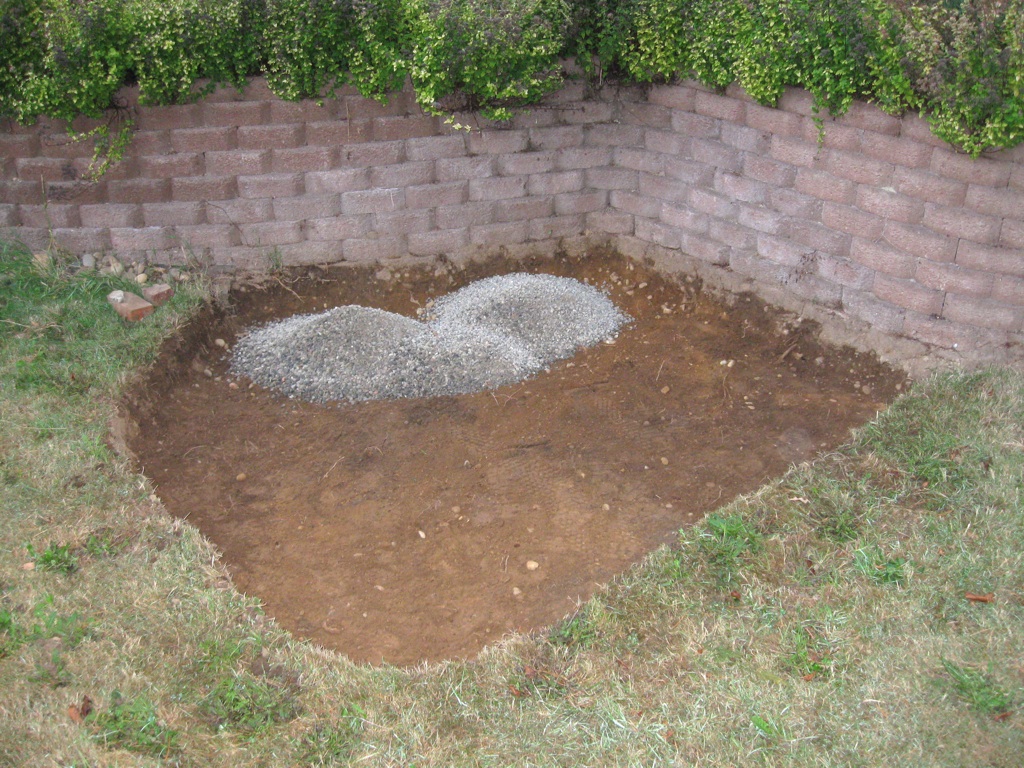
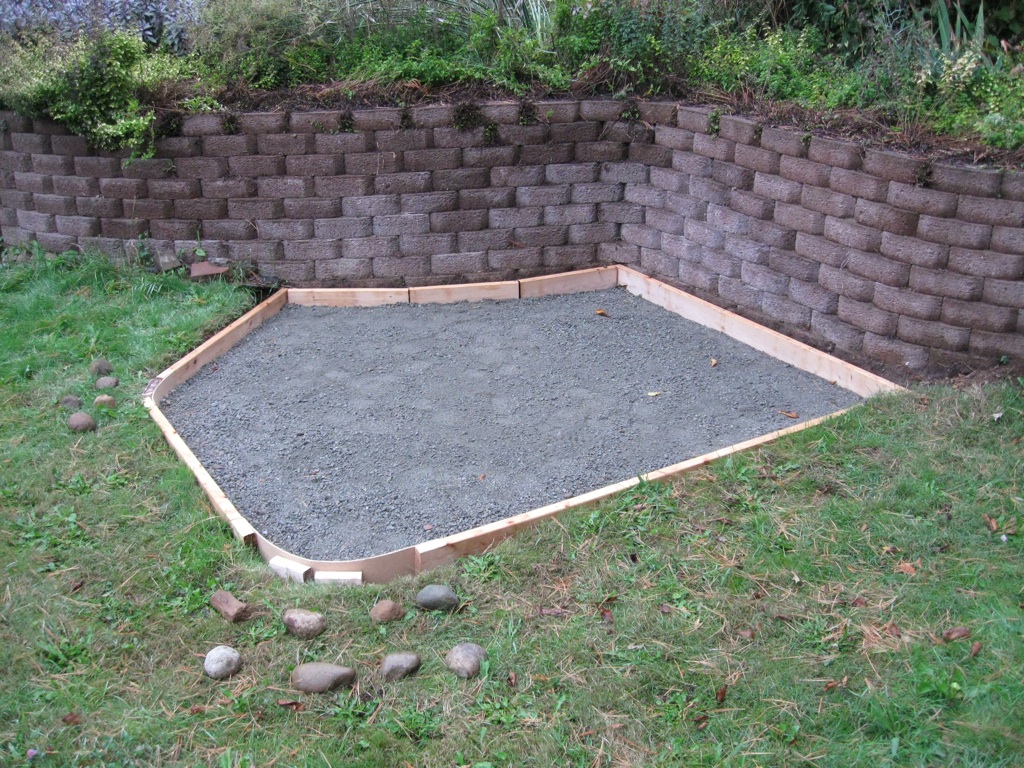
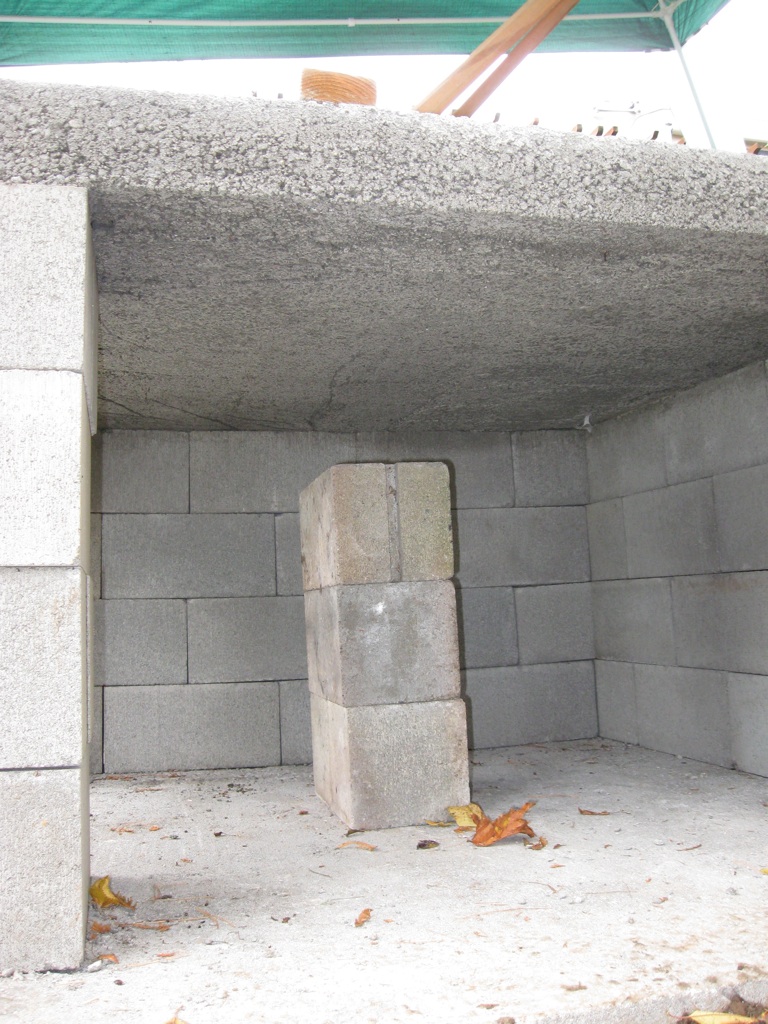
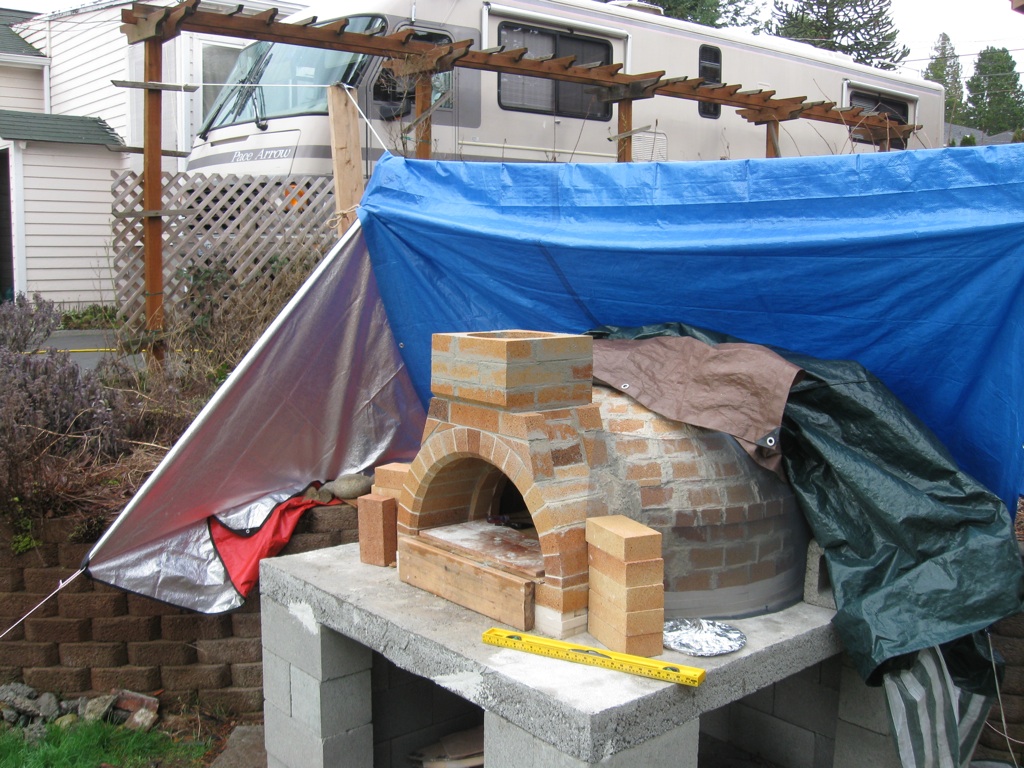
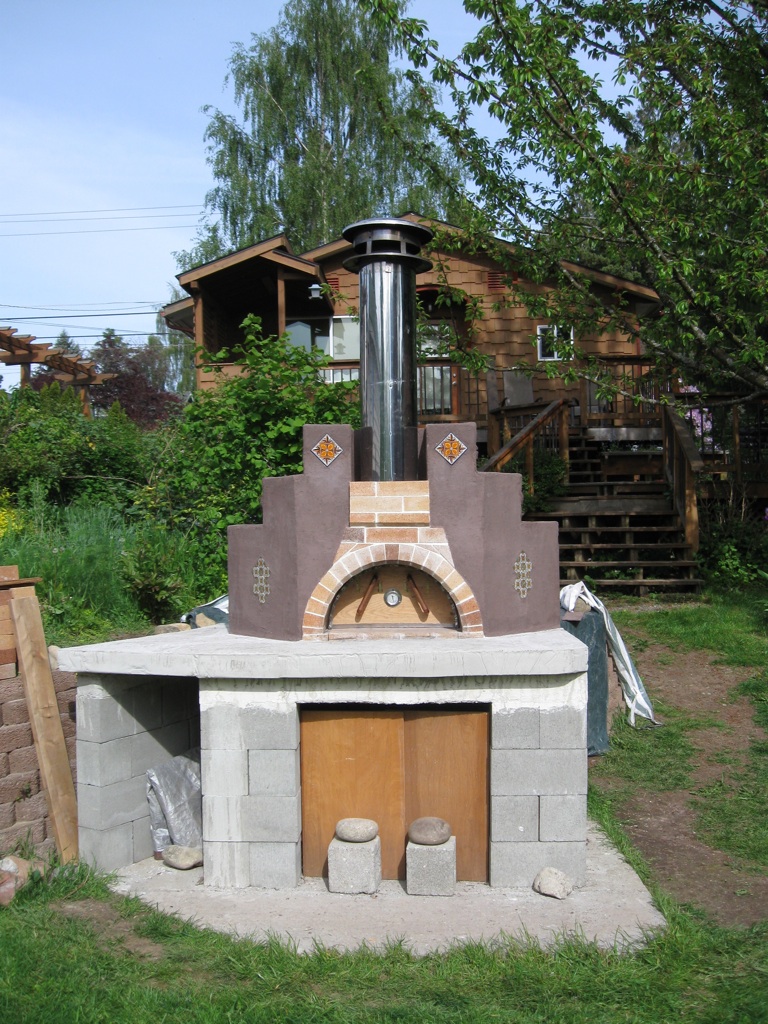
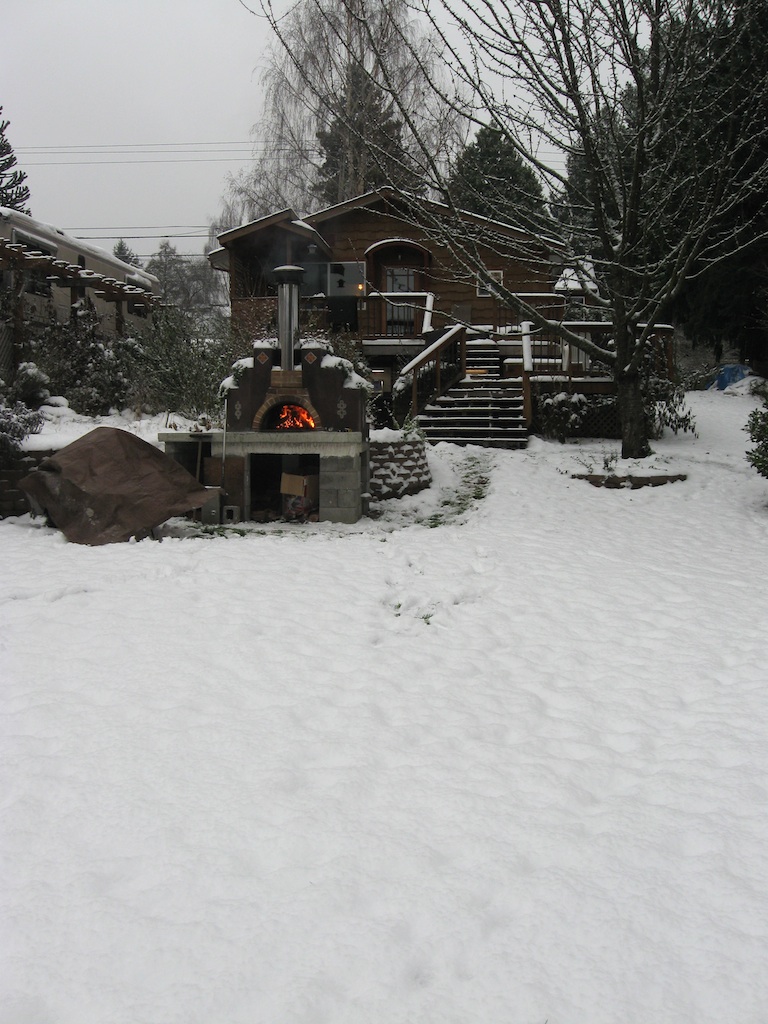
 Yard placement, against a corner in the retaining wall of the raised garden.
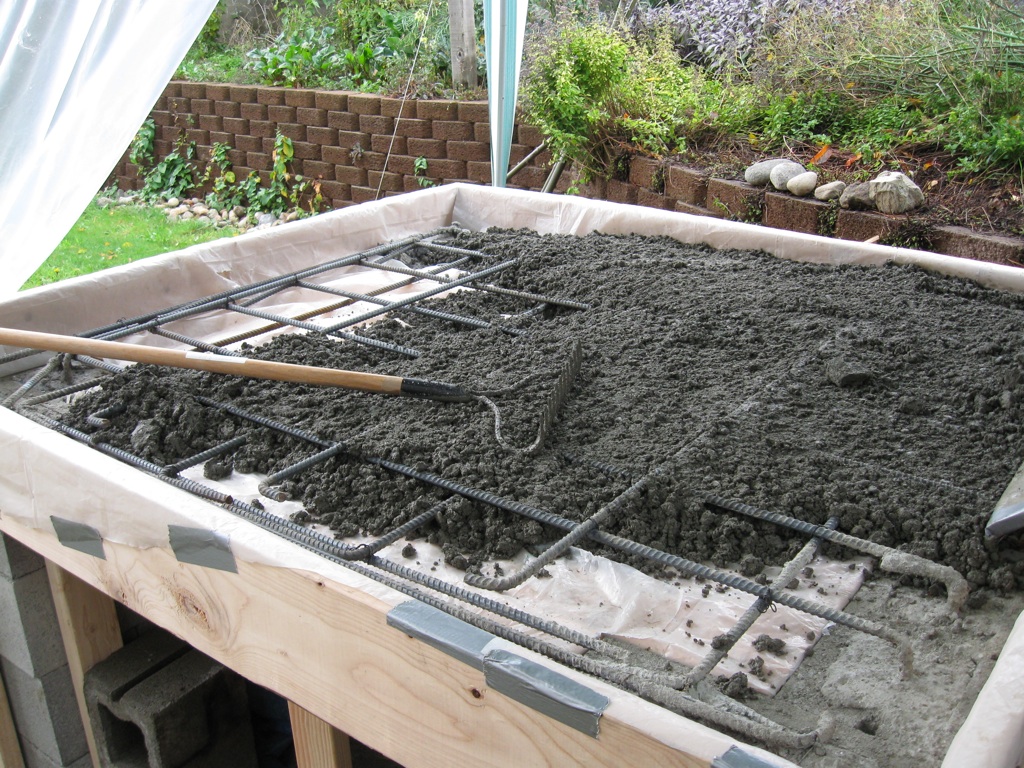
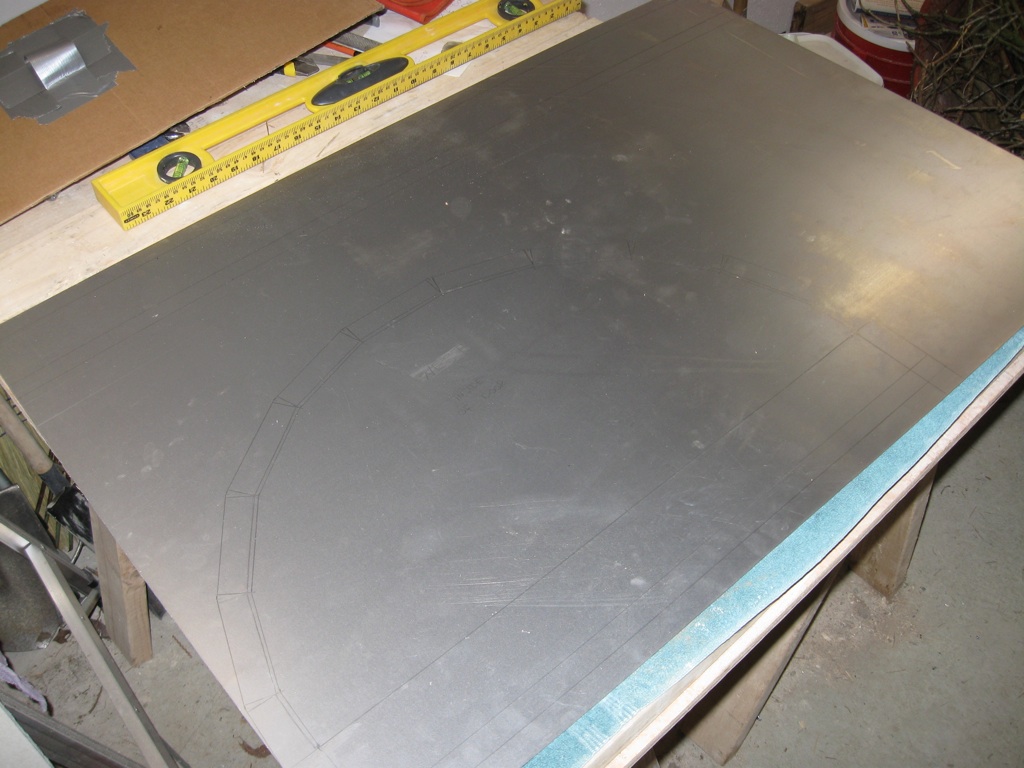
 The shape of the concrete foundation (formed to fit the corner of the retaining wall), with #4 rebar included (wire mesh not shown in this diagram). The footprint of the stand walls is shown with the first course of concrete blocks to illustrate the rebar's arrangment w.r.t. the stand walls. the foundation is in two major sections, one 5" heavily supporting the weight of the oven, the other 4" forming a patio on which to stand while working.
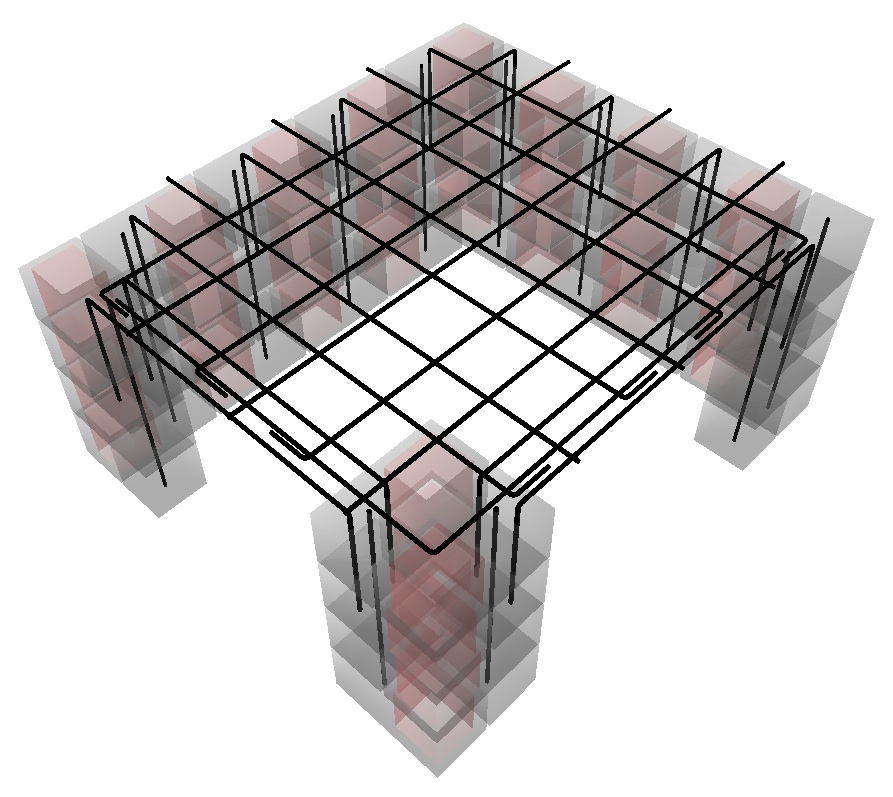
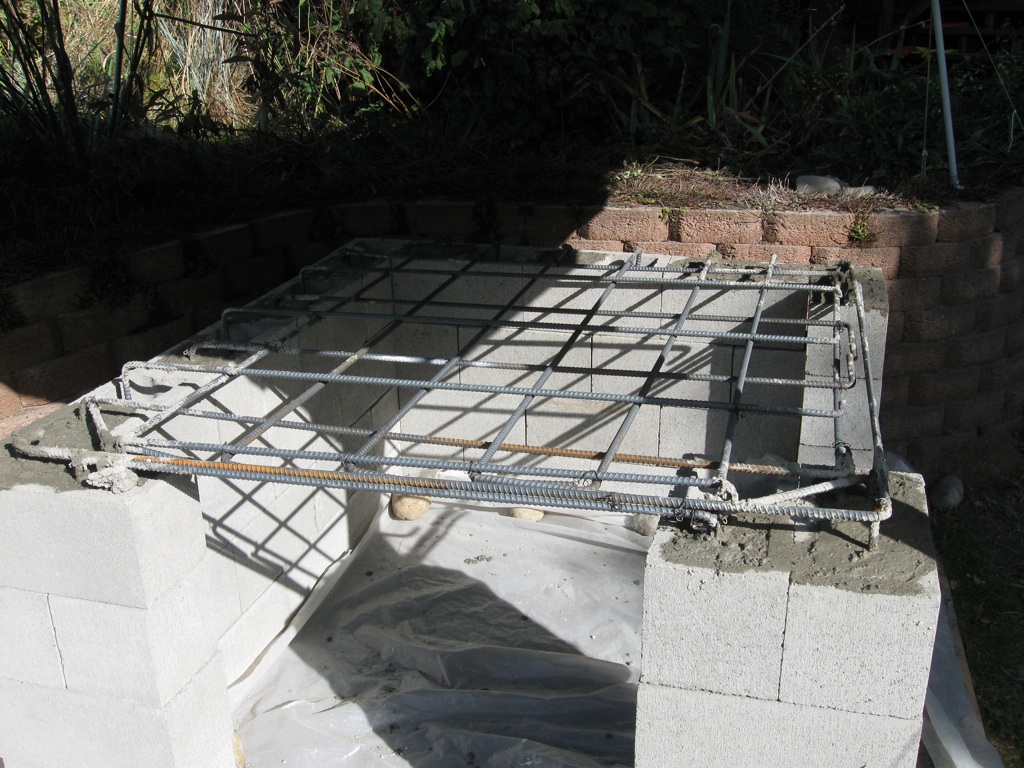
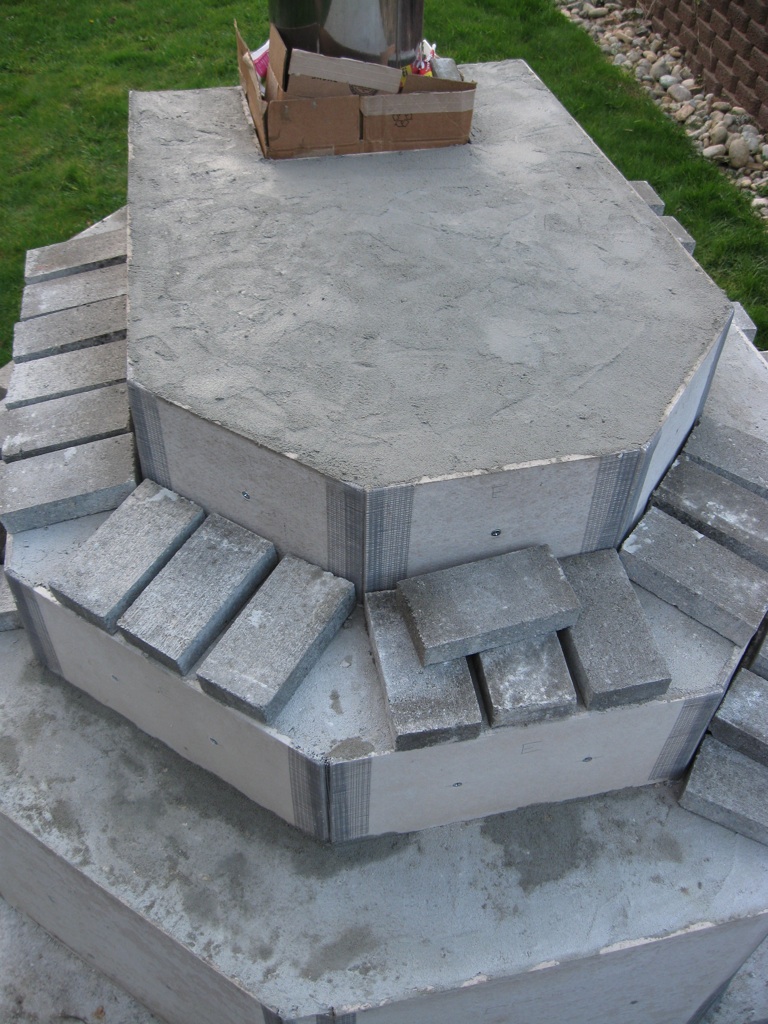
 The concrete block and rebar design for the stand and structural hearth. Two openings are available to permit easy access to the wood storage area. No angle iron is used for the lintels, so they are heavily reinforced with (all 1/2" #4) rebar. Every other core of the wall is filled with solid concrete and encases vertical rebar. The red cores in the diagram remain empty and therefore cannot contain vertical rebar.
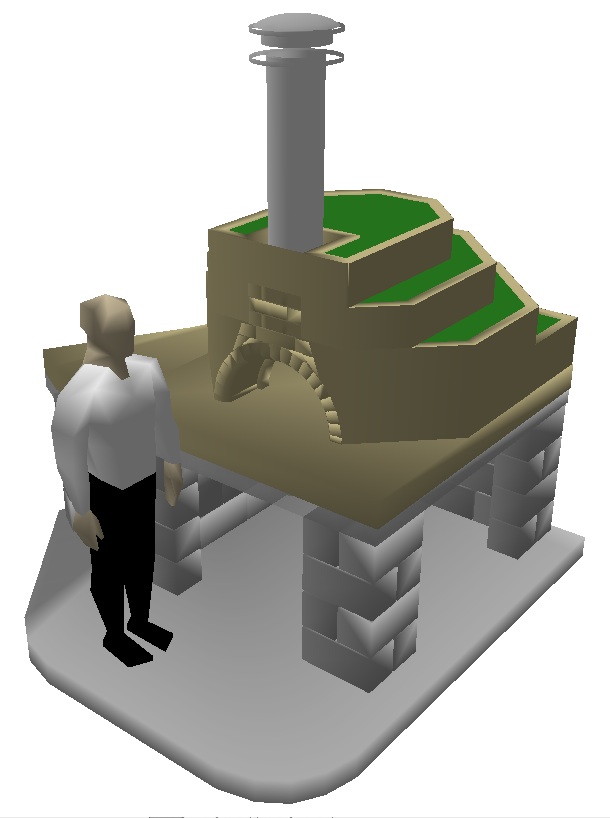
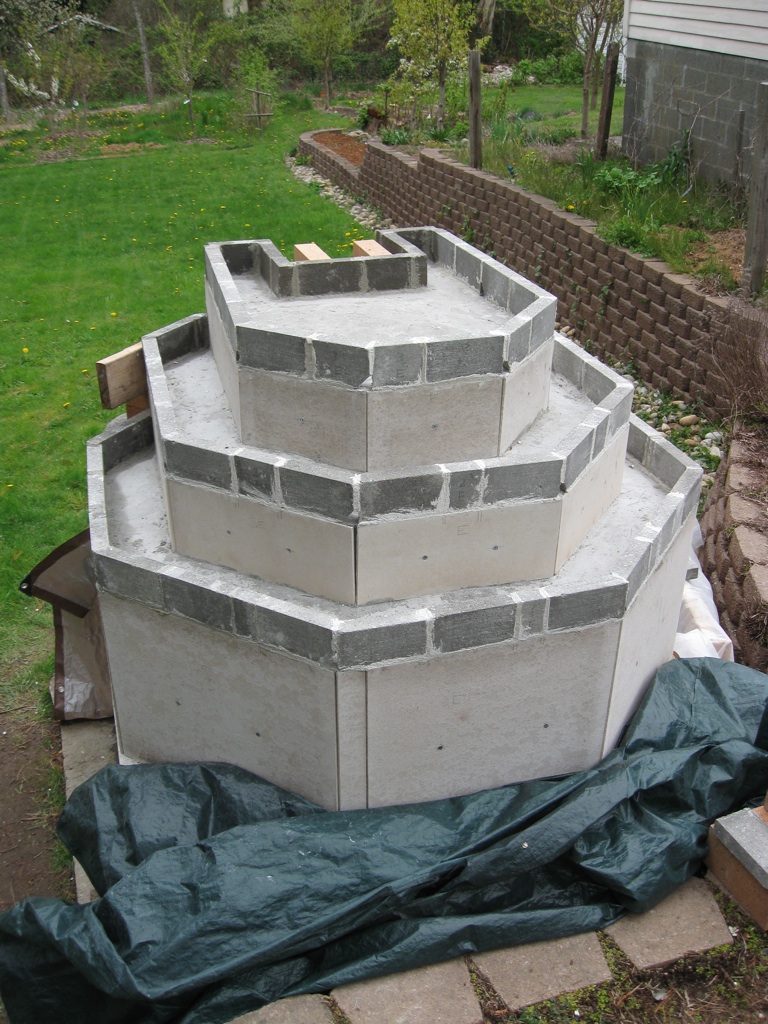
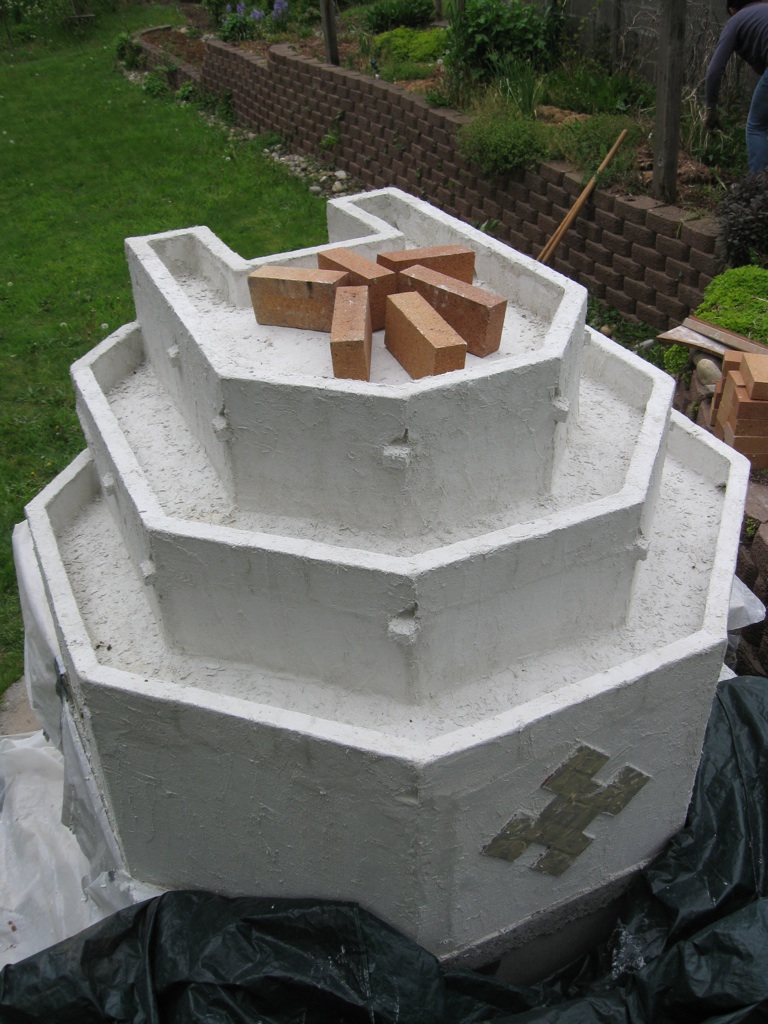
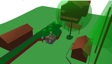
 Basic appearance of the stand, hearth, and octagonal terraced enclosure (with planter beds on each terrace).
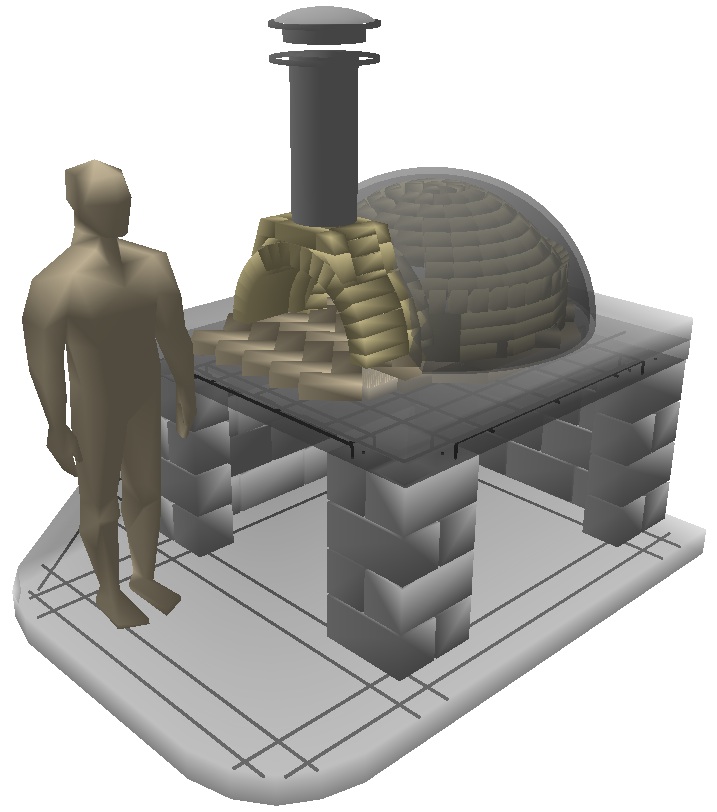
 An alternative vision of the final design illustrating a hemispherical stucco dome. This diagram also shows the rebar in the foundation and the hearth.
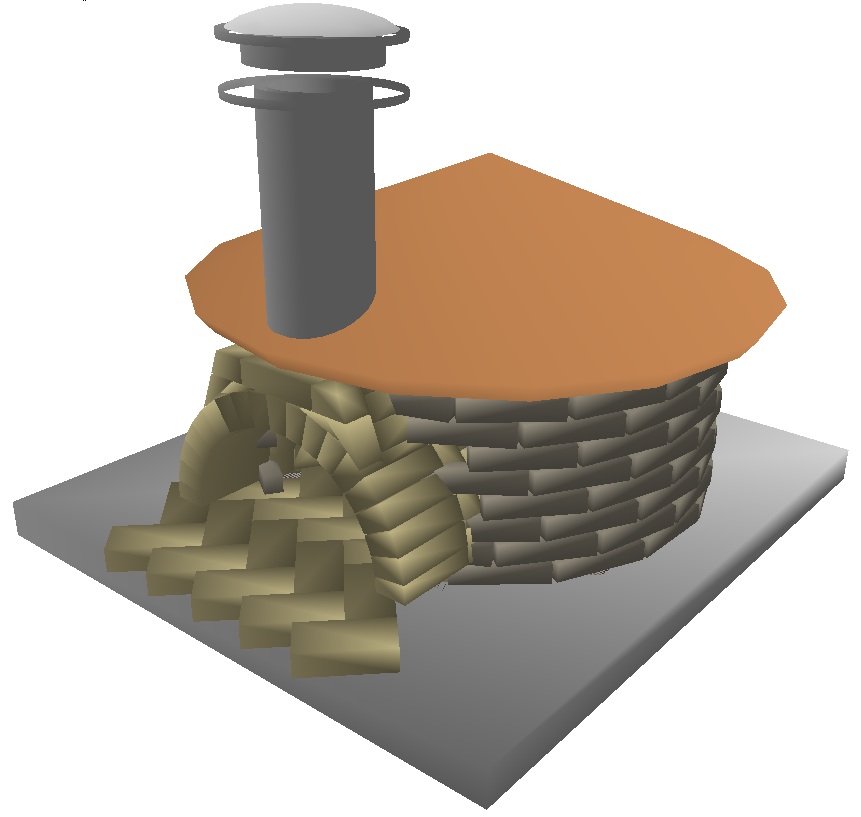
 An alternative design. The dome is surrounded by a cylindrical ledge-stone wall and conically roofed with copper-sheet. I had some concerns that Seattle weather may require something a little more arduous than stucco. Thus this second design involving a true roof.
 Design of the brick dome with different categories of bricks indicated in distinct colors.
 And exploded view of the brick dome.
 Detail of the vent design.
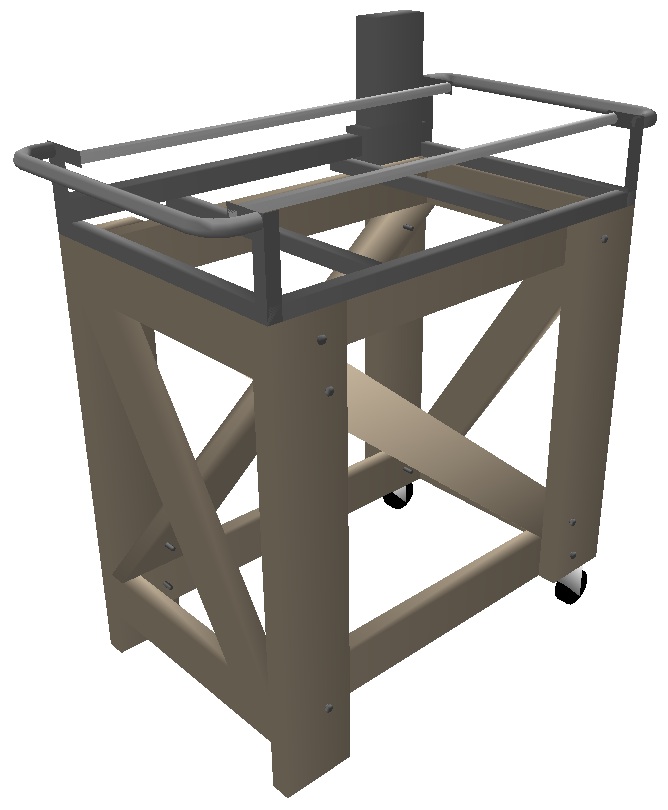
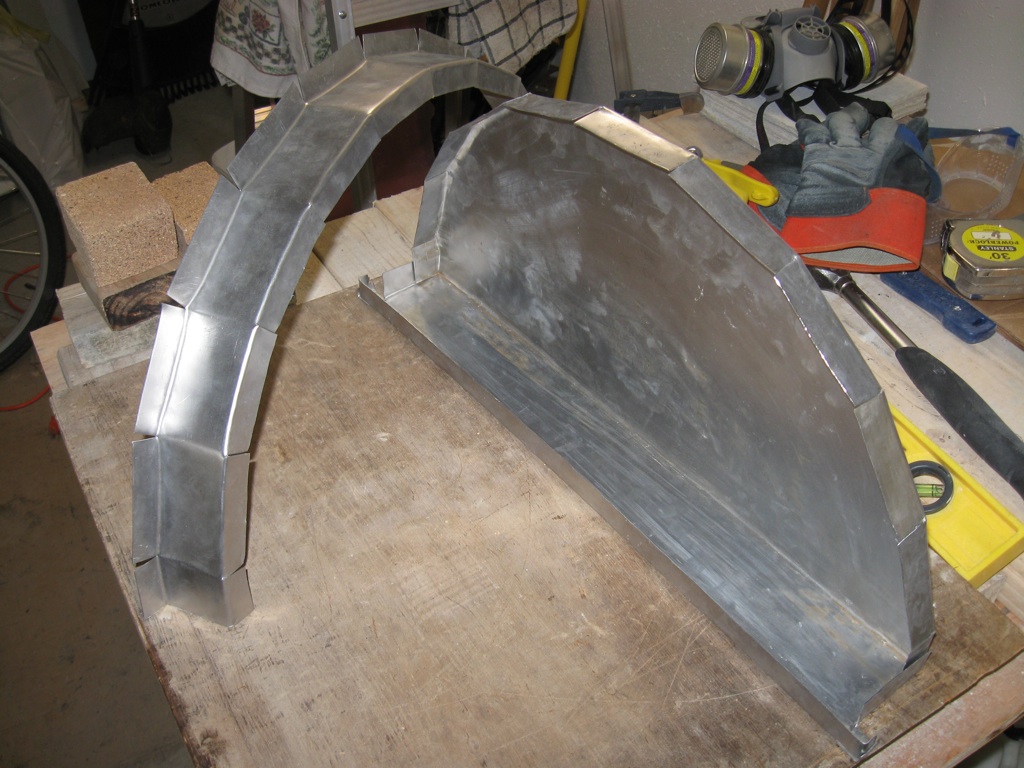
 The plan for the tile-saw stand.
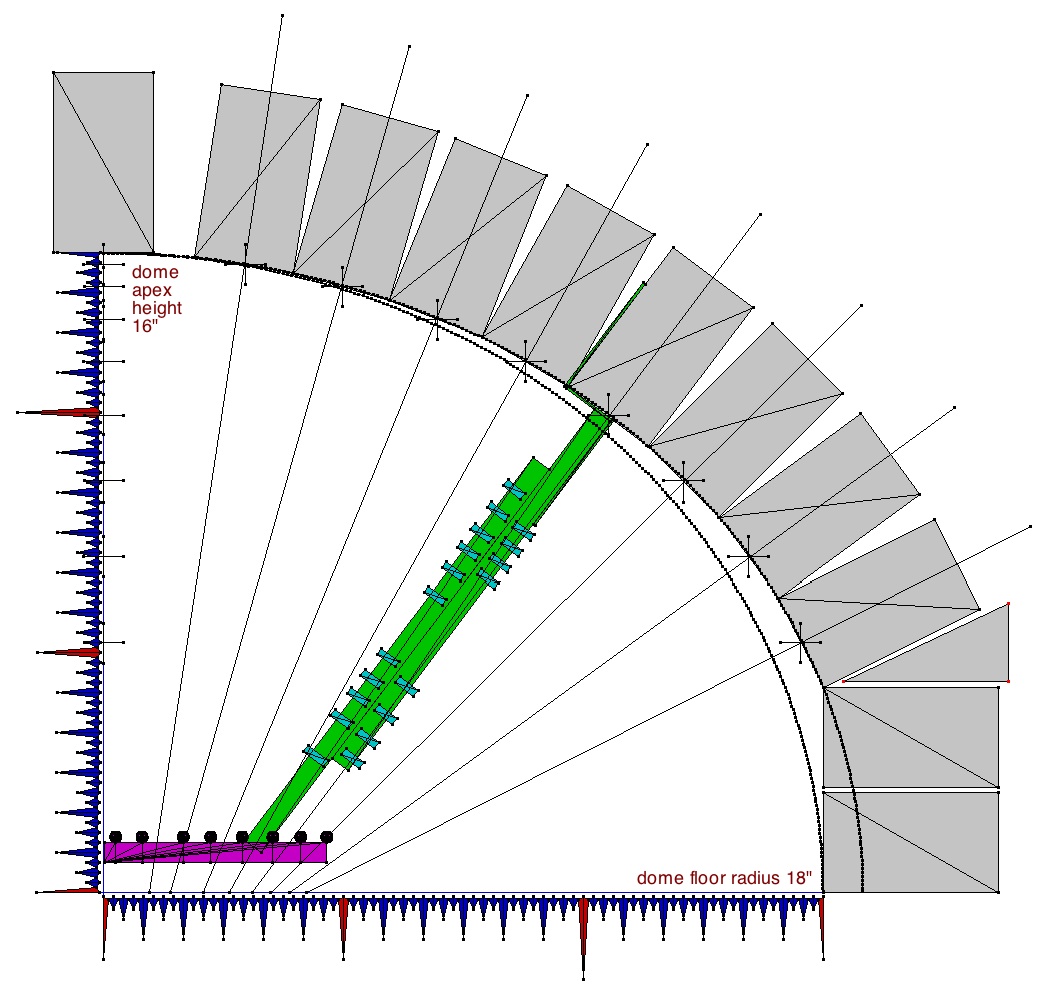
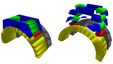
 A schematic of the dome profile showing the alignment of each brick course relative to the dome and the design of the brick-placement tool to be used during construction to achieve perfect alignment.
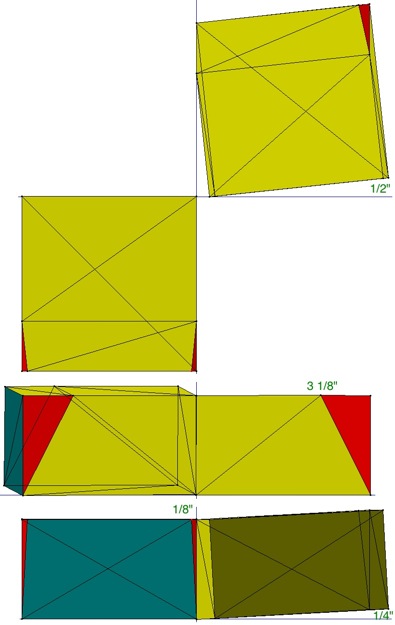
 A schematic of the cut for the bricks of the first tilted course. Cuts for the remaining tilted courses are similar, but of increasing angle, thus removing larger triangles.

Construction and Curing
Click individual images to see larger versions.
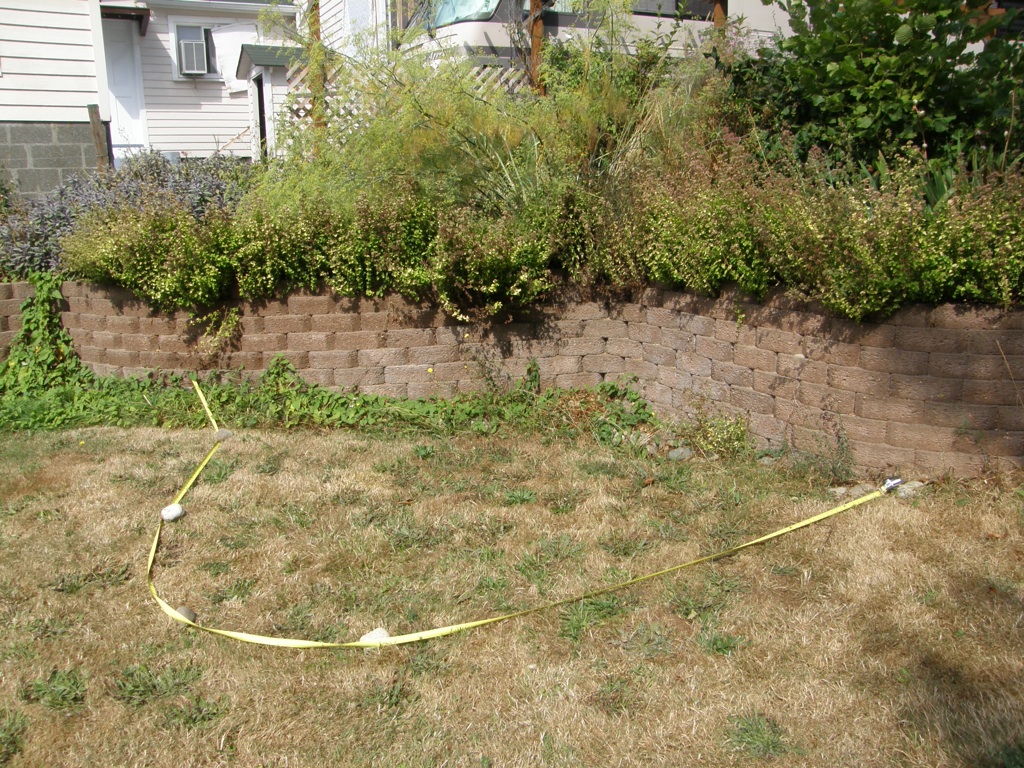
 The site.
 The site.
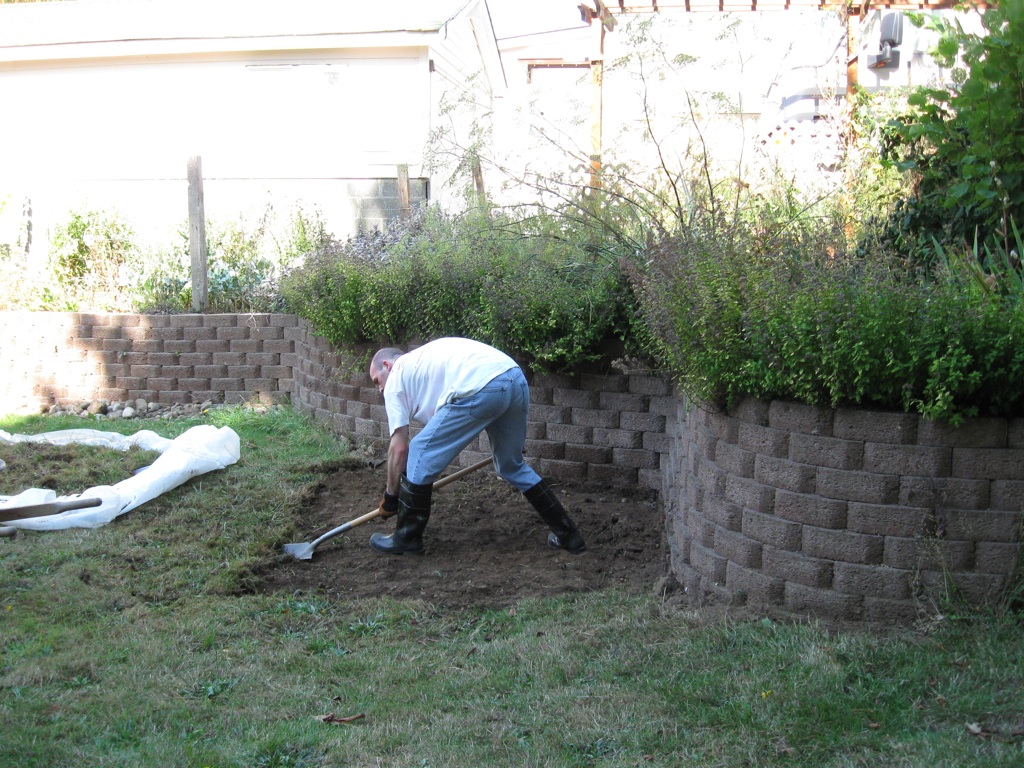
 To get the grass up, I carved the outline with a shovel, then carved the grass into about 12" tiles, then came in sideways and lifted them out slices of pie. Worked remarkably well.
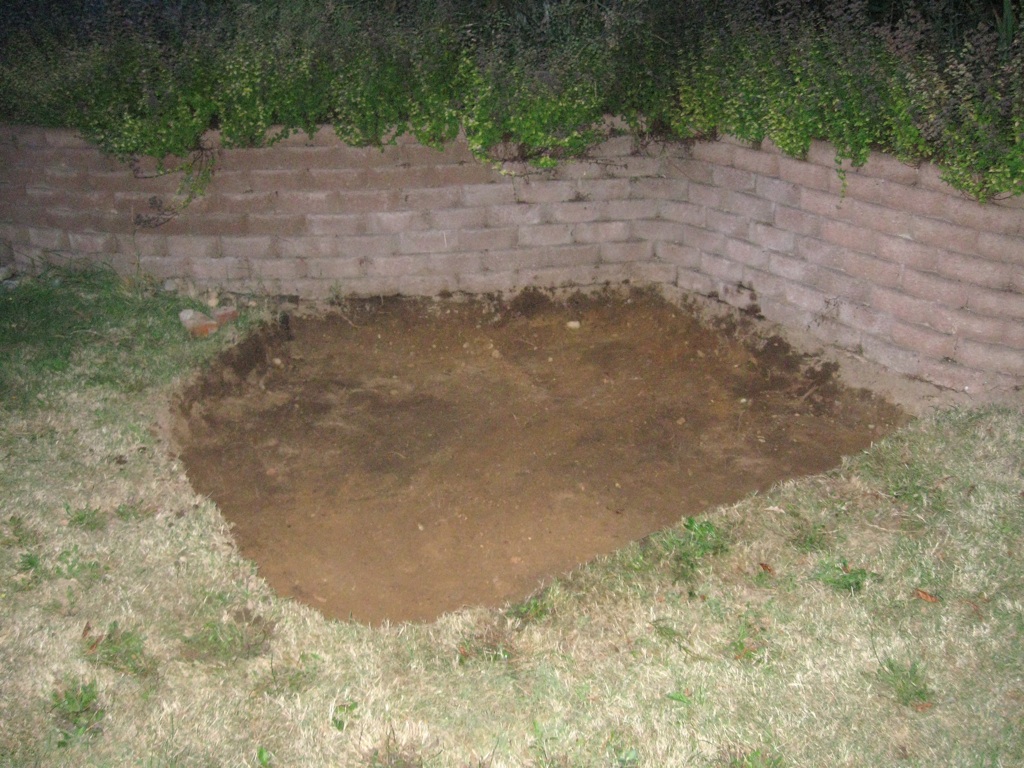
 End of day one. Not deep enough yet, not leveled.
 Proper depth, perfectly level.
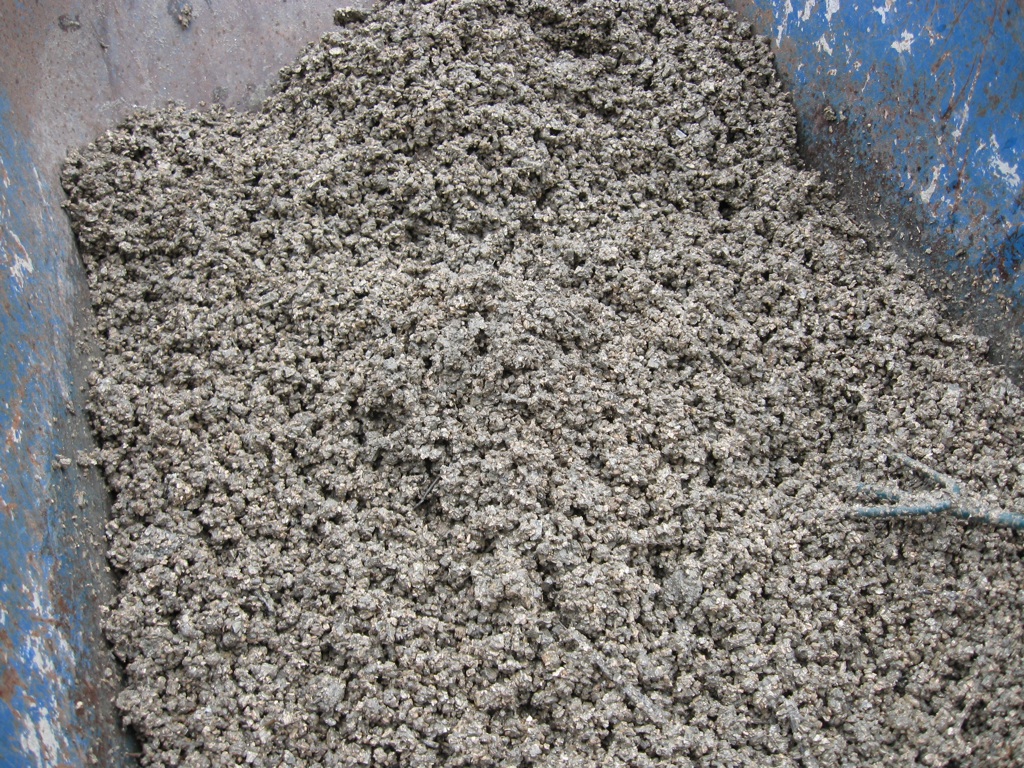
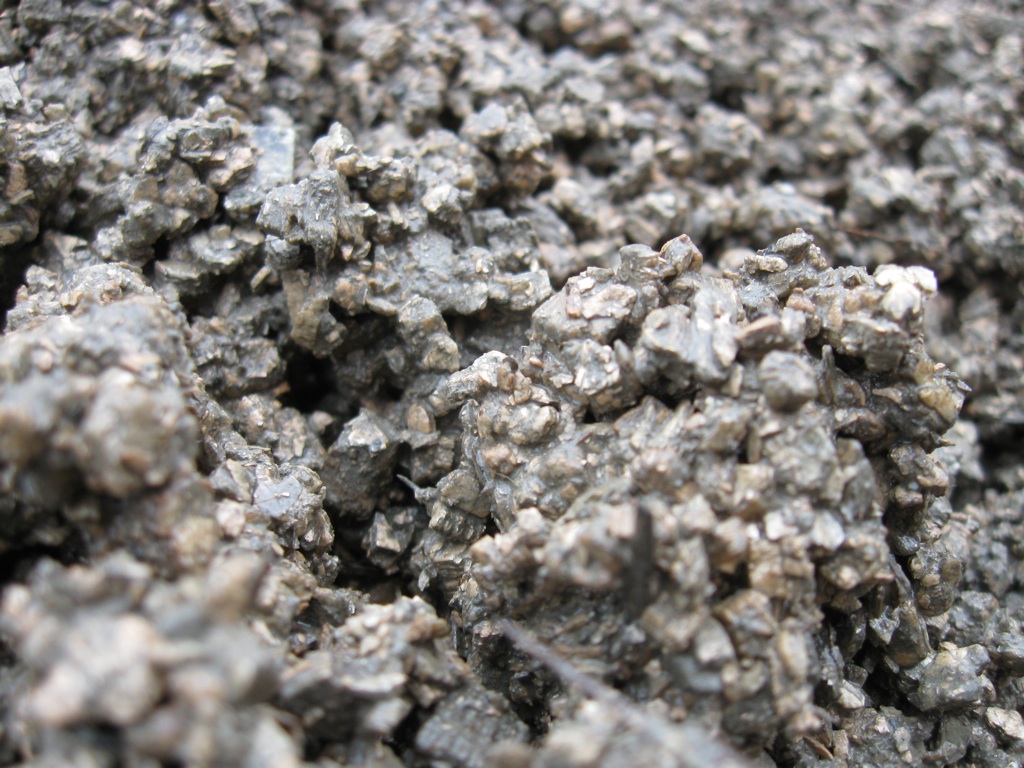
 The first gravel dump: 5/8"-minus, skimmed for the big chunks to exclude as many "fines" as possible (grains of decreasing size down to clay-particle dust size).
 The remainder of the gravel came from this pile behind our studio, left over from a previous concrete slab. It is a similar 5/8"-minus to the first dump, but I didn't skim or seive this, so it put a lot of fines into the mix...which is good, it helps packability.
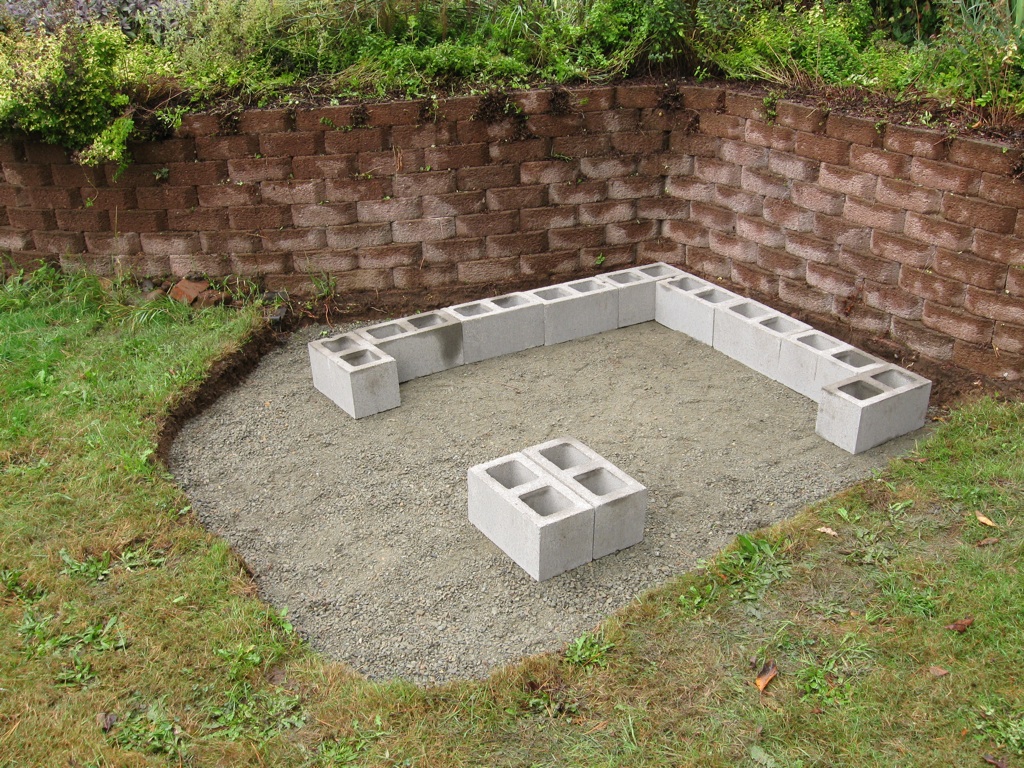
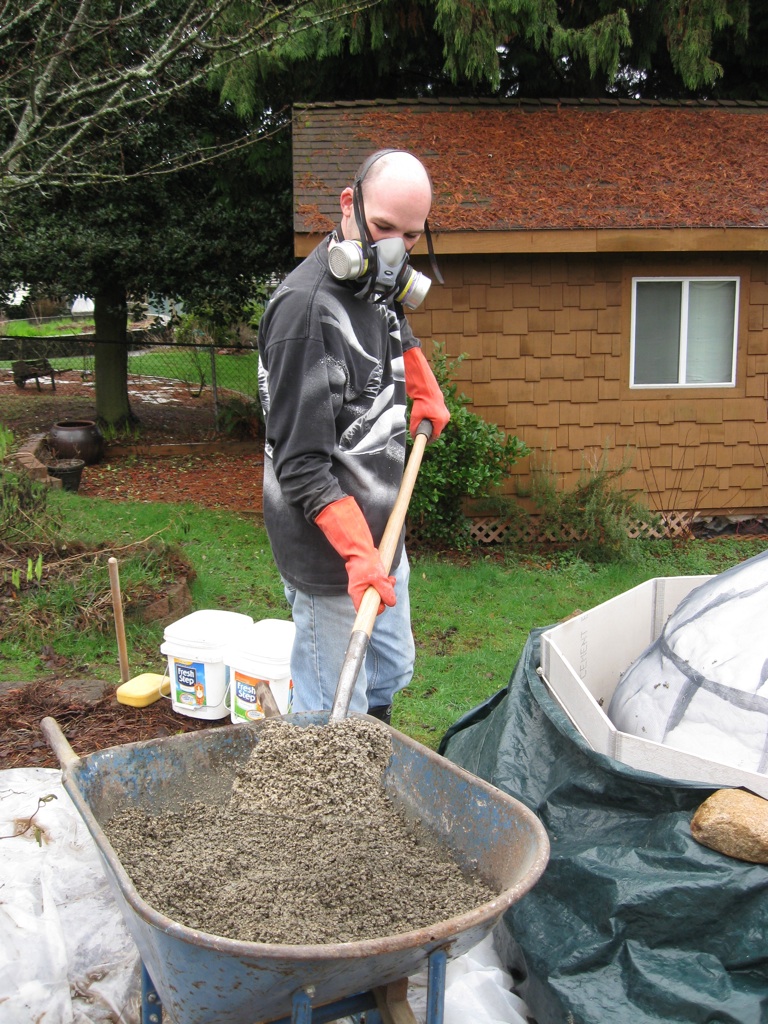
 3" gravel with a the stand's footprint temporarily placed to insure the hole is definitely big enough.
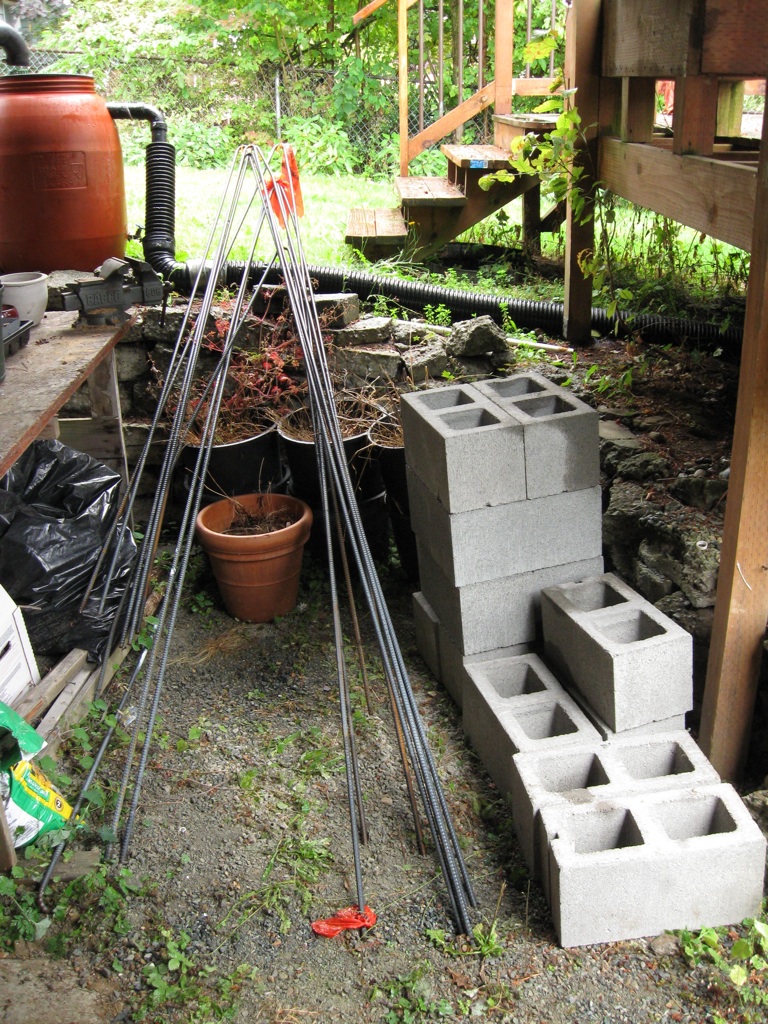
 A pile of 1/2" 20' rebar and concrete blocks (by far not the full set of ether item). I pipe-bent the rebar in the Home Depot parking lot, lashed it to my roof rack, brought it home, then chopped it up with the angle grinder.
 Starting to form up the foundation with 2x6s.
 Angle grinding rebar is ridiculous loads of fun! Rarrr!!! Me tough man. Woof woof woof!
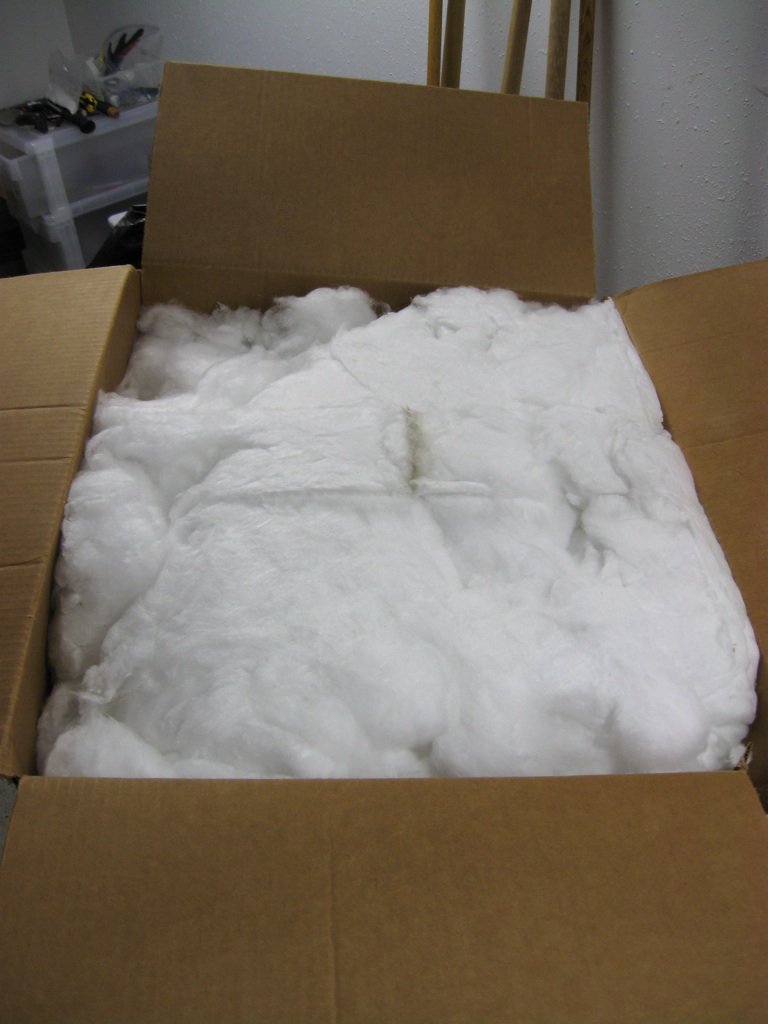
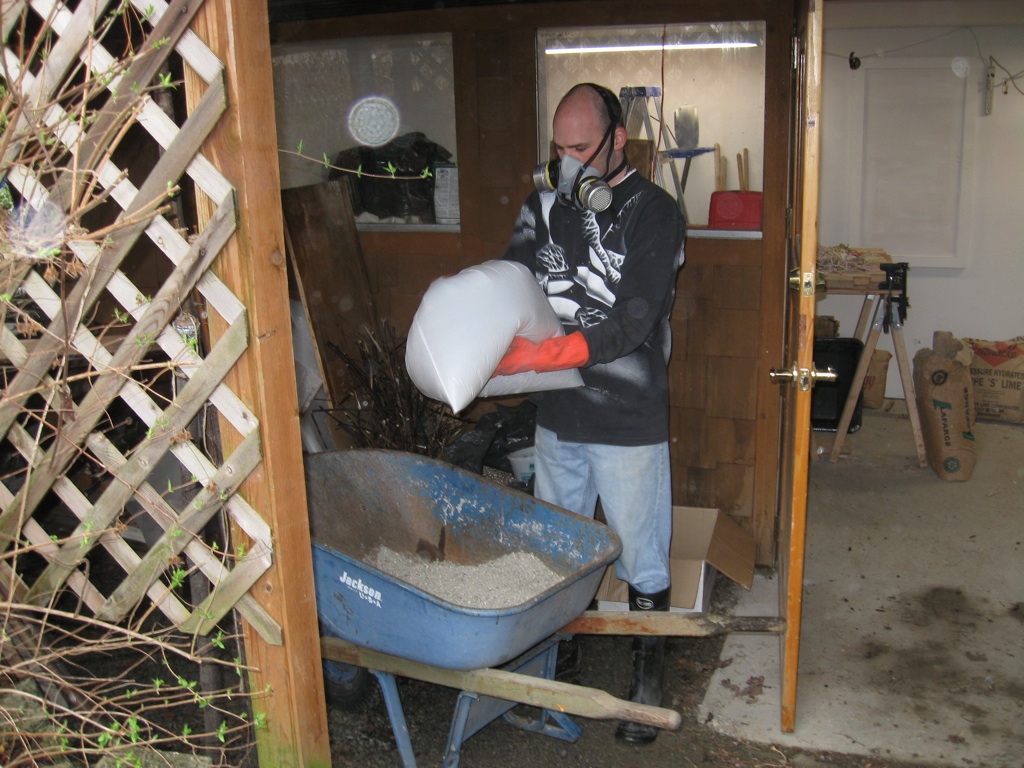
 I got two boxes of this stuff: fifty pounds total of loose bulk cermic fiber (InsWool HP Bulk if you care). Don't work with it without wearing a good respirator (not just the paper masks with elastic string). Goggles, gloves, long sleeves and pants are also recommended.
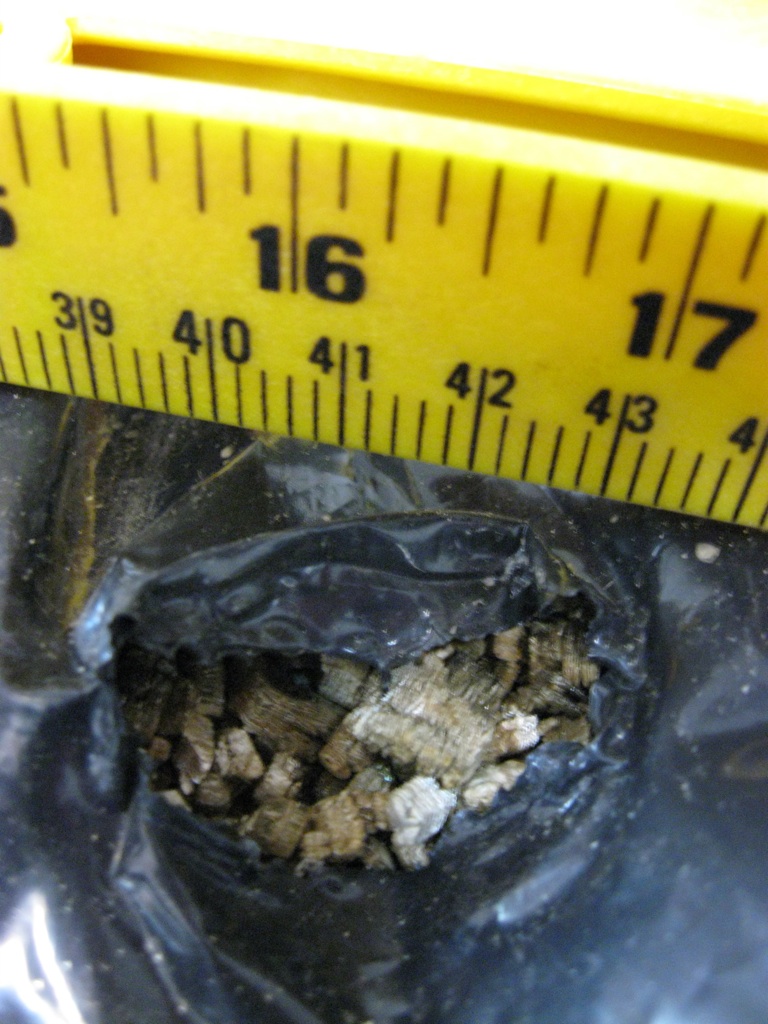
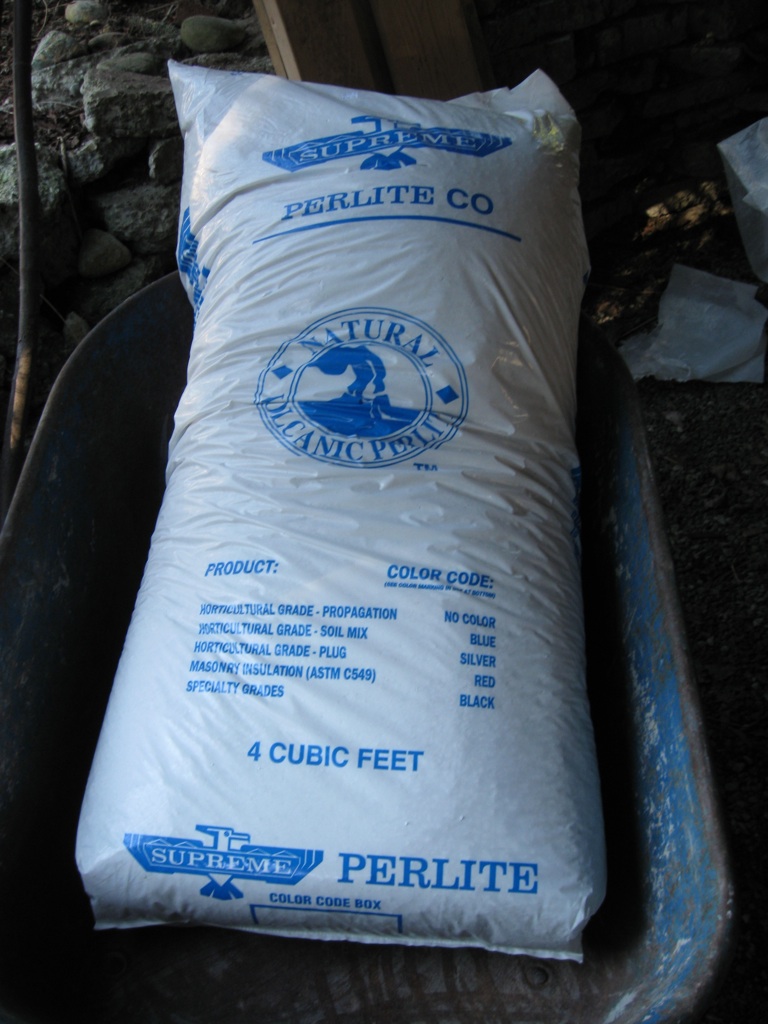
 I got several garbage bags of left over vermiculite for free. This wretched unfocused photo attempts to illustrate its basic appearance and grain size. Vermiculite (and perlite, a similar product for similar purposes) come in different grain sizes, sometimes called grades. You want the larger stuff for insulation (2/8" - 3/4"). The smaller stuff (dust - 2/8") is better left to its alternate horticultural applications.
 My growing pile of materials. In this shot: fifty pounds of fireclay, two boxes of bulk fiber and 4.5 garbage bags of vermiculite.
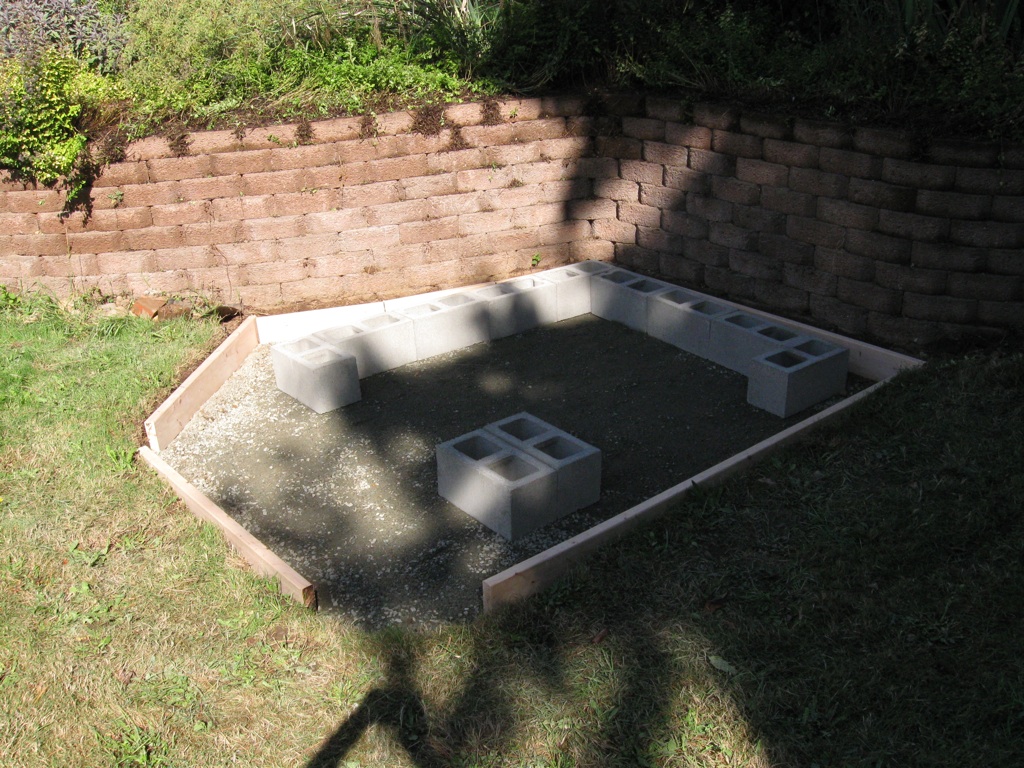
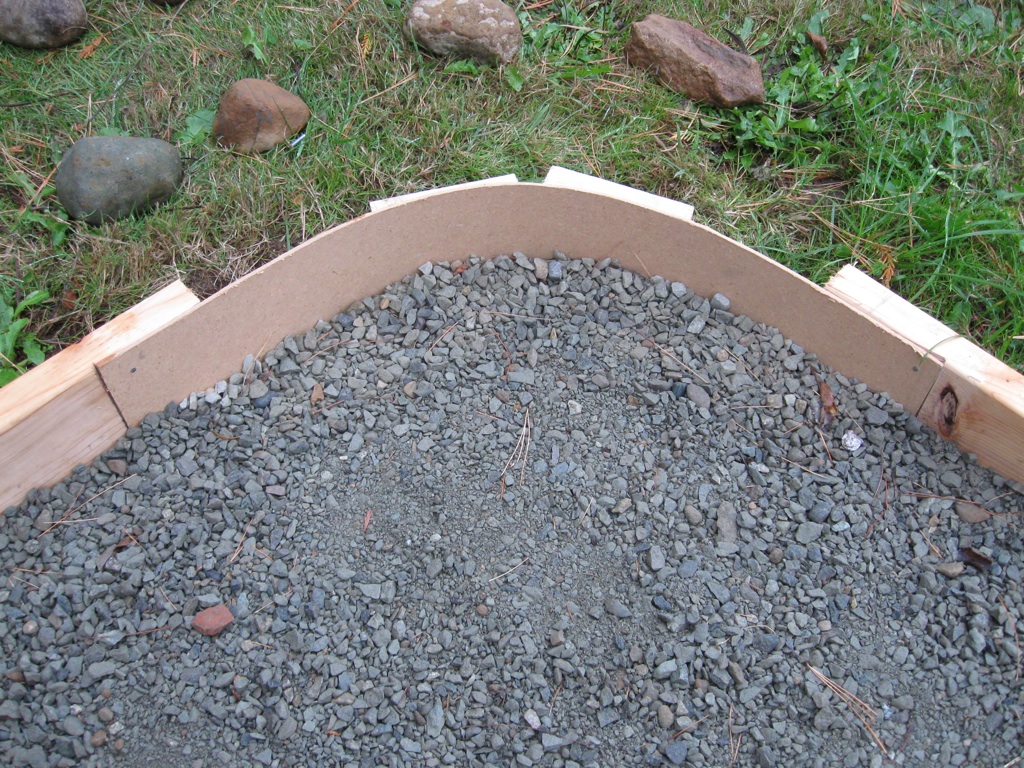
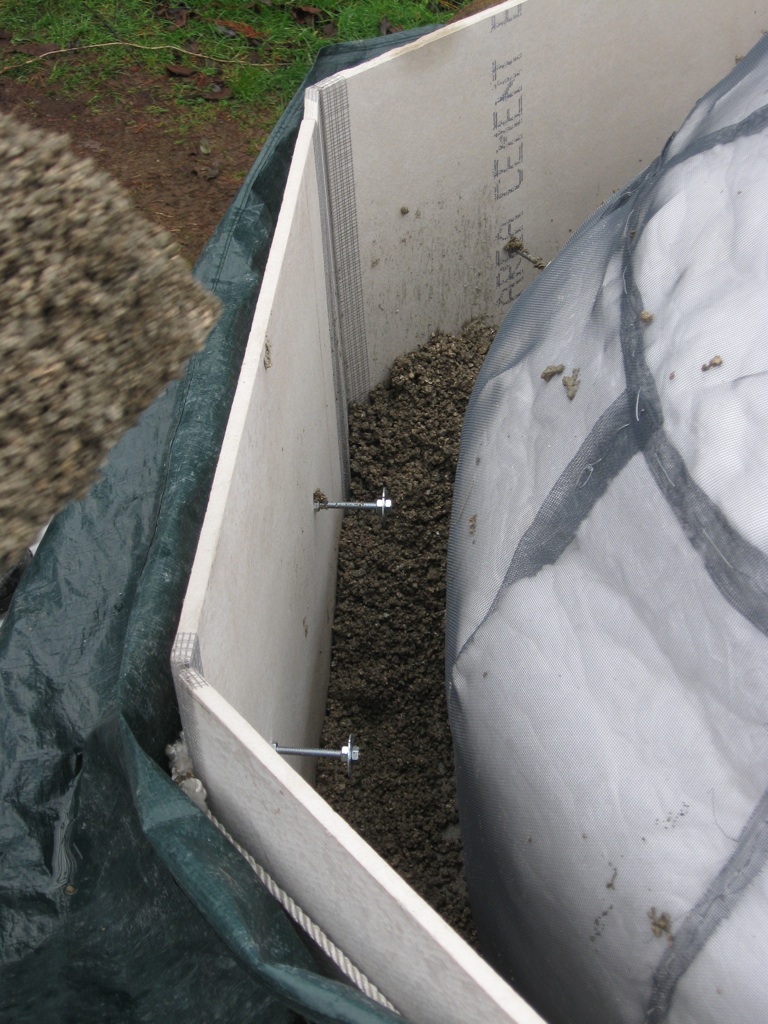
 The foundation form is finally done. All the gravel is in place (I keep adding more and packing it down) and leveled, the form is (mostly) level and completely nailed together, and the two curved sections are fitted with masonite.
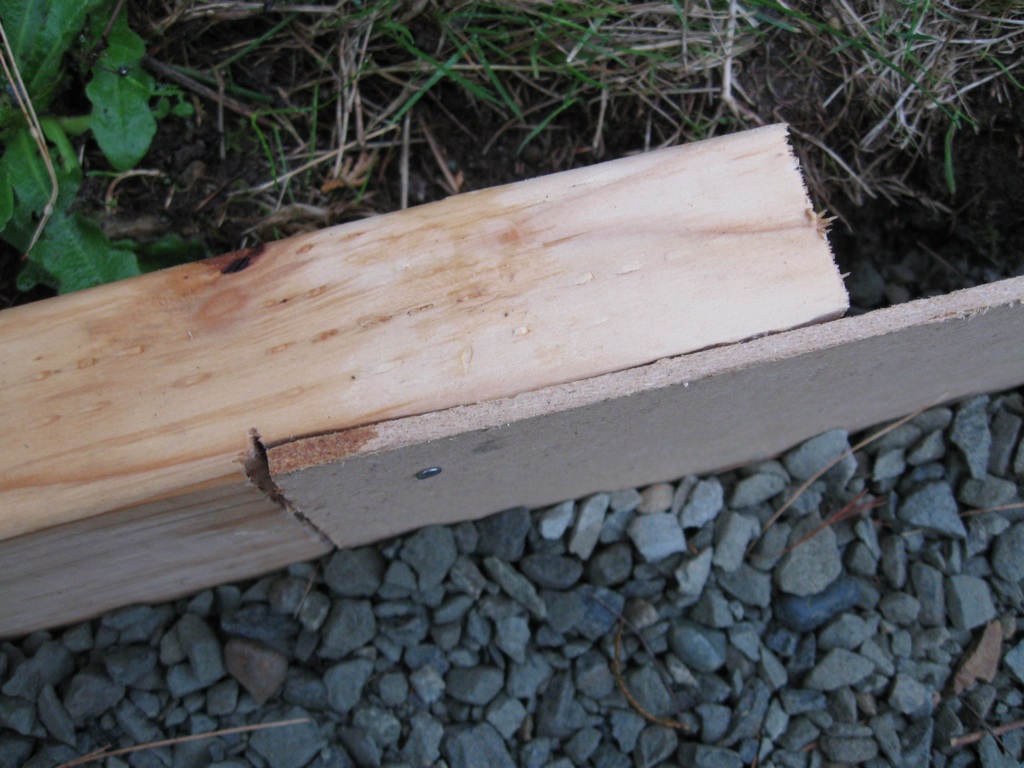
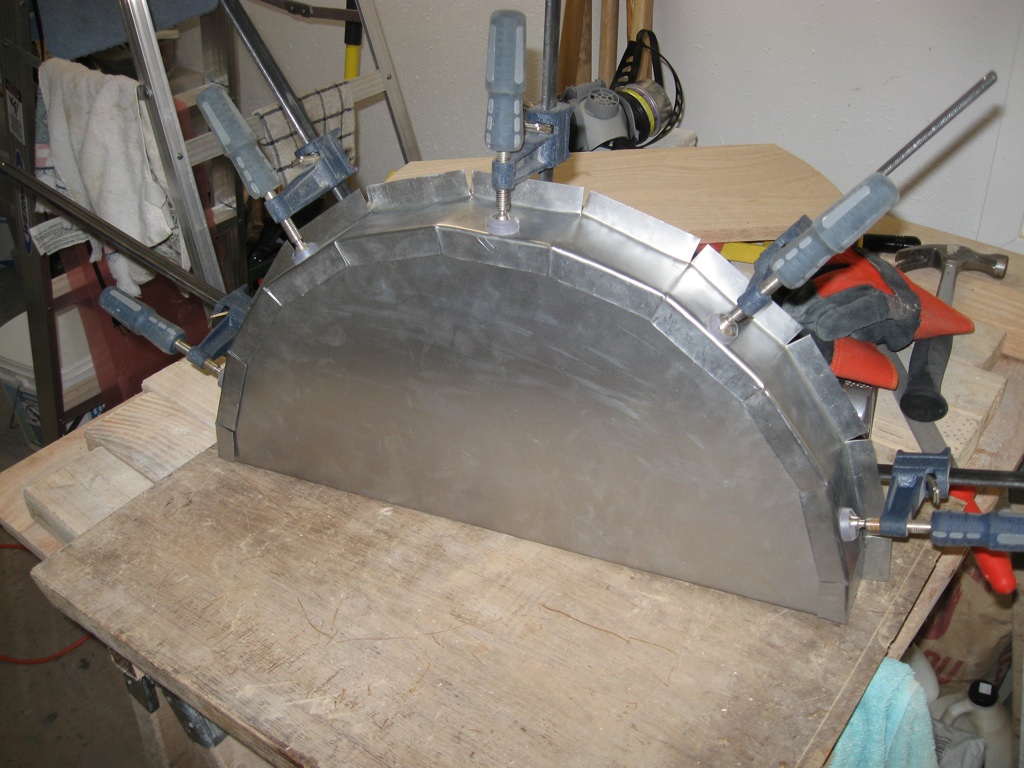
 A detailed photo of the curved section of the foundation form, constructed with masonite. Notice that I I chiseled a lip into the 2x6 to hold the masonite. The tension of the curved masonite actually holds it in place without any nails, but I added some nails anyway, just to be sure the masonite wouldn't spring out while pouring and and working the concrete.
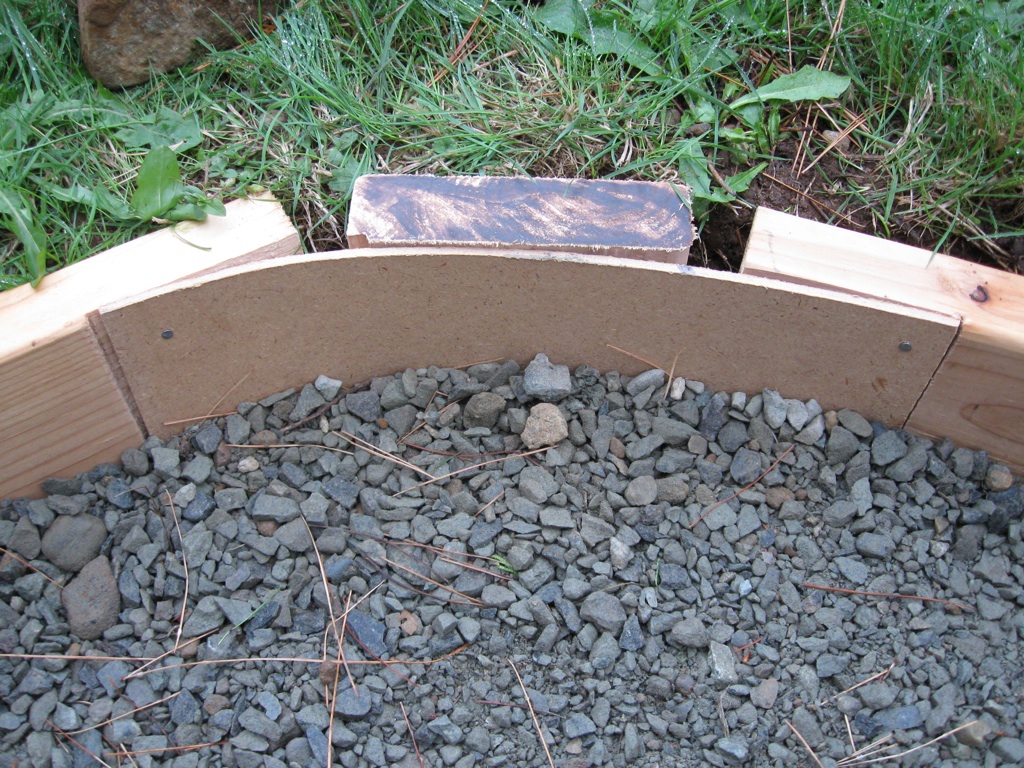
 Foundation form (curved masonite detail).
 Foundation form (curved masonite detail).
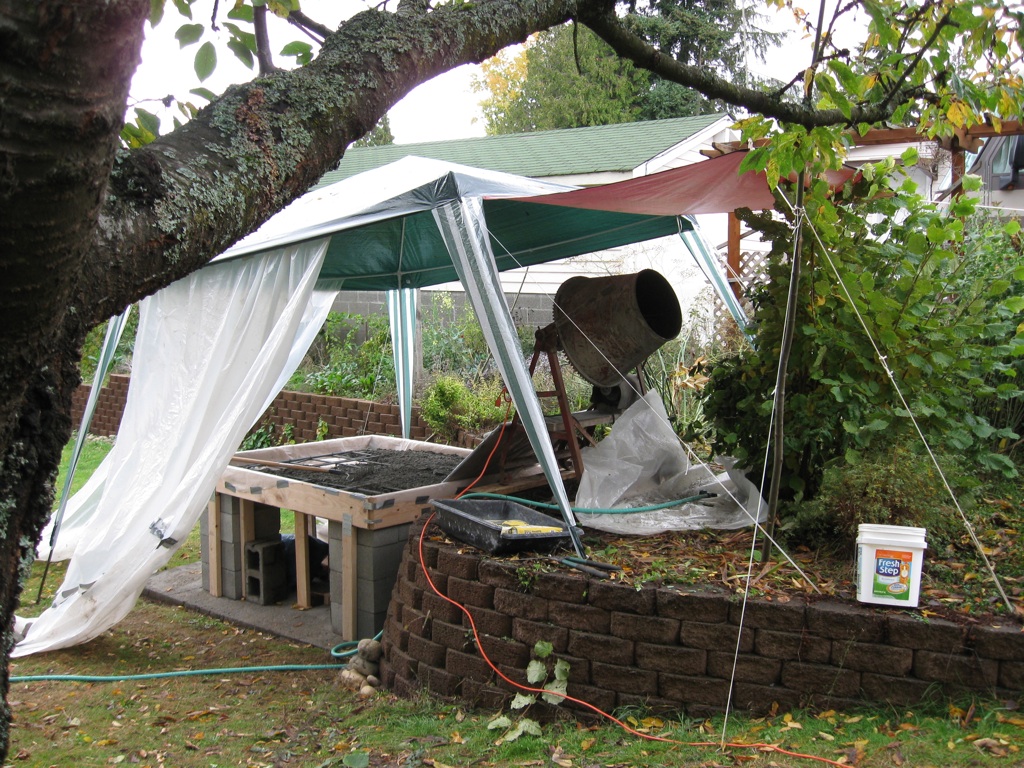
 The morning of the foundation pour. It has rained for three days. Will it rain today? Let's find out.
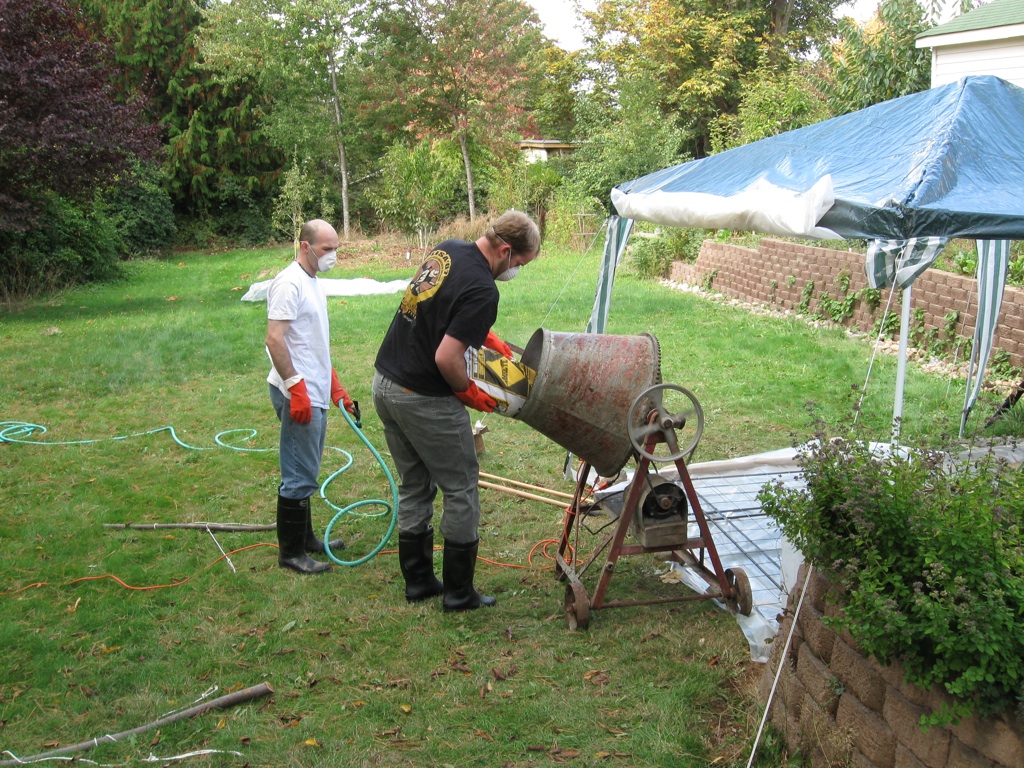
 Check out the kick-ass civil-war-era cement mixer! Seriously, my neighbor leant it to me. Thank god! This shot also shows the basic rebar and steel mesh layout. The rebar is strategically placed underneath the eventual concrete block stand walls that will bear the weight of the hearth and the oven.
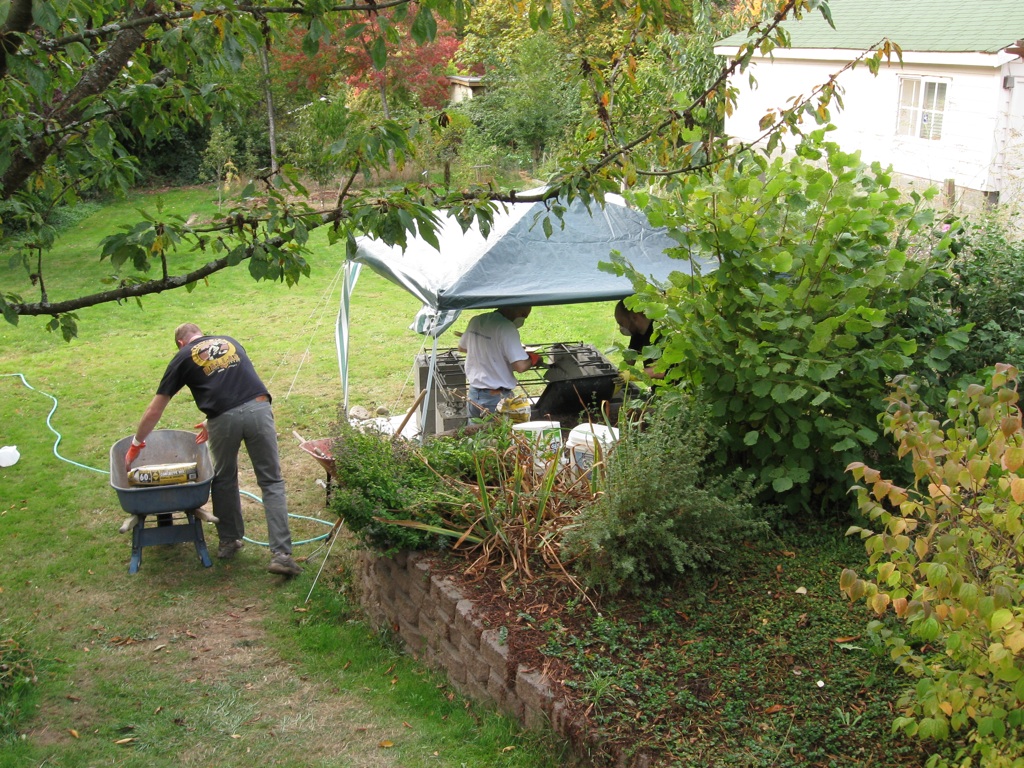
 Apparently, it takes about 1.2 people to operate a cement mixer, so someone always ends up standing around looking like a schmuck (in this case, me). Thanks Kevin. You rock! The other invaluable helper was Tom, whose primary job was ferrying bags of concrete from storage under the deck out to the build site while Kevin and I mixed, poured, and distributed the concrete. Nicely done guys. Kevin had so much fun he offered to help pour the hearth as well.
 It took us about two seconds to realize the cement mixer was going to dump a significant fraction of the concrete on the grass, so I quickly jury-rigged this ramp from junk shelving. You can probably buy something specially designed for this purpose for $50. HA! Note the completely unused mixing tub on the wall. Wish I hadn't taken the sticker off, we never used it. Maybe I'll use it for the latter parts of the project.
 As it turned out, spreading the concrete around the form was MUCH tougher work than loading and operating the cement mixer. Go figure.
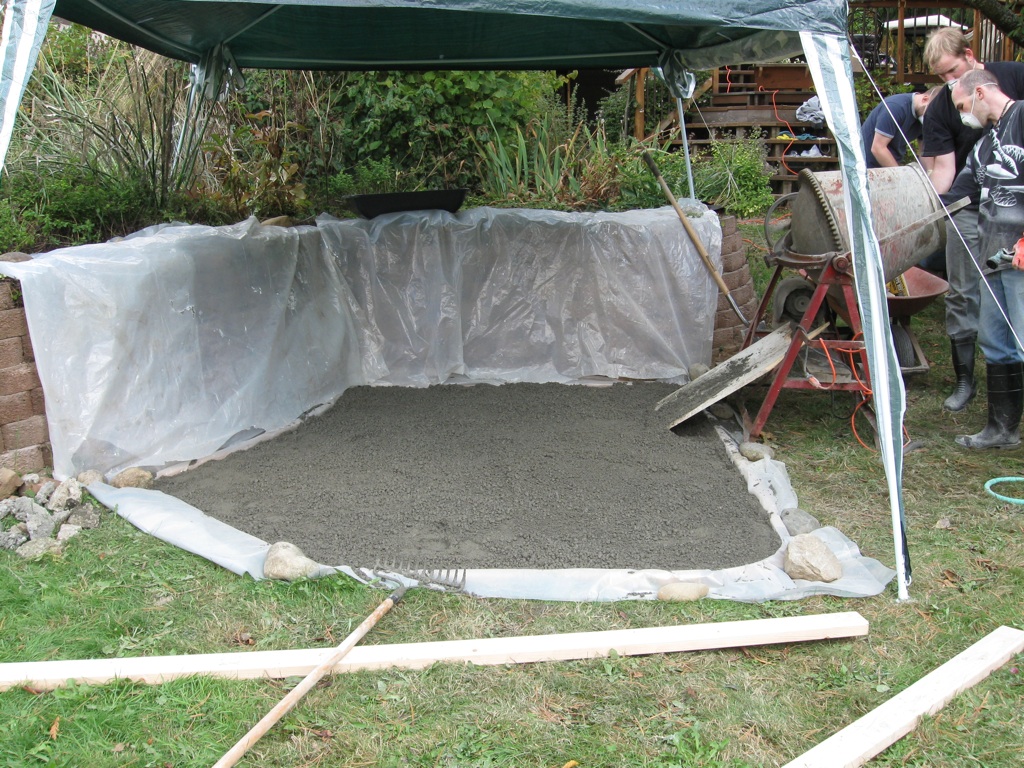
 Almost done.
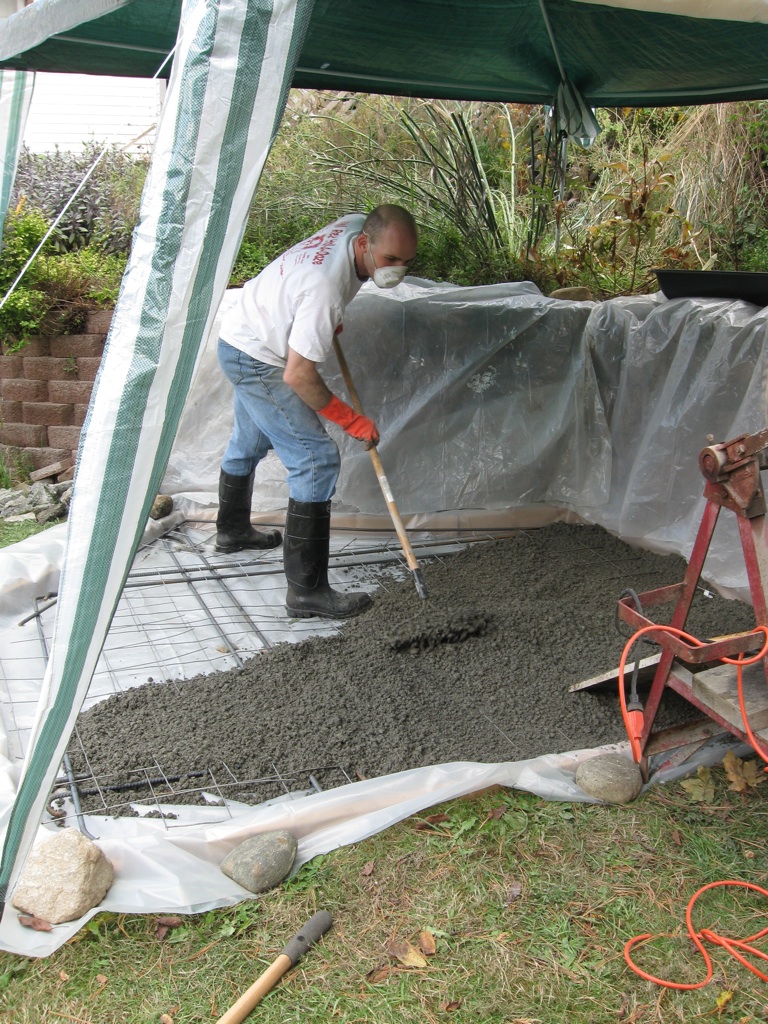
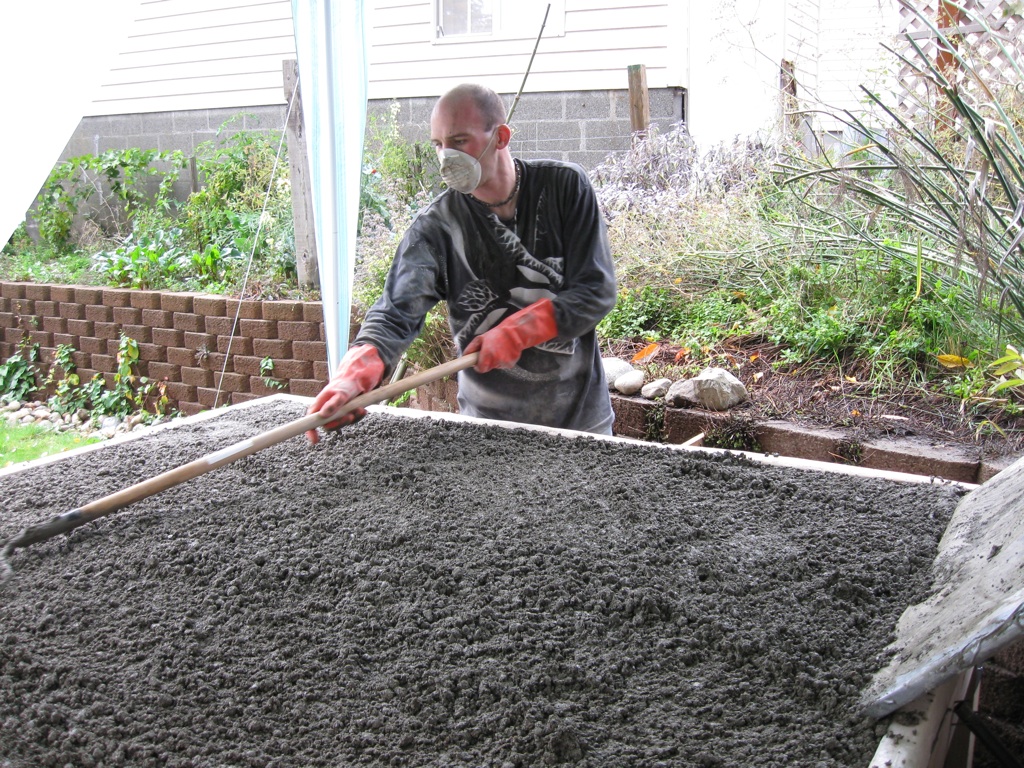
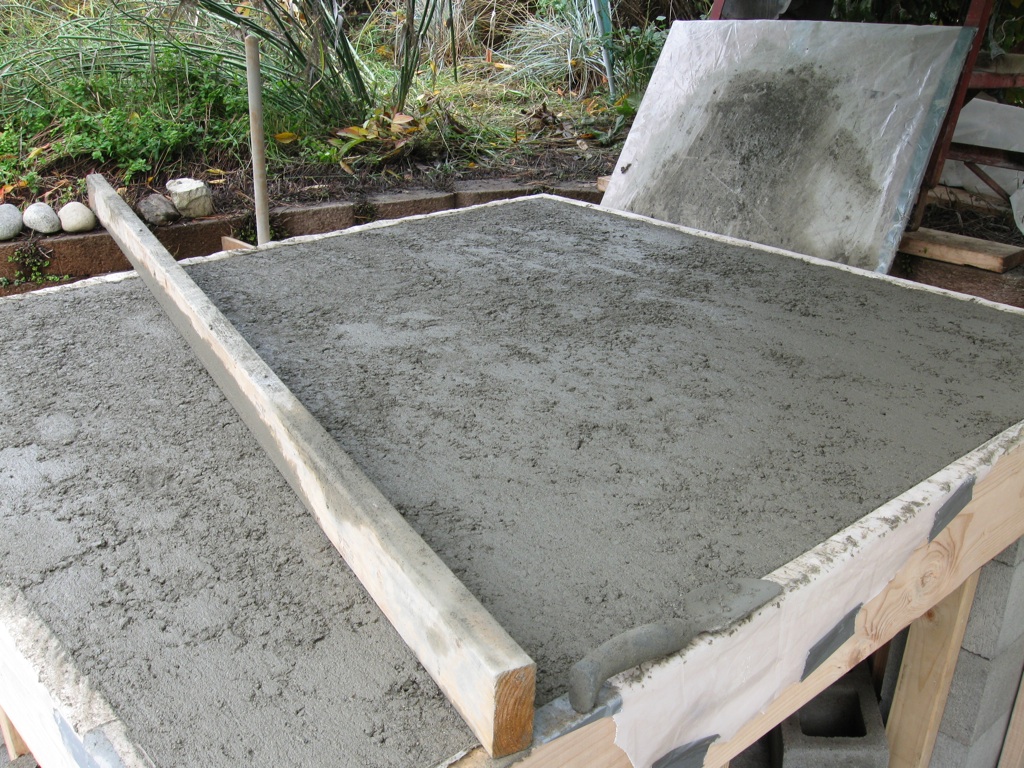
 Screeding.
 Done screeding, two passes: 5x80lbs + 29x60lbs - 20ish lbs screeded off, Sakrete high strength concrete. We didn't float it at all. I still don't understand the concept of floating. The concrete seemed very dry (I hope we made it right — I followed the infinite supply of directions available on the internet, relying heavily on the ball-in-fist method: not crumbling apart, not running soupy.). I can't conceptualize what floating would have actually accomplished. The idea that any amount of water might would have gathered on or smoothed the surface by floating seems absurd based on the texture and consistency we were getting. I should figure this out before I pour the hearth. Sigh.
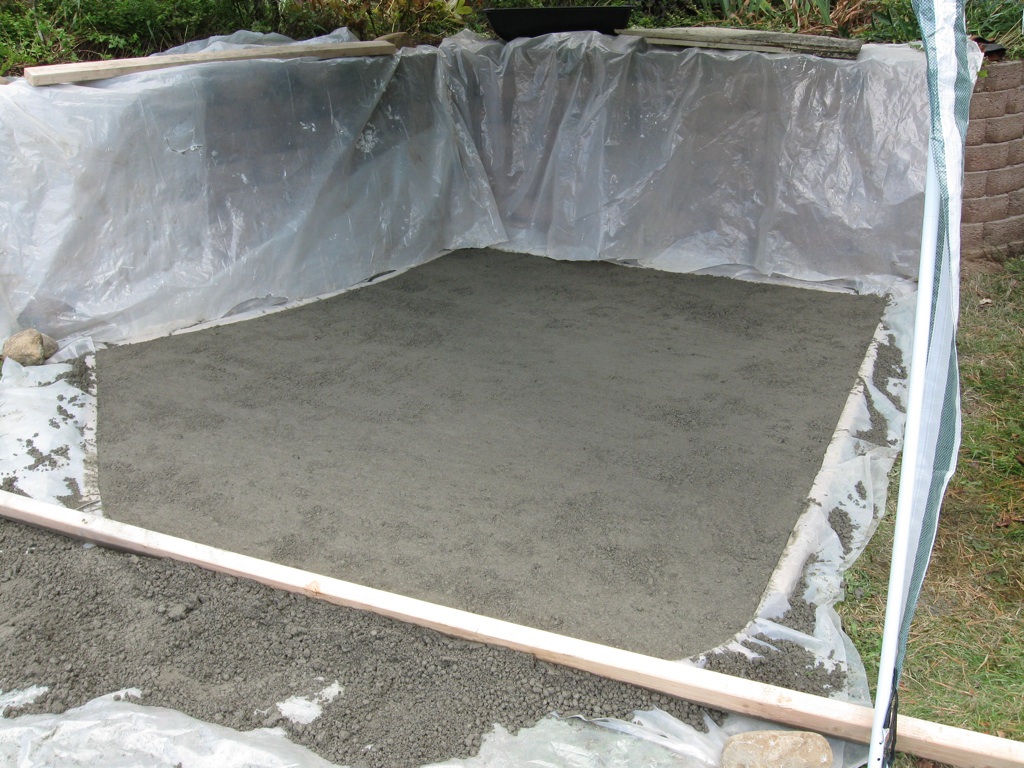
 The sun was kind of beating in the west side of the awning when we were done, so we misted the entire pour, then laid down paper bags, then misted them as well, and finally added a second "wall" to the awning to help mitigate the direct sun (but the wall is translucent plastic, so, you know...)
 From what I've read, most novices mix their concrete too wet, which ultimately weakens the concrete and makes it take longer to cure. I think I may be the only person to ever mix concrete too dry! Of course, I only did that because I was so paranoid about mixing it too wet. GAH! The surface was very crumbly after the first day, like petrified feta cheese, as shown in this picture. Another contributor to the texture I got is that I didn't float it at all after screeding it. I couldn't see the point because it was so dry I couldn't visualize what a float would actually do. If it had been wetter, I suppose it would have been easier to imagine that floating might do something in the first place, which might have motivated me to float it. At any rate, I suspect my foundation will actually be all right, but for the week following the initial pour I intend to keep the surface constantly misted and covered with plastic. These lessons will be applied when I pour the cores in the wall, and more importantly, the hearth.
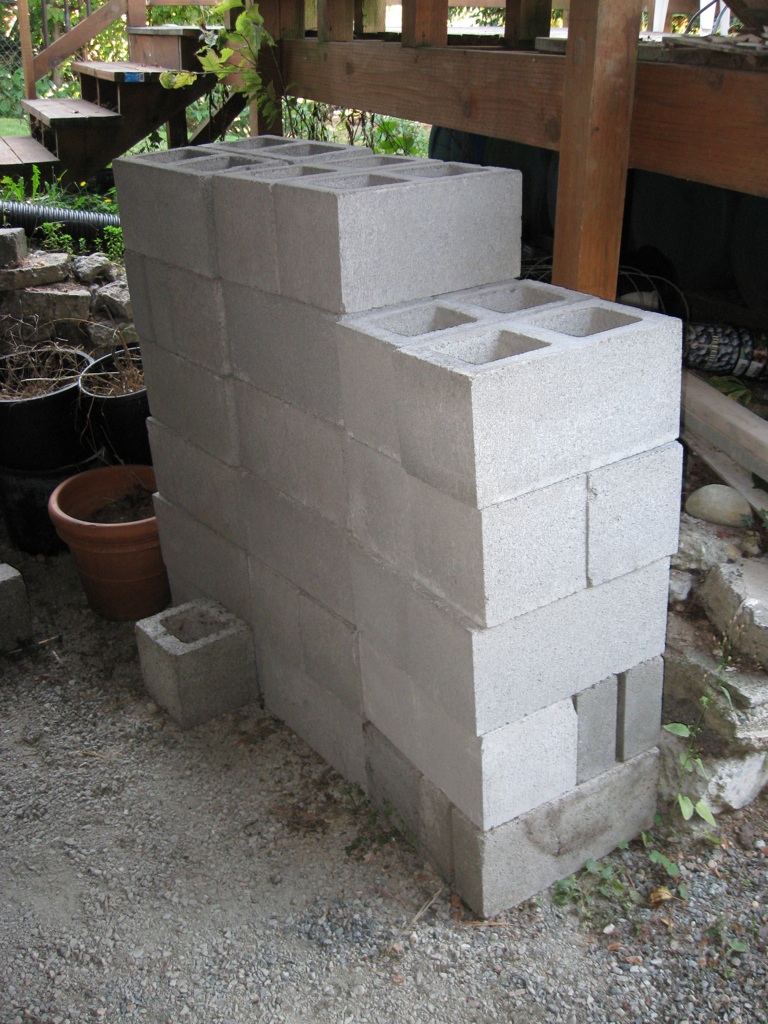
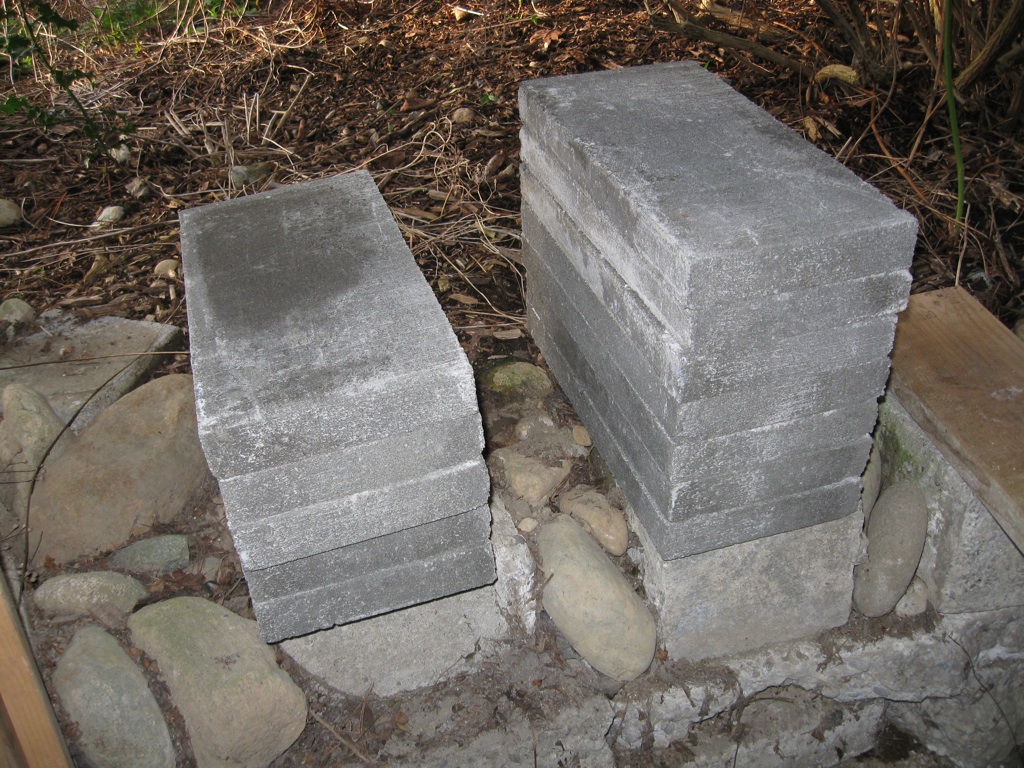
 More concrete blocks. Still not quite there yet, but getting close.
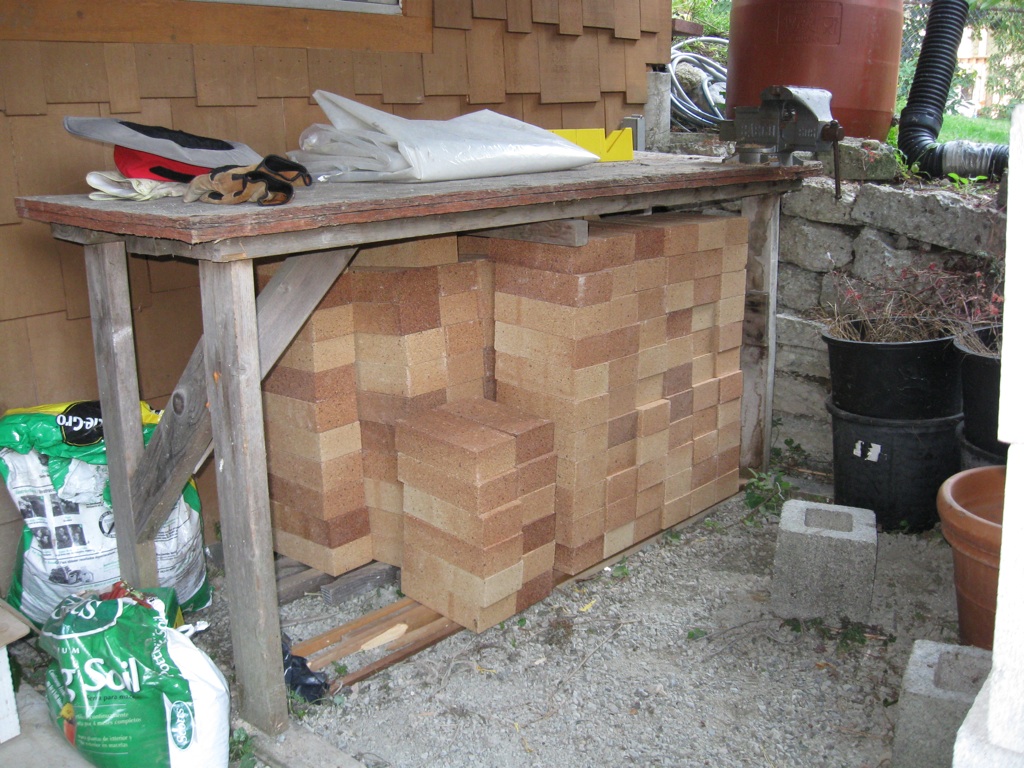
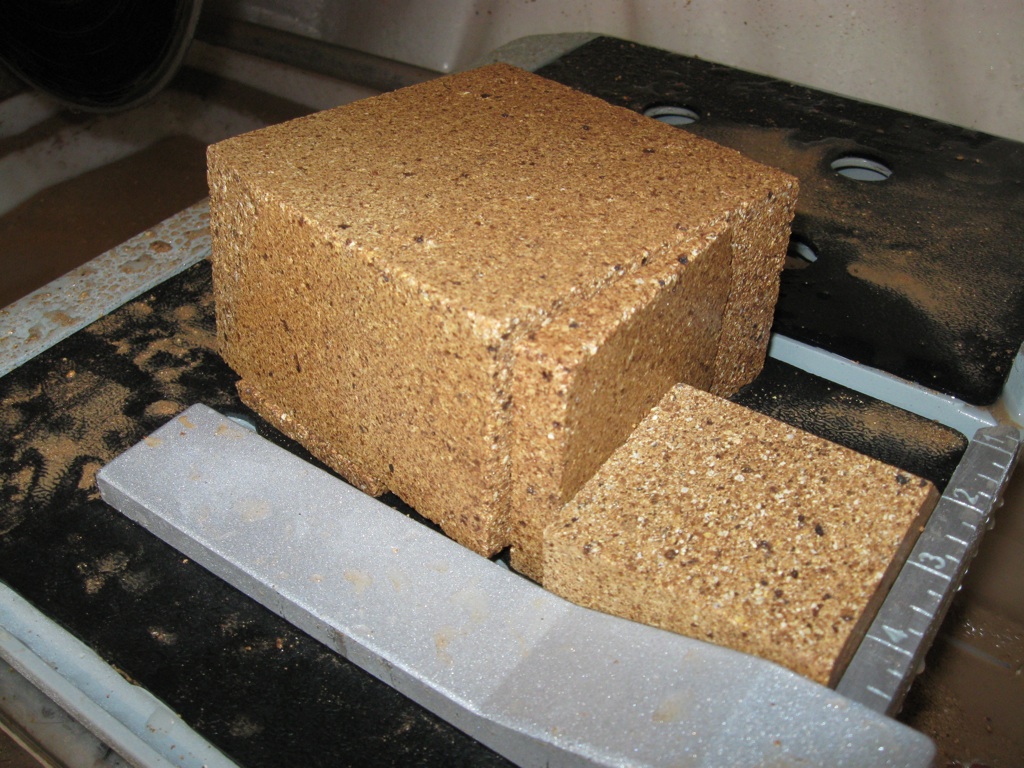
 250 medium grade fire bricks, ~8lbs apiece! 159 in Tom's truck (~1272lbs), 91 in my Forester (~728 lbs). Heck, I put 900 pounds of concrete in my Forester already. I should've taken more bricks. Oh well.
 Fire bricks.
 Fire bricks.
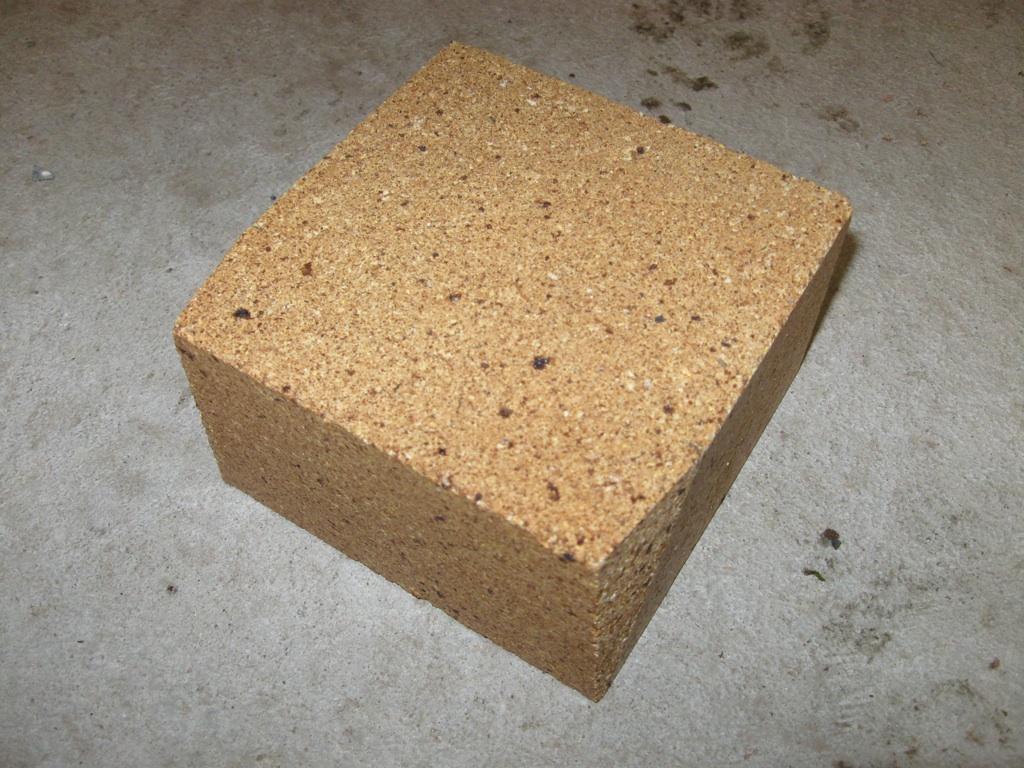
 So pretty.
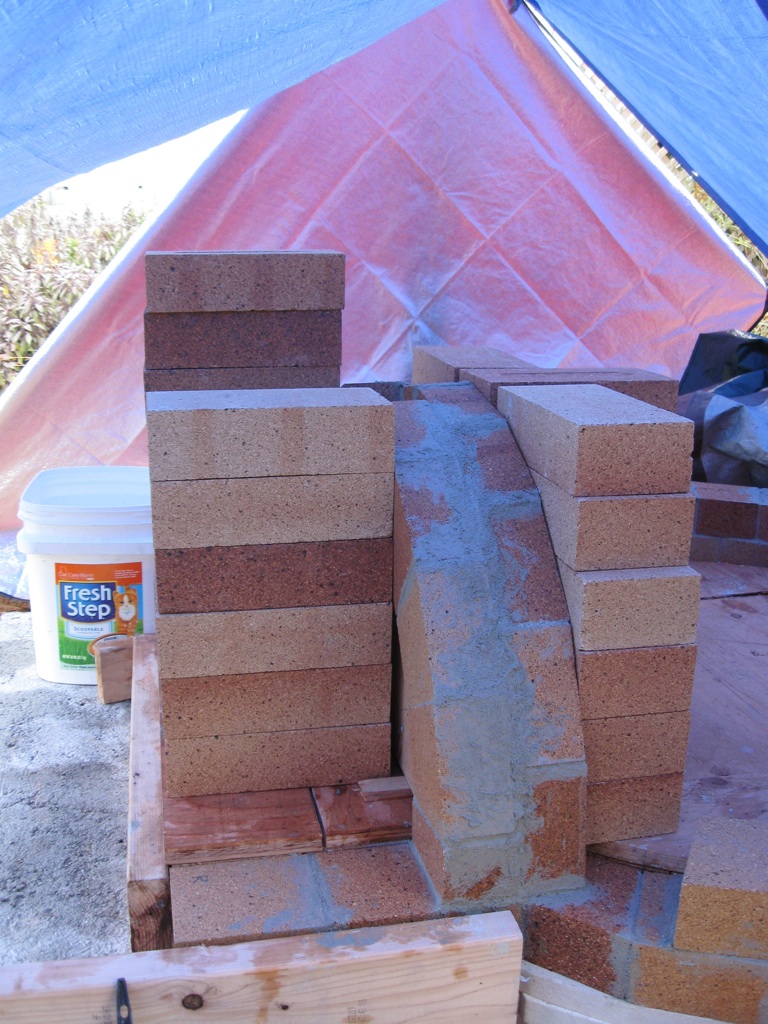
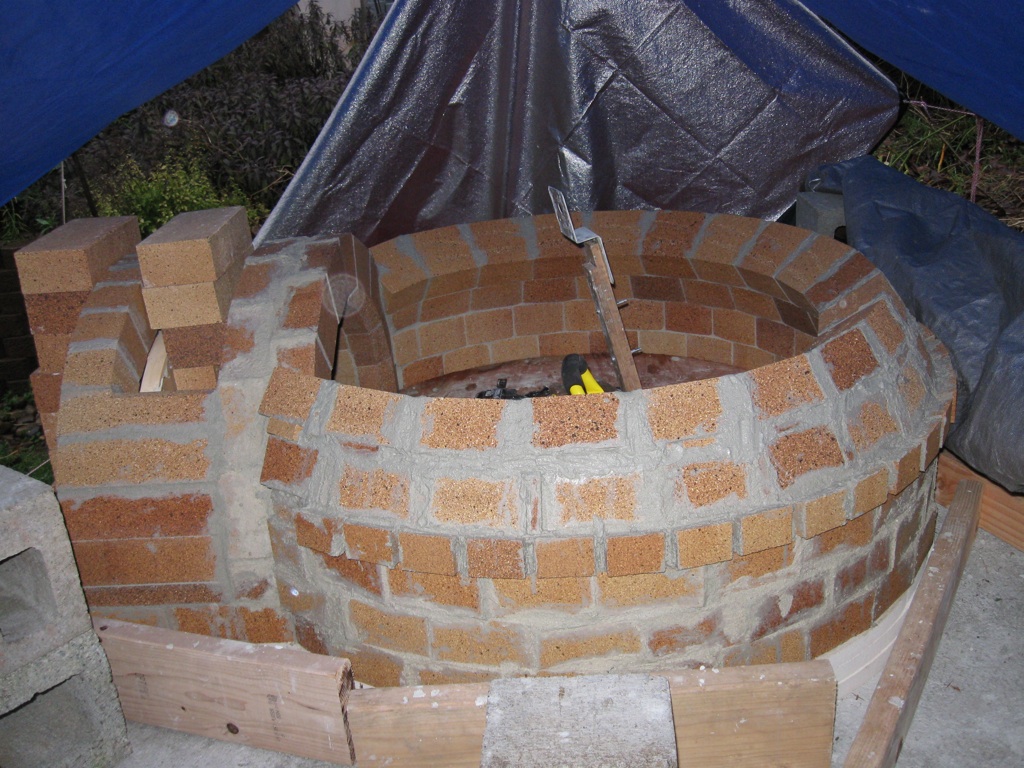
 Dry-stacked the blocks.
 Dry-stacked the blocks.
 Turns out my foundation isn't perfectly flat (much less level), as shown here. In my defense, one, I have never poured concrete before, and two, it was very difficult to level, frame, and work the foundation against the corner of the retaining wall because I couldn't walk around it from two sides. My current plan is to ignore this problem on the theory that when the hearth is framed and poured across the top of the walls, it will liquidly fill the slightly curved bottom without any trouble and still provide a perfectly level (and flat) upper surface.
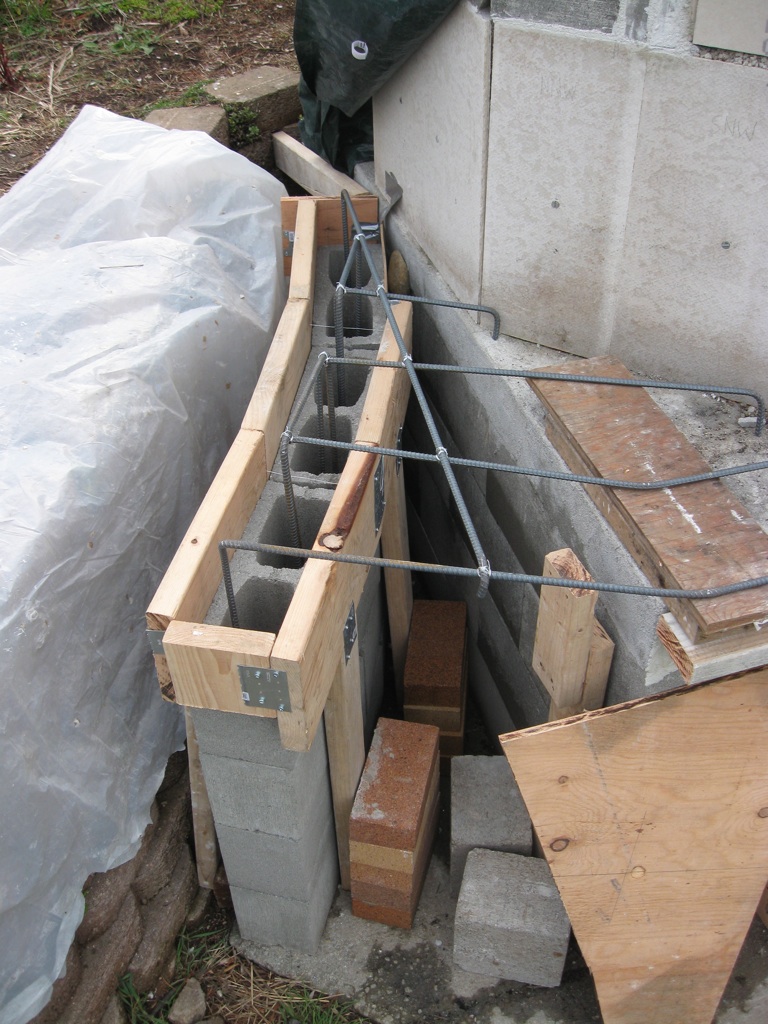
The two openings are bridged by (amongst other various rebar) two lintel rebars each. For the longer (and therefore weaker) opening, the lintels descend all the way to the ground and then J-hook, as shown here.
Turns out my foundation isn't perfectly flat (much less level), as shown here. In my defense, one, I have never poured concrete before, and two, it was very difficult to level, frame, and work the foundation against the corner of the retaining wall because I couldn't walk around it from two sides. My current plan is to ignore this problem on the theory that when the hearth is framed and poured across the top of the walls, it will liquidly fill the slightly curved bottom without any trouble and still provide a perfectly level (and flat) upper surface.
The two openings are bridged by (amongst other various rebar) two lintel rebars each. For the longer (and therefore weaker) opening, the lintels descend all the way to the ground and then J-hook, as shown here.
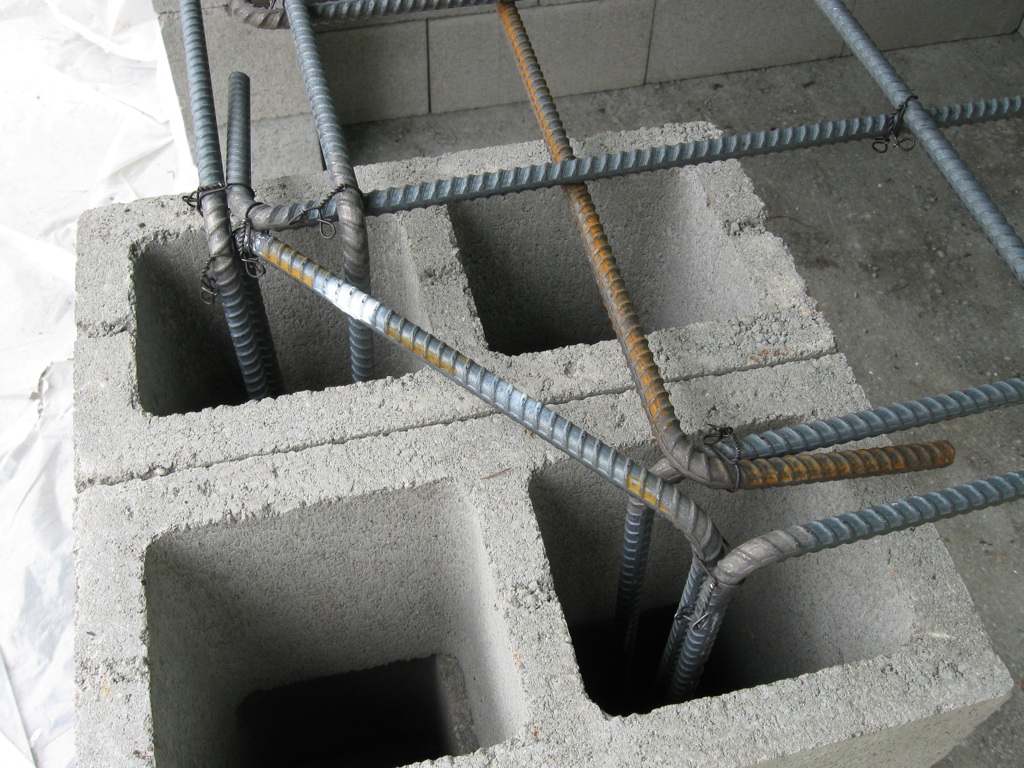
 Approximately every other core of the wall will be filled with concrete, each one reinforced with a piece of vertical rebar, the pieces shown here. J-hooks go at the bottom, L-hooks tie into the hearth rebar and will be encased within the hearth concrete, much like the rebar in the foundation.
 A detail of the rebar arrangement in the "weak" corner. There will be even more rebar here before it is done, as shown in later photos.
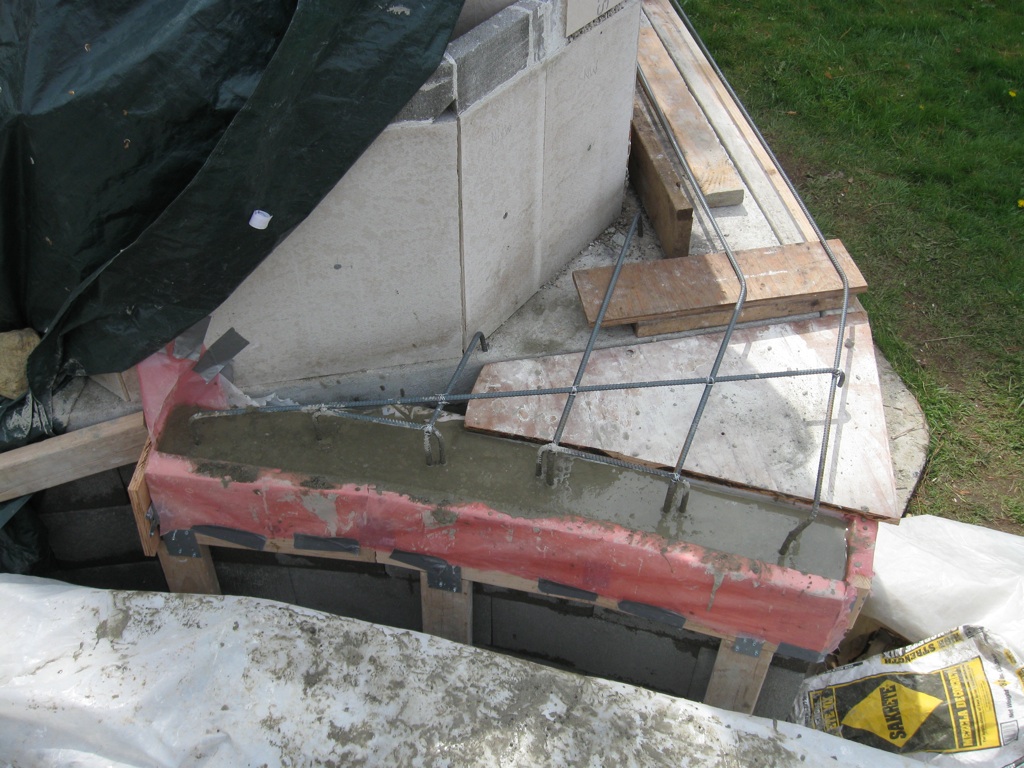
 Most of the hearth rebar, with the exception of one very long piece that wraps halfway from corner to corner around the "weak" corner and an additional vertical rebar in the "weak" corner (see later photos).
 Filling the vertical cores with concrete.
 The "weak" corner filled and done.
 Men at work.
 We used the retaining wall as a graviy assist as much as possible, both mixing concrete on top of the ledge and then using the ledge to angle the mixing tub toward the concrete block wall.
 The core-filling job after completion, 4x80lbs + 9.5x60lbs Sakrete high strength concrete. An attentive observer will notice some of the hearth rebar bent vertically into empty cores. I figured, what the heck. I might fill them, I might not, so I may as well put the rebar there and decide later.
 A detail of the rebar and core-fill in the "weak" corner.
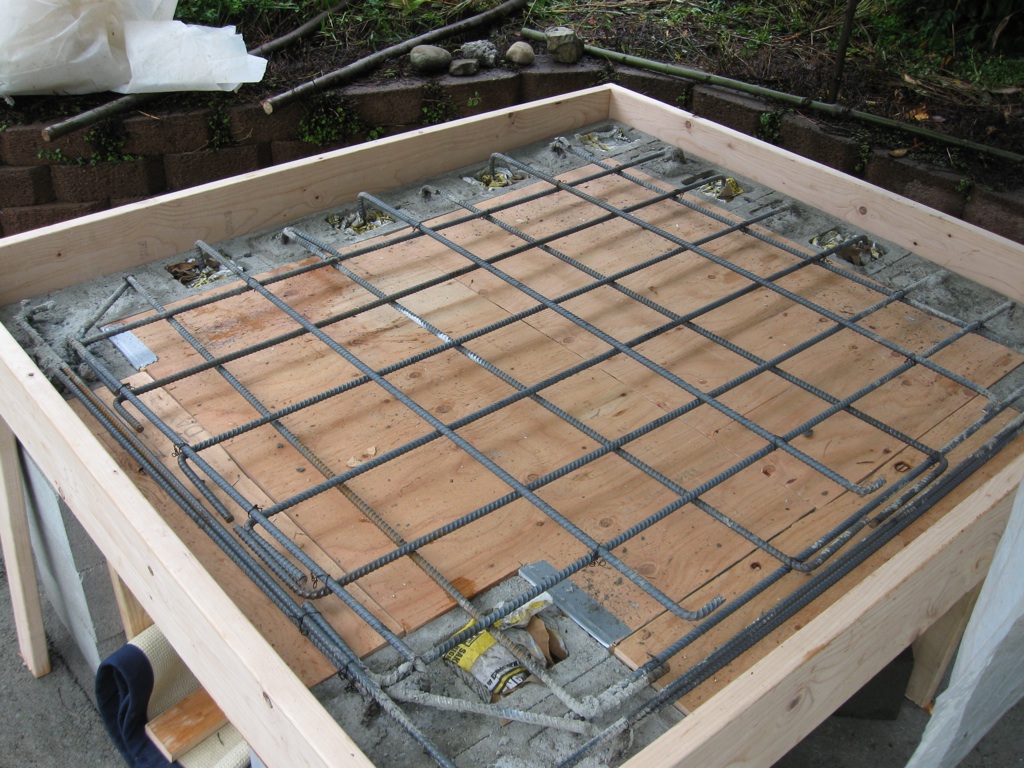
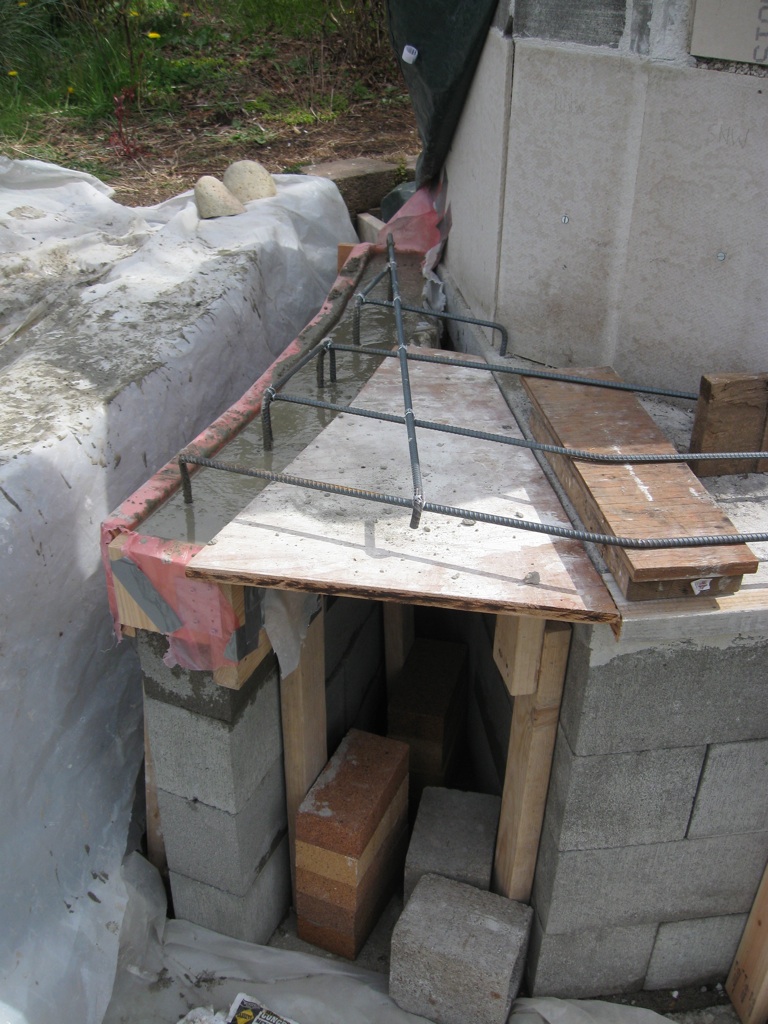
 The form for the hearth slab. It will be about four inches thick, a little more in one corner, a little less in another, such that the top of the hearth is perfectly level (I hope).
 The form for the hearth slab.
 The form for the hearth slab.
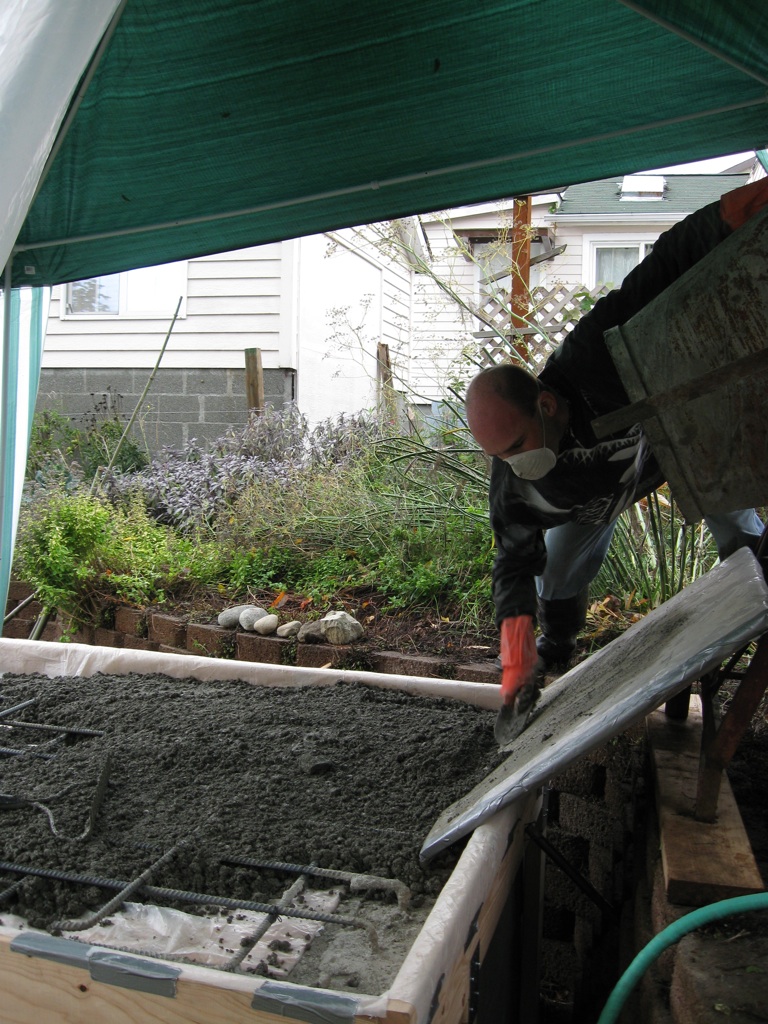
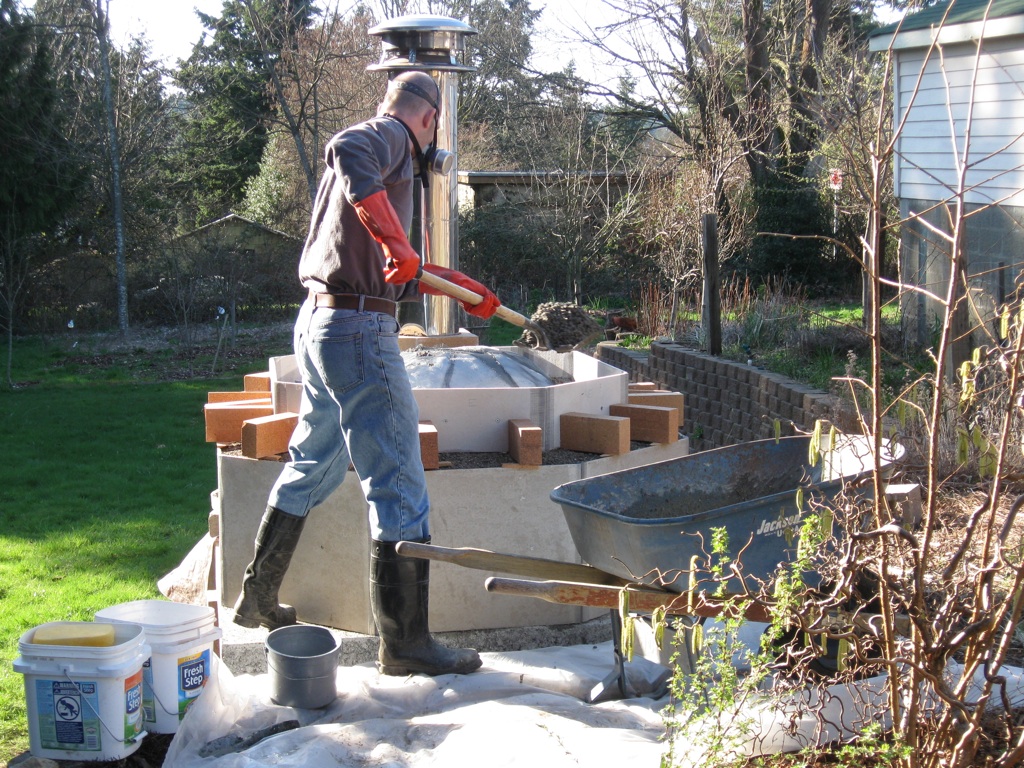
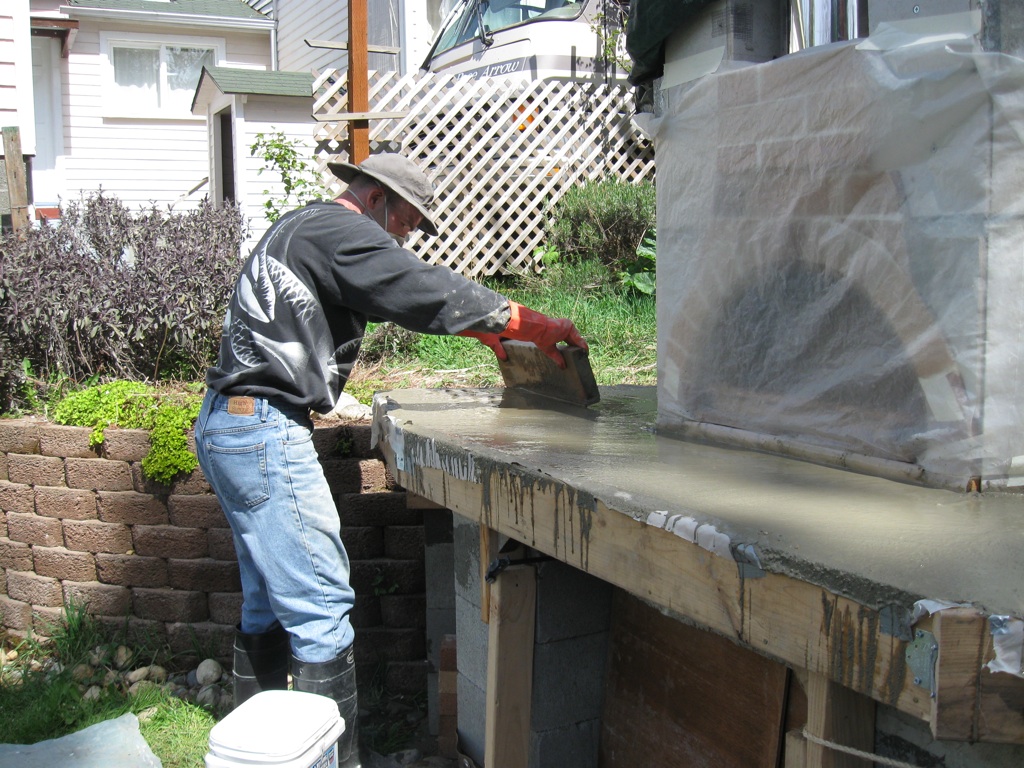
 Pouring the hearth. After the foundation I mixed the concrete wetter for the cores and then wetter still for the hearth and it's still too dry!!! I mixed it really muddy in the mixer, but it ended up looking like this after I poured it out. You'll see in later photos that I really didn't get a good "creamy" surface for the final floating procedure. C'est la vie.
 Gravity is your friend. You want to pour concrete DOWNHILL!!!
 I really wish I had a time-lapse video showing how I single-handedly wrestled the concrete mixer onto the retaining wall. It involved a complex system of 2x6 planks and lots of small motions followed by small adjustments.
 Raking it out. It's too dry! I've commented on this already. Leave me alone.
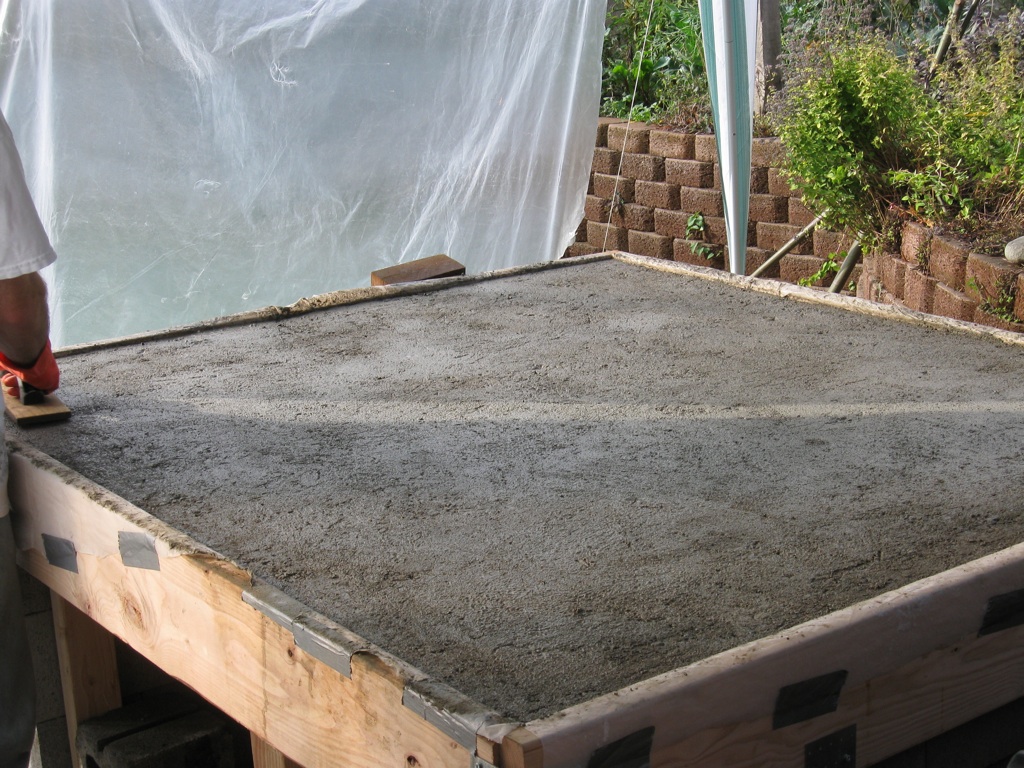
 Screeded. Following this step, I took a 4x6 and pounded it end-on over the entire slab. This resulted in a compaction by about 1/4" which I didn't bother to fill in with additional concrete, but I think it's thick enough to handle it.
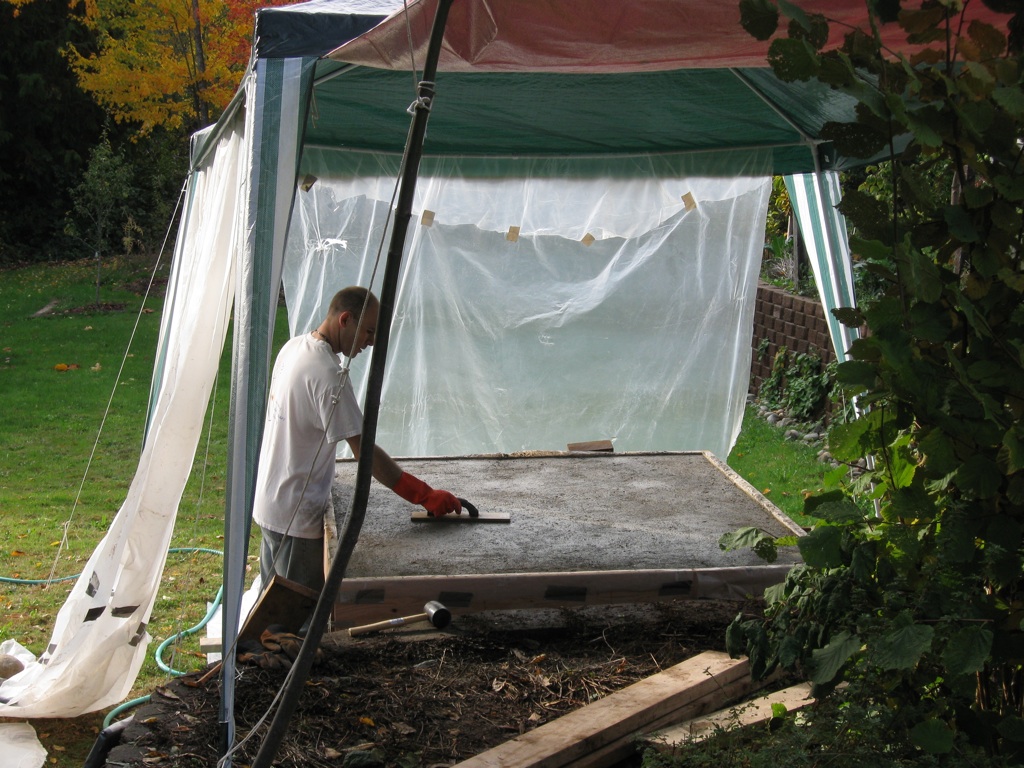
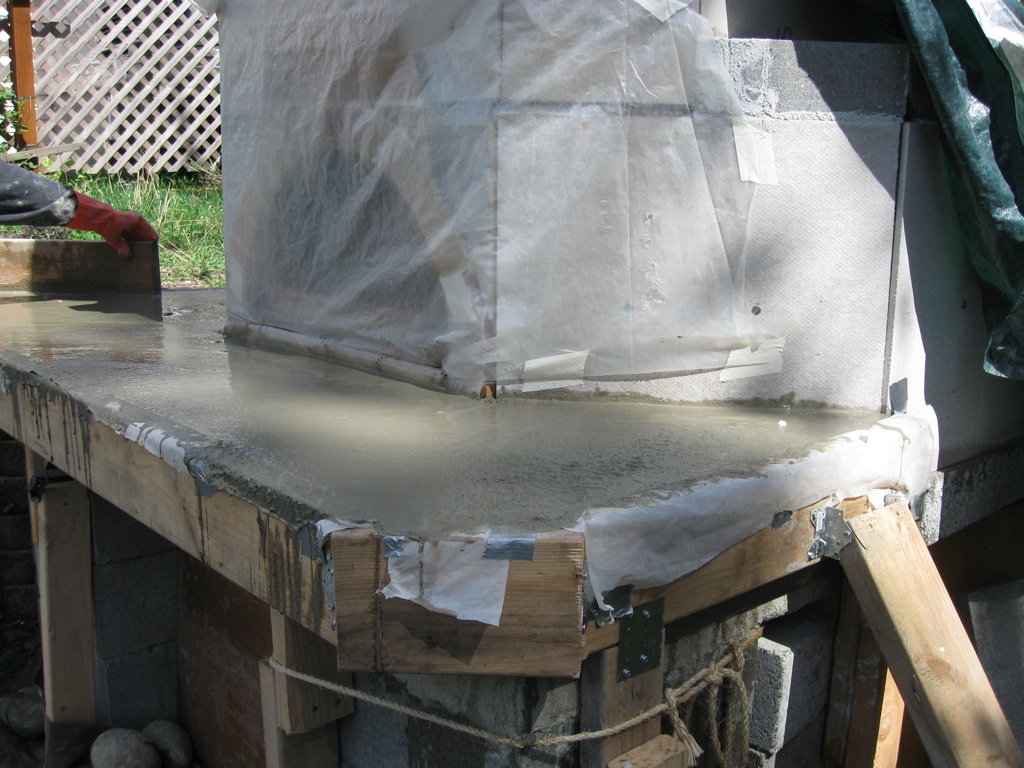
 Floating the concrete. The only way I could even pretend to float was to mist the concrete with a hose. It did not "sweat" like proper concrete should. Too dry, 'nuff said.
 You can see the 1/4" dip that resulted from the 4x6 pounding. You can also see that I don't care. Go away.
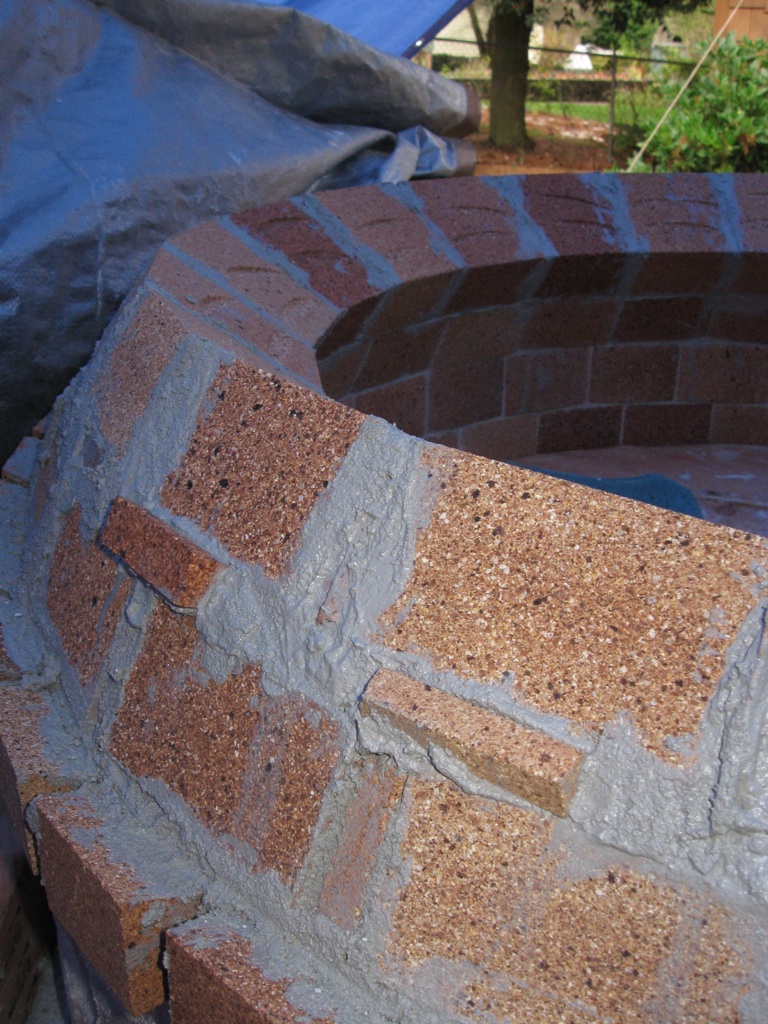
 Hearth with the forms removed. What lovely sharp edges and corners. You can see the consequences of pouring the concrete too dry now. The pocketed exposed edges tell the story.
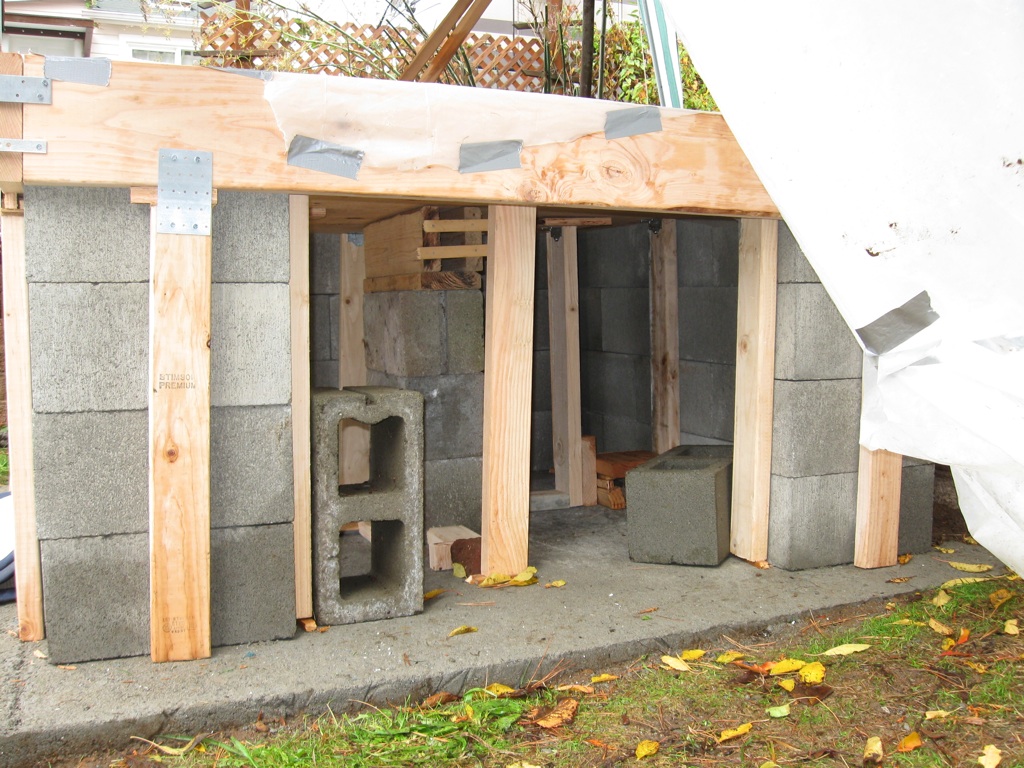
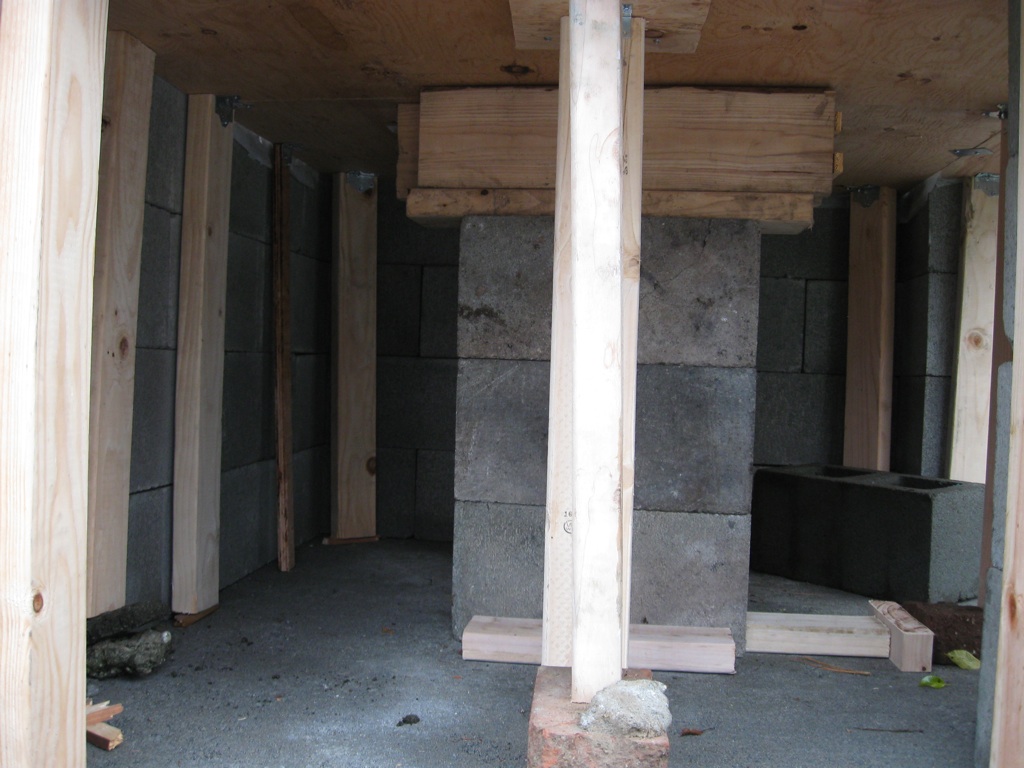
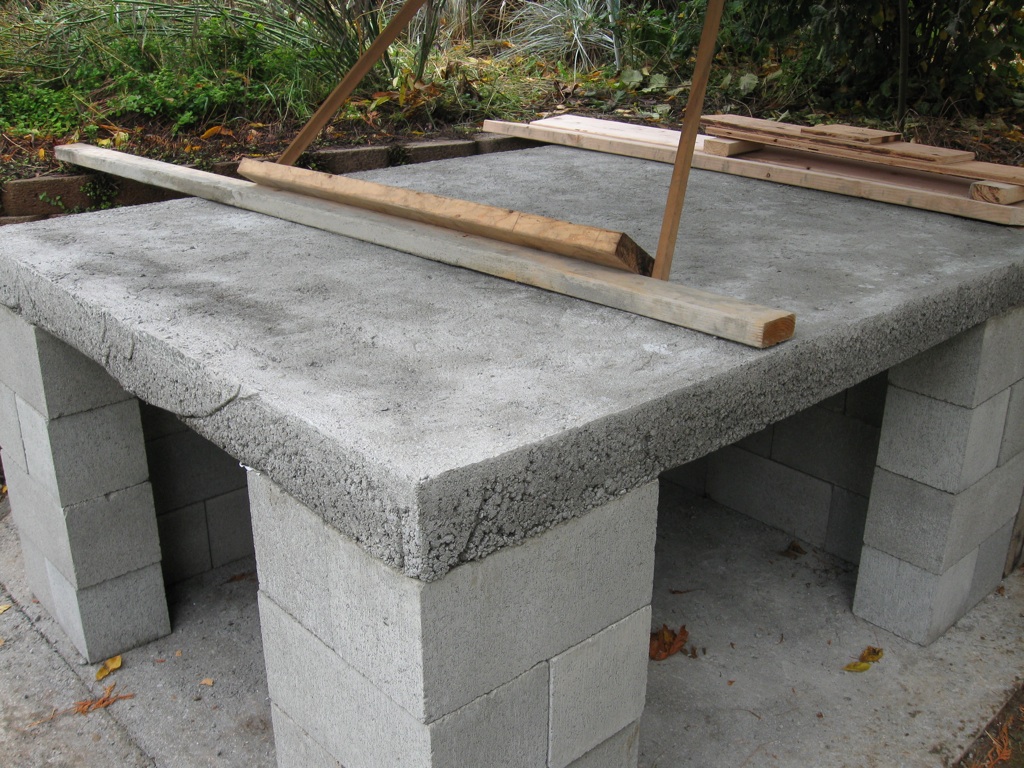
 Hearth with the forms removed. My original plan was to clear the vestigial form-supporting blocks (shown in this photo) out from under the hearth, thus leaving a nice open storage area. However, because my concrete is too dry (the edges of the hearth in this photo illustrate the problem), I have decided to strengthen the hearth with a center column before proceeding to pile heavy bricks on top of it. At some point I will also parge the sides of the hearth (and the foundation) to prevent them from crumbling. Sigh.
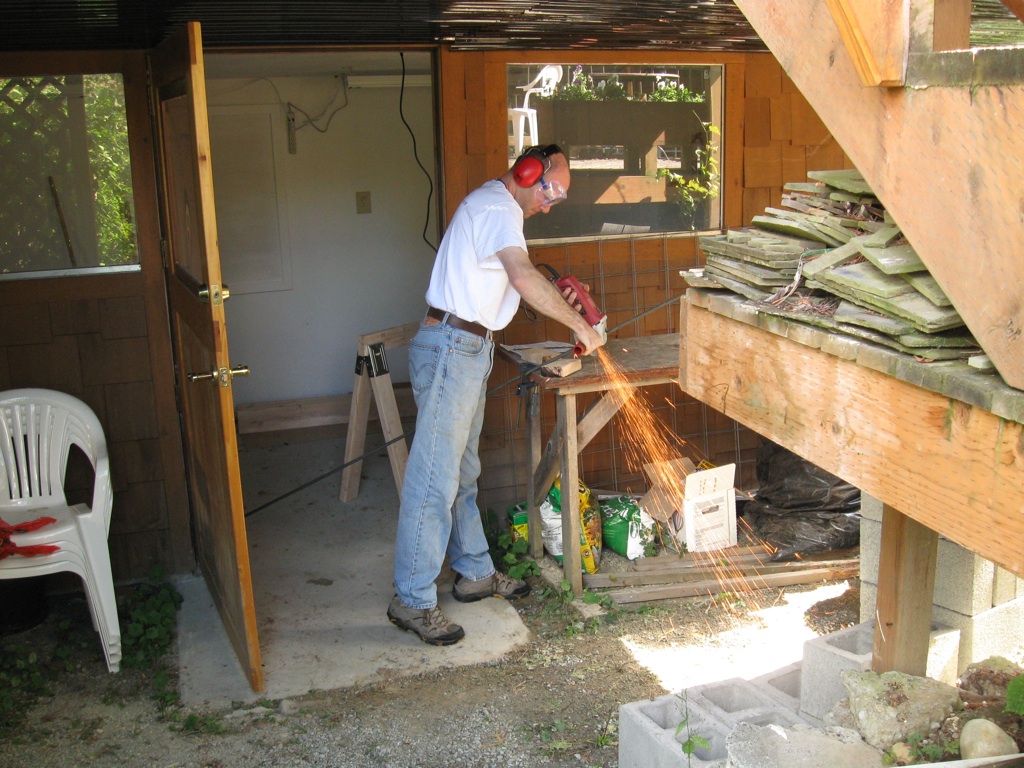
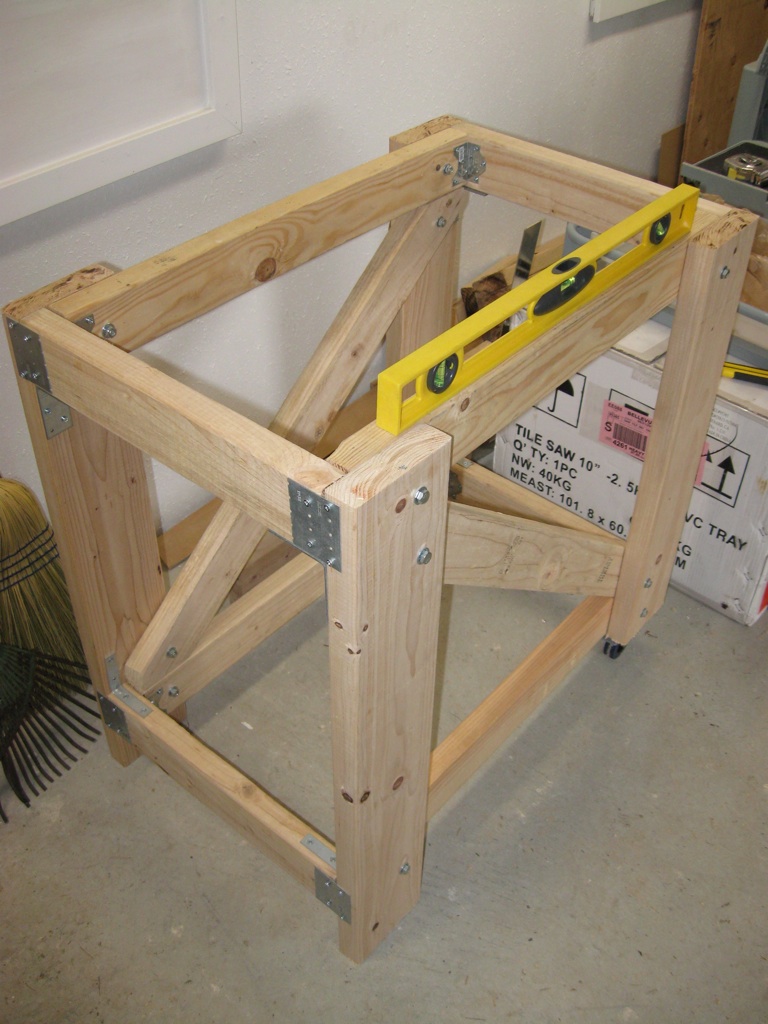
 The heavily over-engineered tile-saw stand.
 After turning and rotating and drilling and bolting and screwing this thing together for three days, I finally turned it upright and received this pleasant surprise! None of my poured concrete was this level; I can tell you that much for sure.
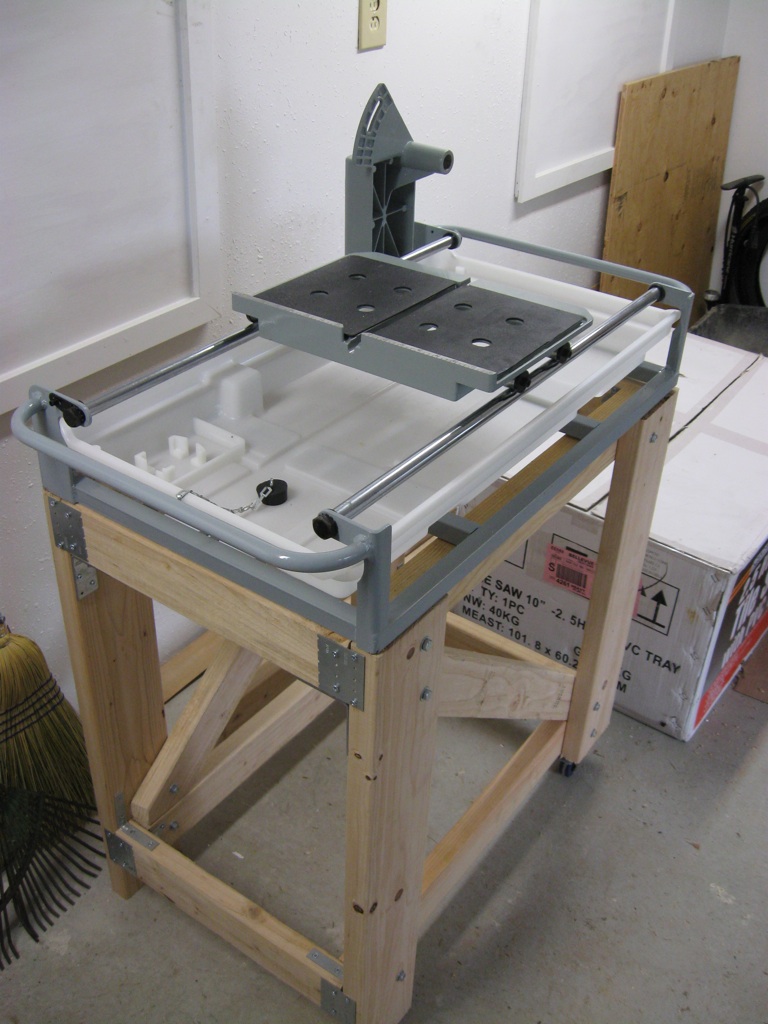
 The tile-saw stand. The final step will be a small lip at the corners to hold the tile-saw in place.
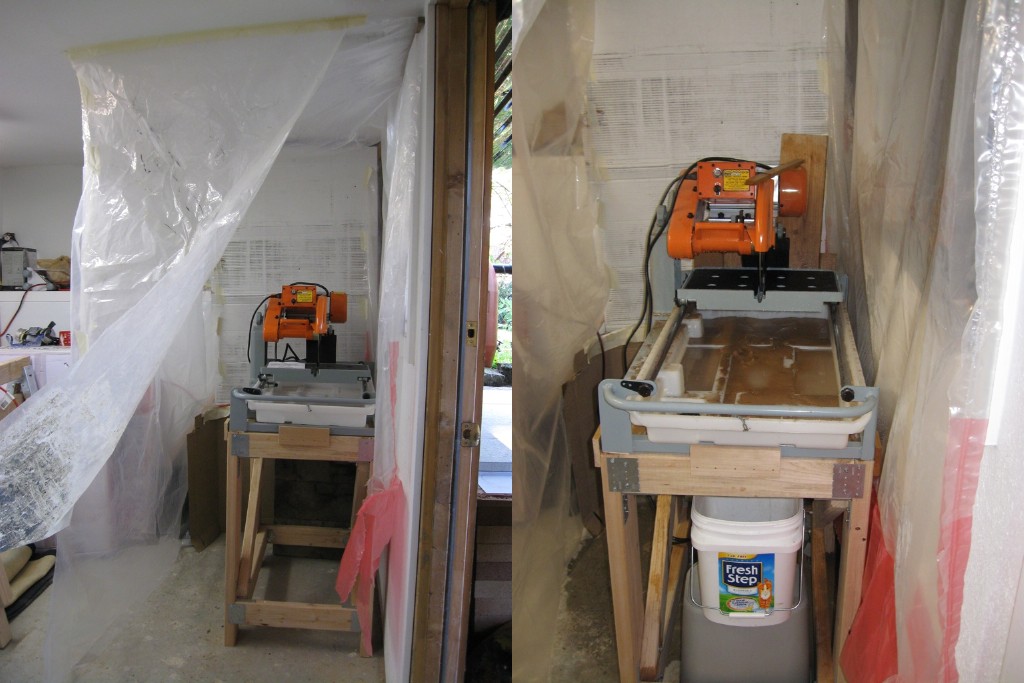
 Here's my setup for the tile-saw, a plastic room masking-taped into the corner of my basement, although the floor is getting a little wet. The pump is removed from the factory suggestion of the tray to a separate bucket sitting on the concrete blocks in the back (left image) and the drain in the tray drains into a second bucket at the front (right image). You can also see that I put up a wall of boards behind the saw to keep brick crud coming off the blade from getting in the pump bucket; I very quickly realized this was a serious problem that would otherwise undermine the whole purpose of placing the pump in a separate reservoir.
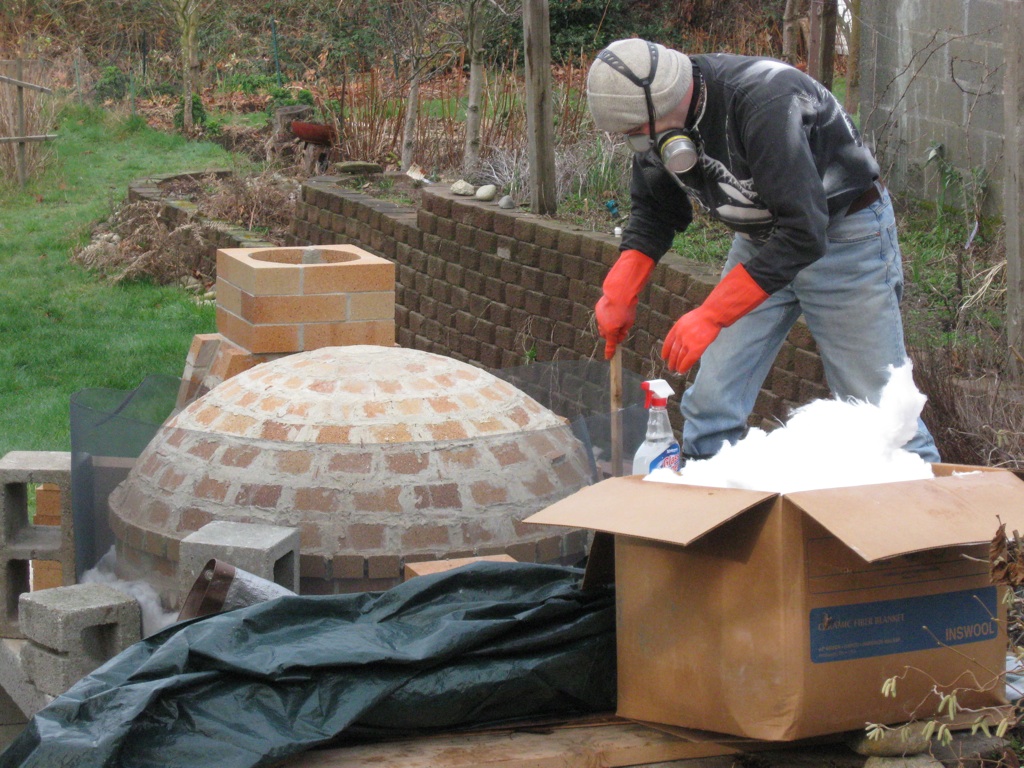
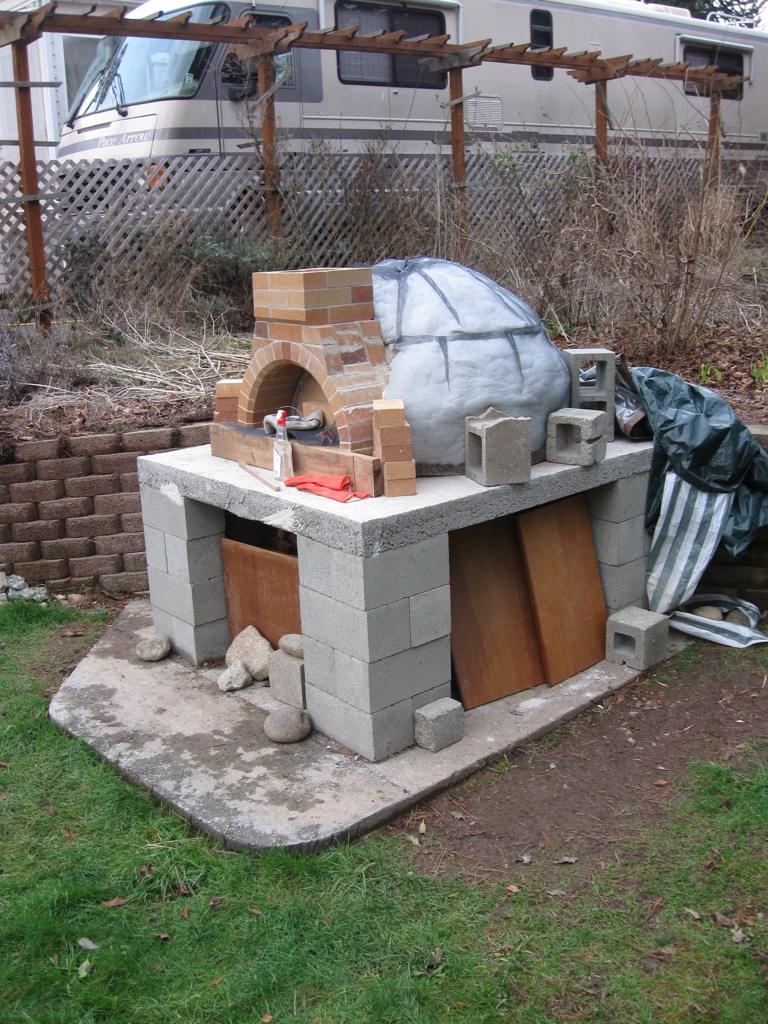
 Check out the overkill on the bio-hazard protection I used while cutting up the InsBlock 19 (hearth insulation). I'll be using that again for the InsWool HP Bulk loose fiber for the dome. The foundation board is very soft. A jig-saw goes through it like styrofoam although I used a small-toothed "metal" blade instead of a normal "wood blade" to minimize tearing.
 Here are the pieces of InsBlock 19, 1" thick per layer, three layers.
 This is the InsBlock 19 layout for the second layer (of three).
 This is the InsBlock 19 layout for the first and third layers. They overlap the second layer such that no seams line up.
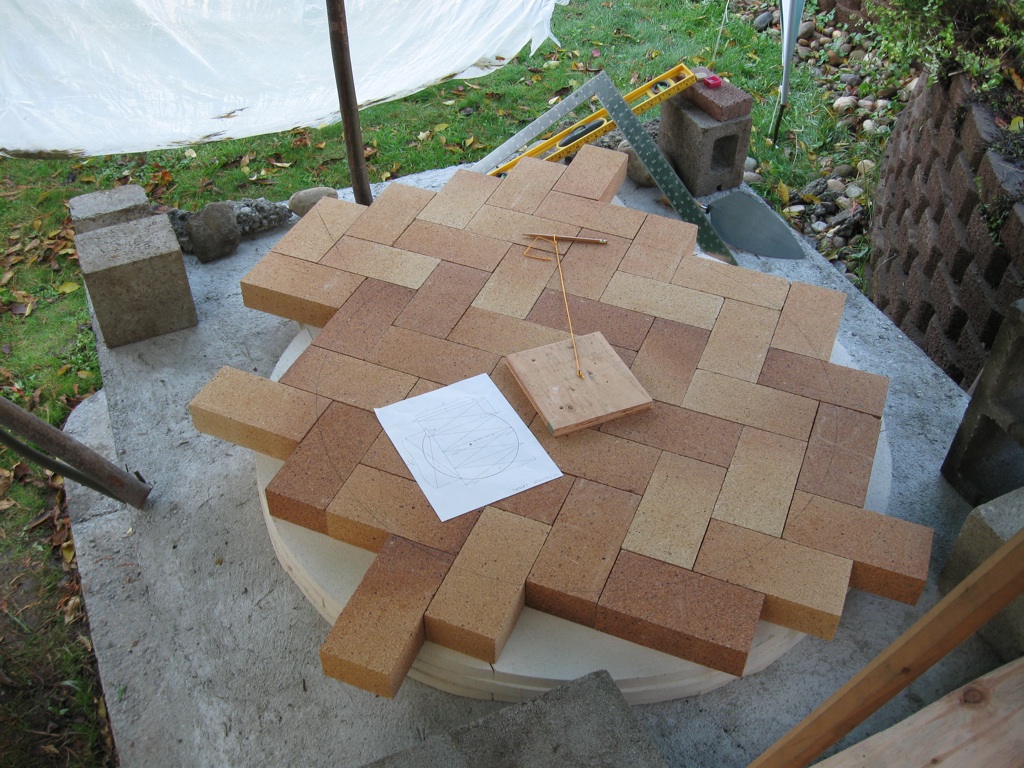
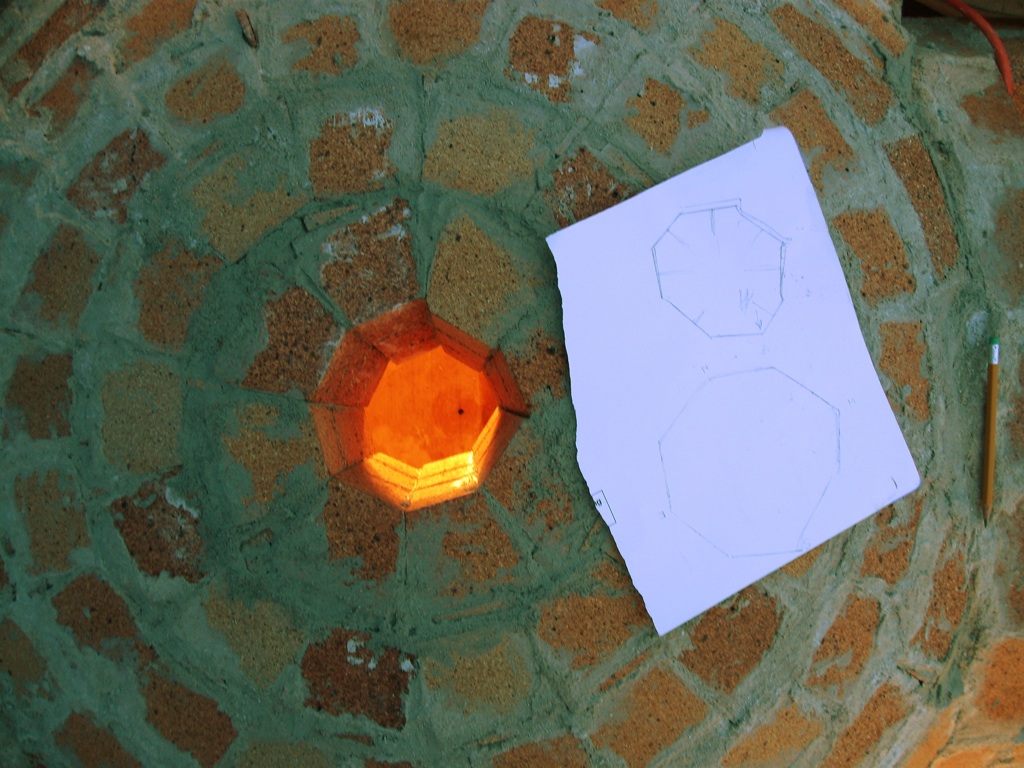
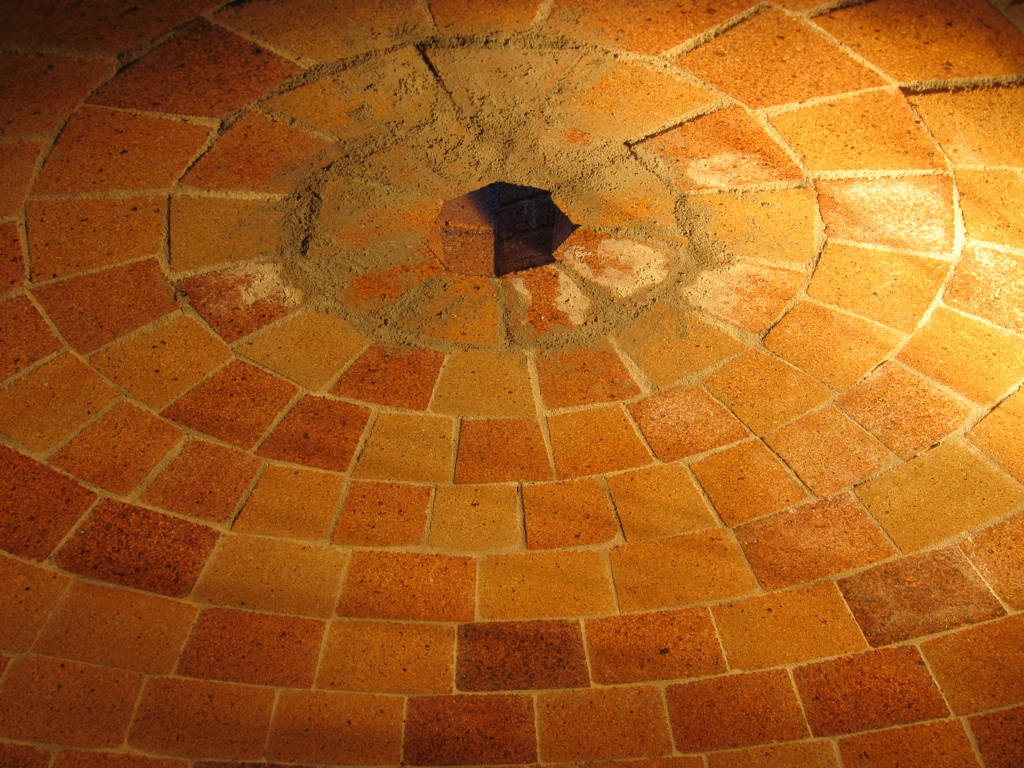
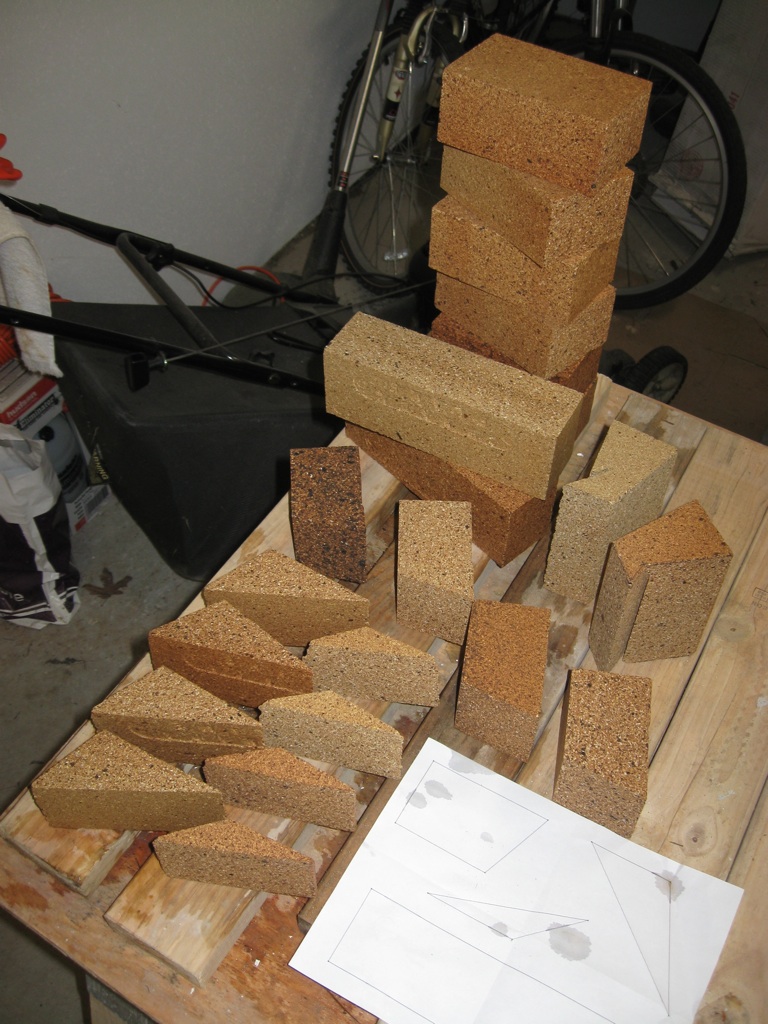
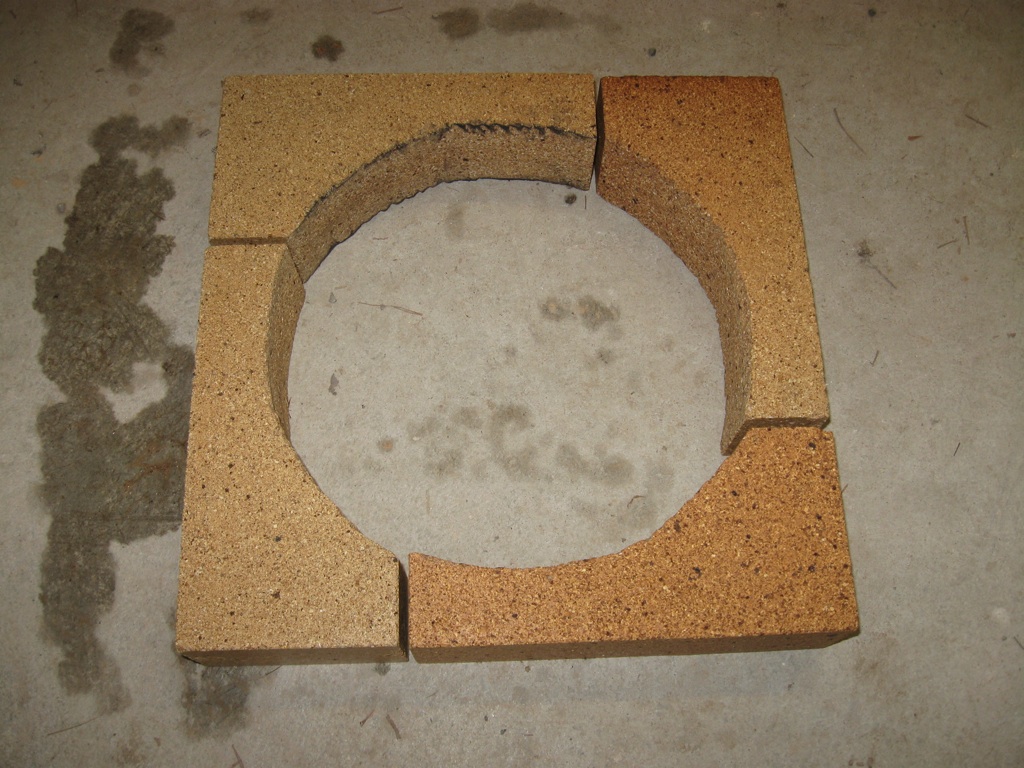
 The oven floor bricks laid out on the insulation board. If you look closely, you can see that I have traced out the oven's interior perimeter with a string compass (same way I cut the insulation board), to be used for subsequent cuts.
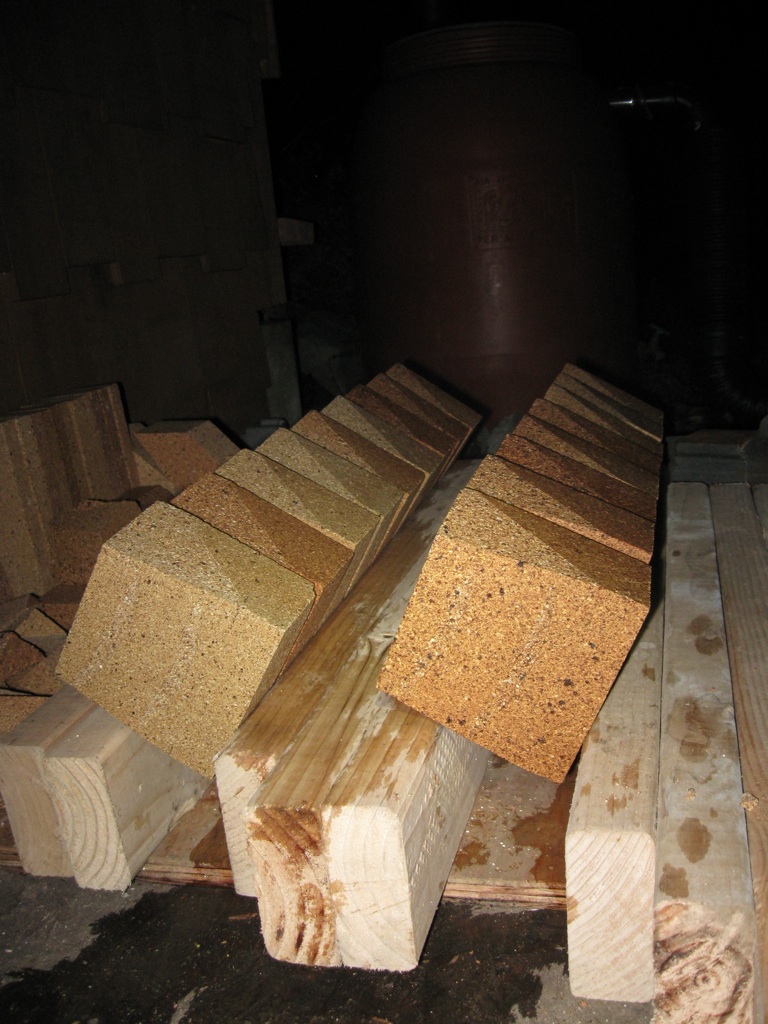
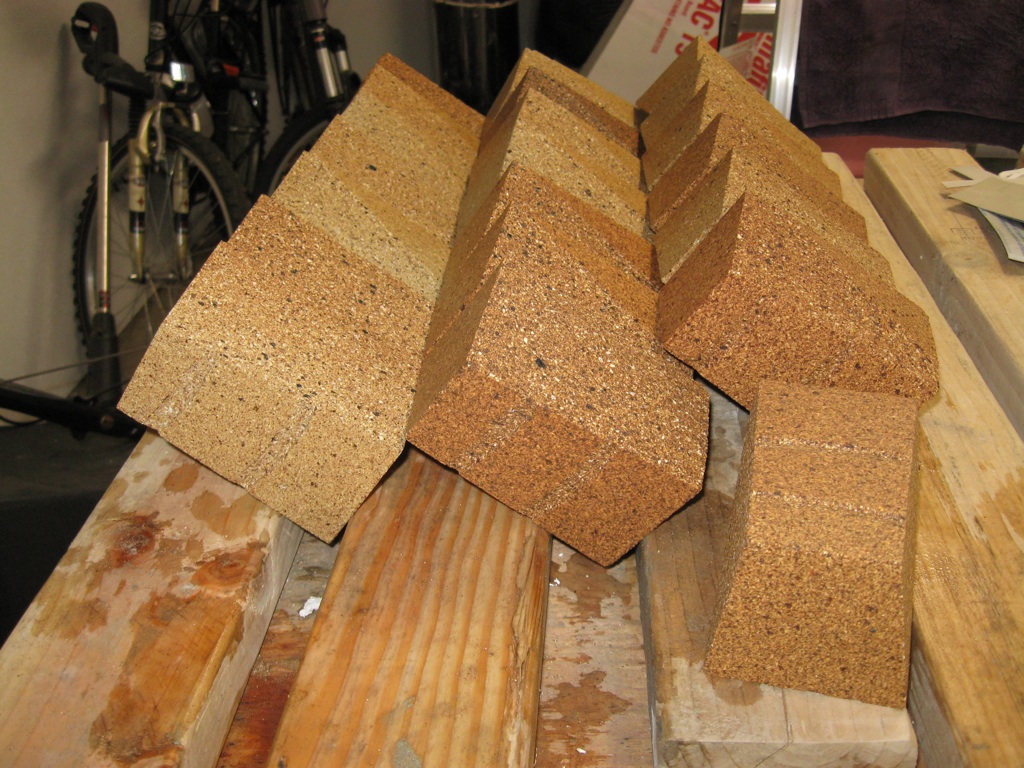
 Some bricks, recently cut, drying in the sun. I soak them before cutting to reduce dust and increase lifetime of the tile-saw blade.
 The oven floor bricks mostly cut to shape. A few are obviously missing from this shot and I have not yet decided whether to make precision cuts to grind down the perimeter to a more precise circular shape. I'll decide after I cut the first courses of dome bricks.
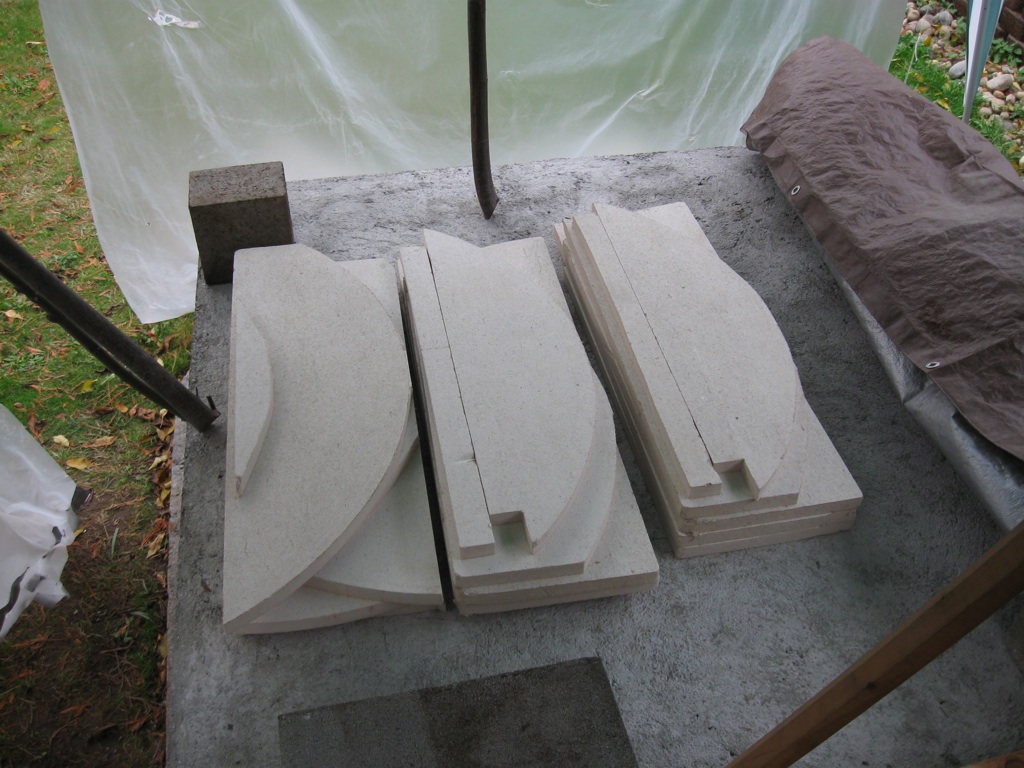
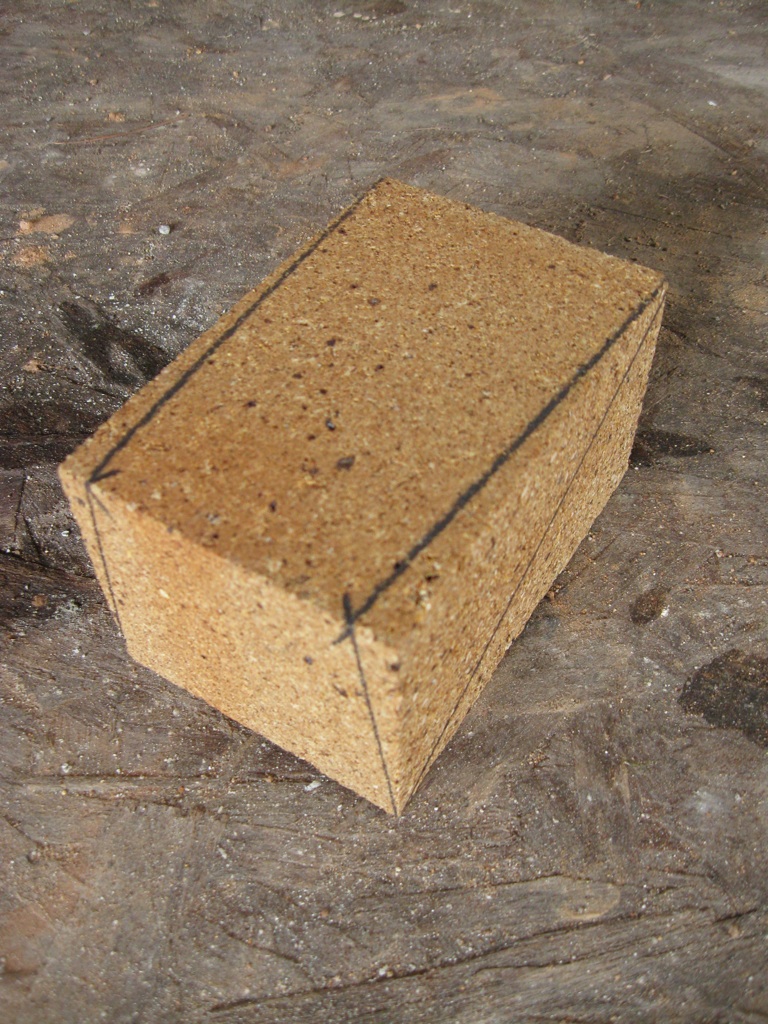
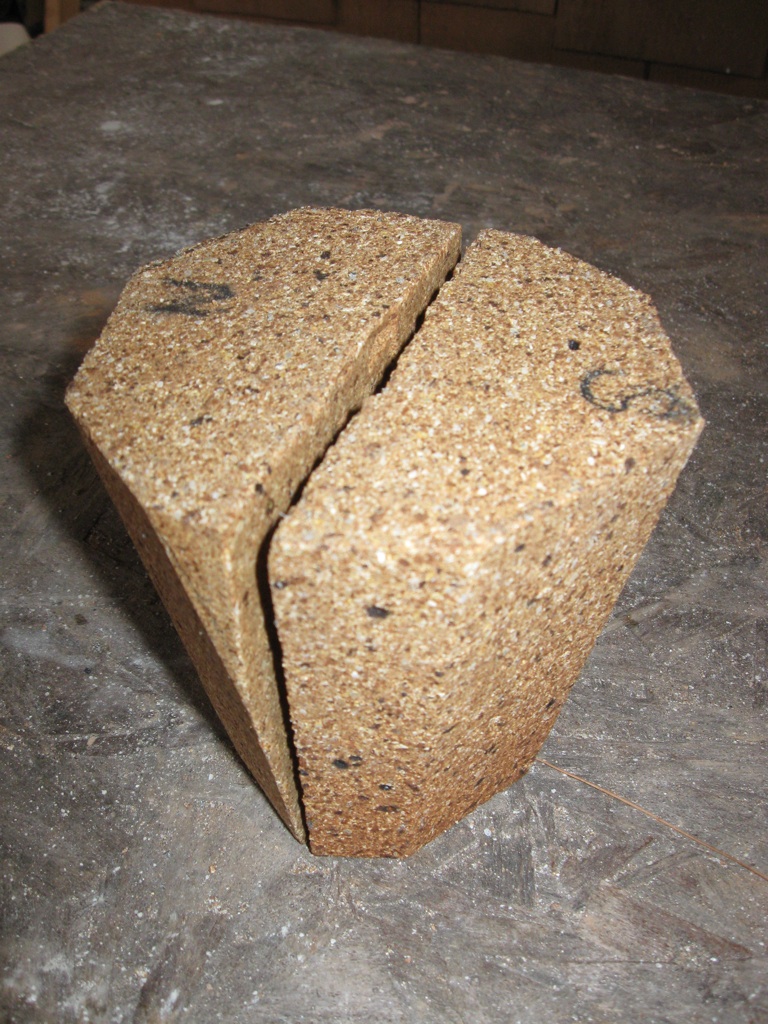
 I needed to produce approximately sixty-six bricks for the first three (identical) courses, two per original brick, meaning at about thirty-three identical cuts. I used this guide consisting of a precisely shaped block and a precisely positioned parallel beam to slam through the requisite cuts quickly and identically for each such block. A similar (but more complicated) approach will be used for the tilted courses of the dome.
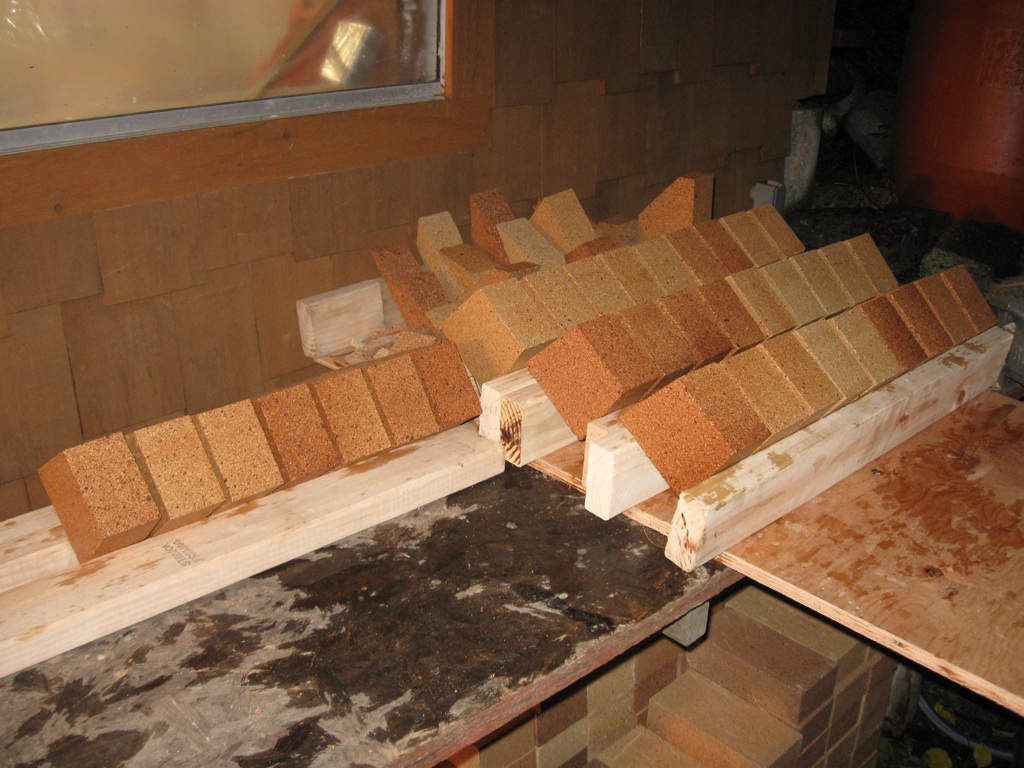
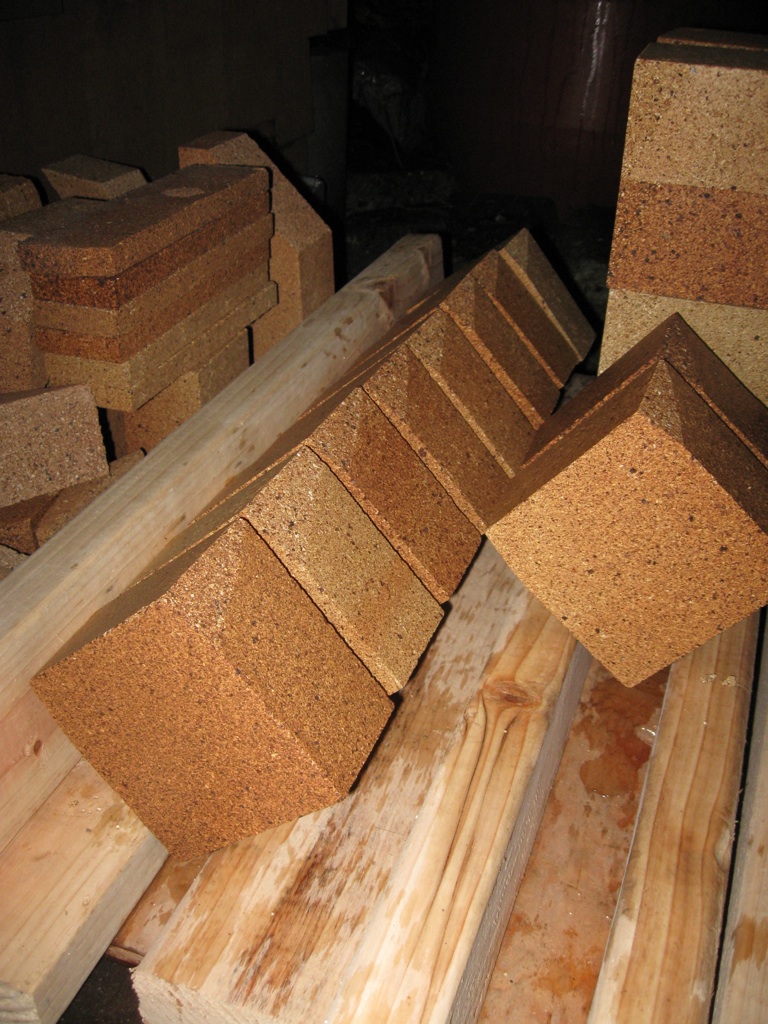
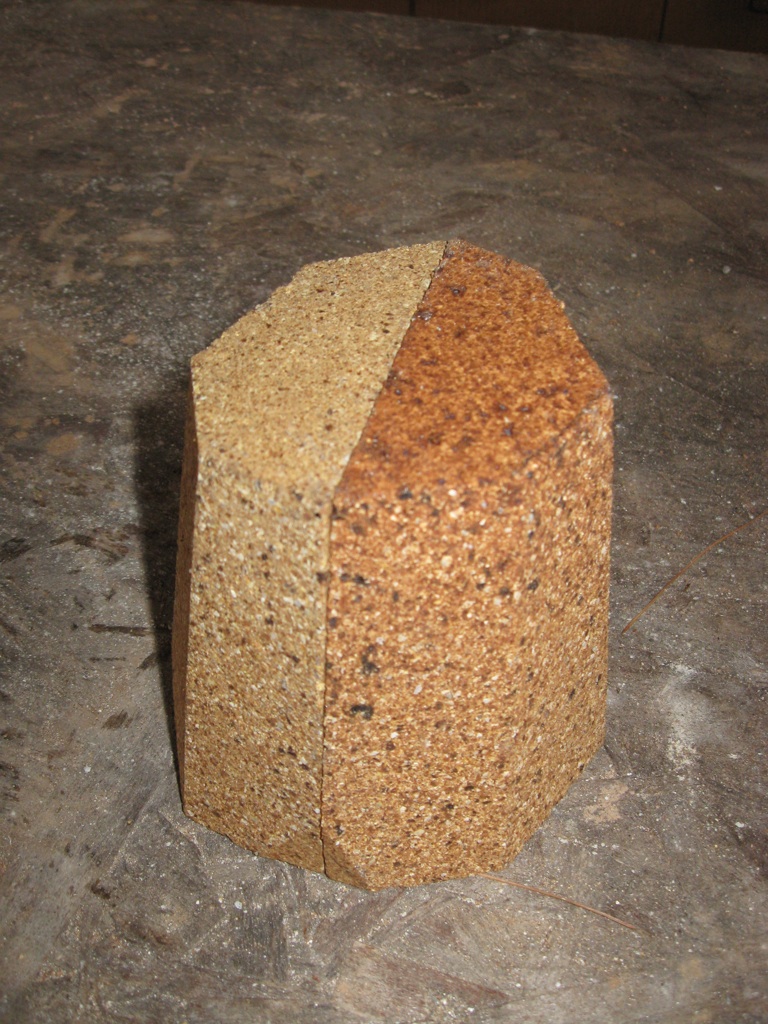
 Another shot of bricks drying. So pretty. These assymetrical right trapezoids will form the vertical side walls, three layers tall including a layer level with and surrounding the floor.
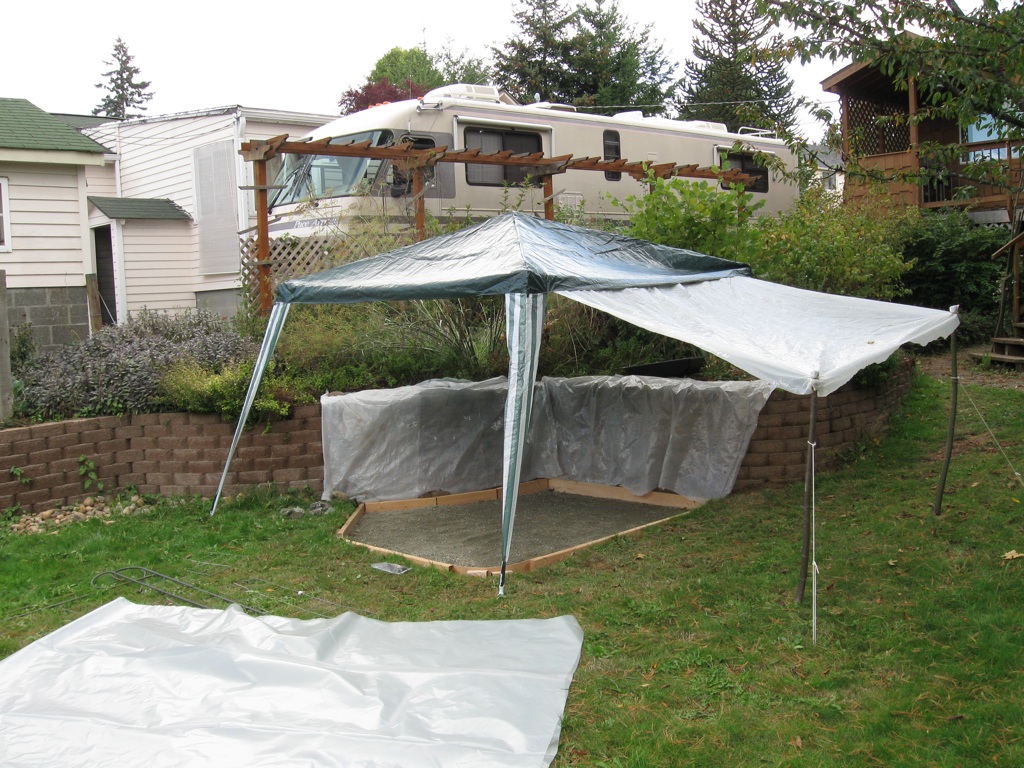
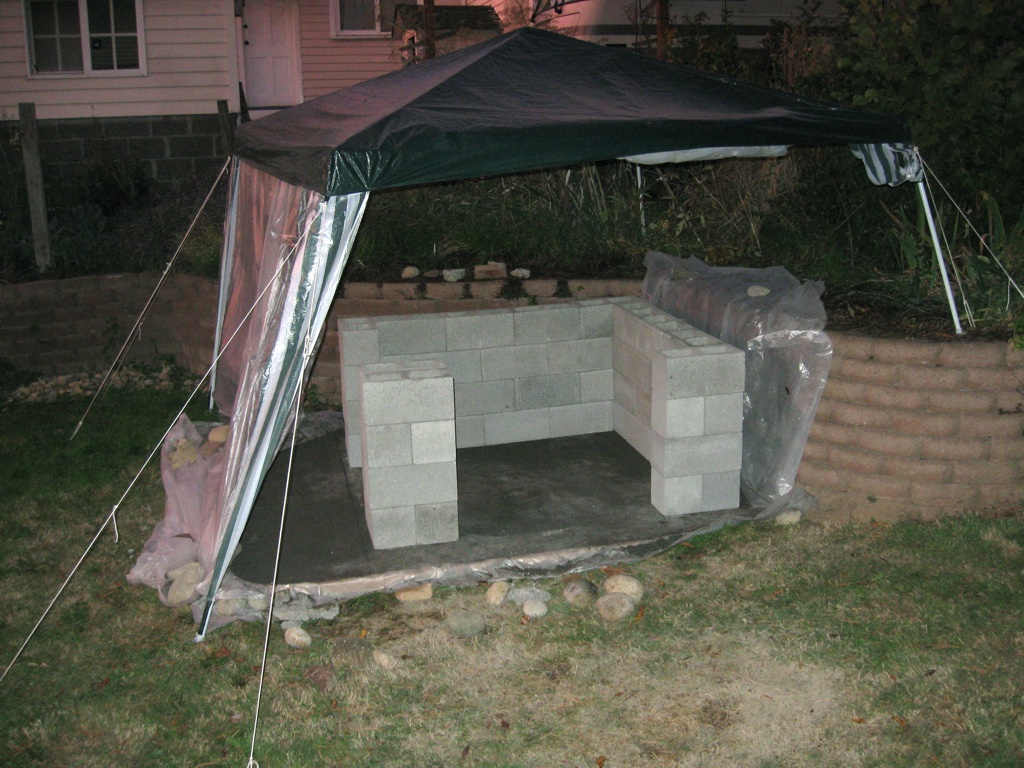
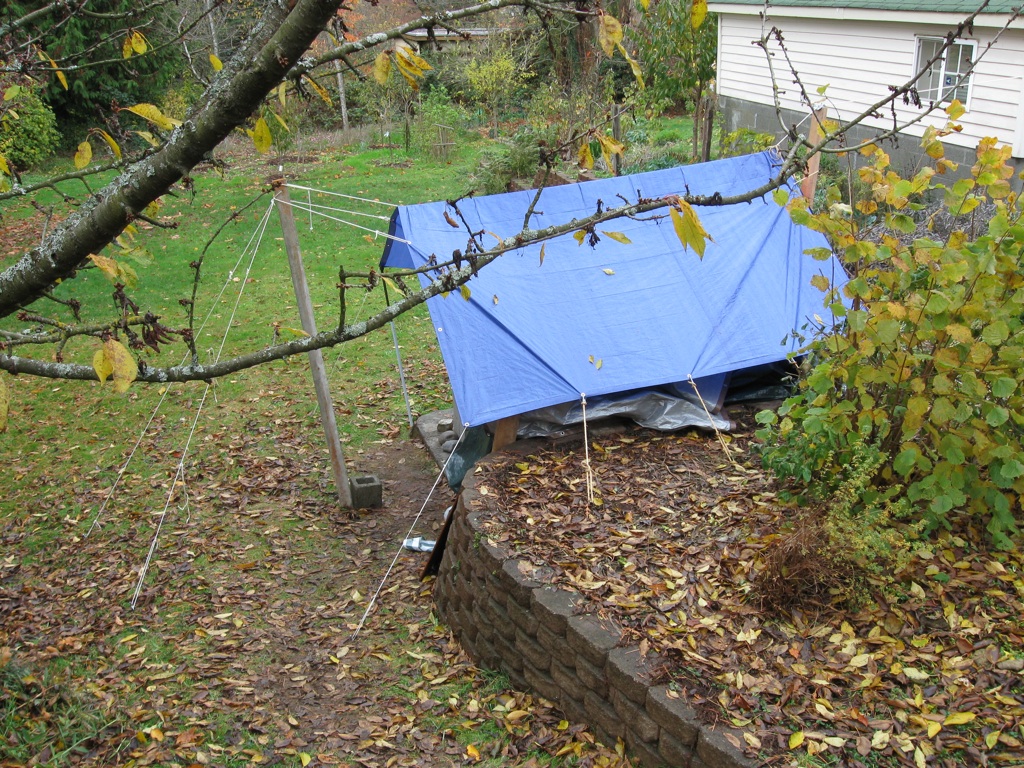
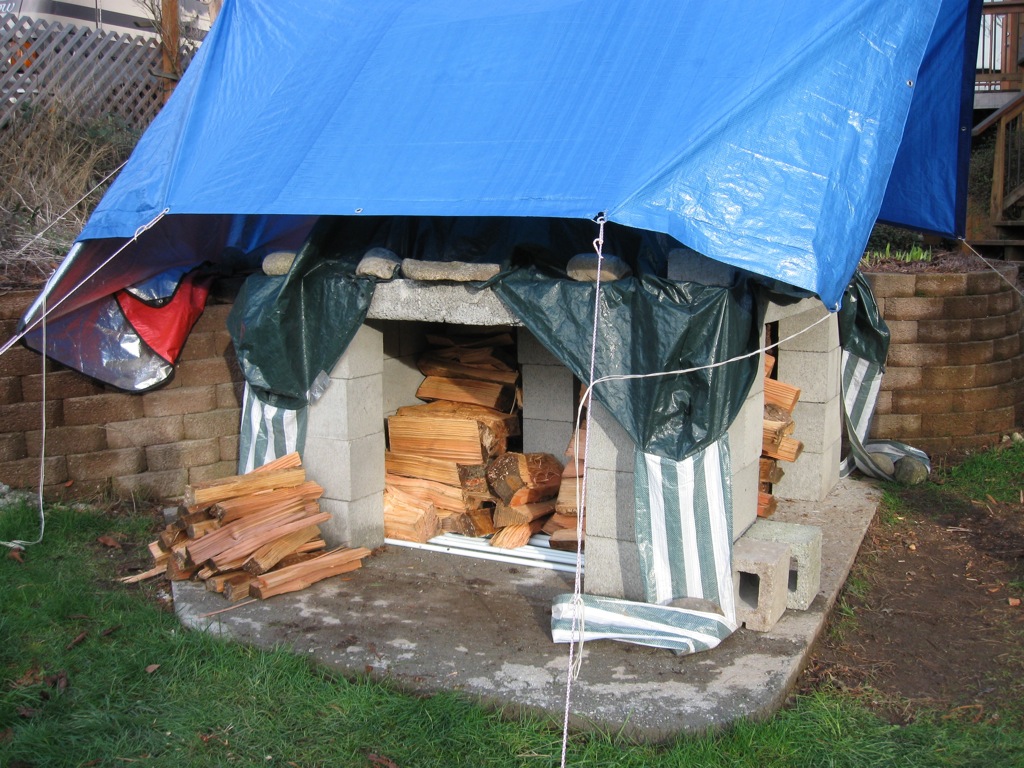
 My first awning was totally completely destroyed in a remarkably violent thunderstorm (that hailed later the same night). This is awning number two. Hope it holds.
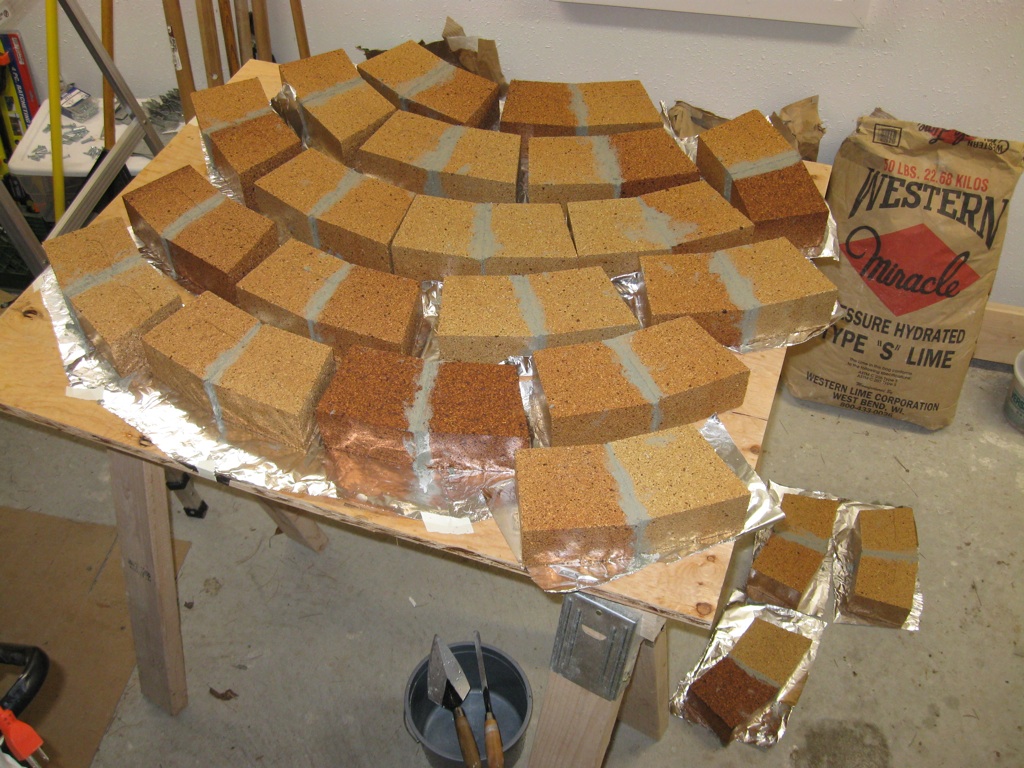
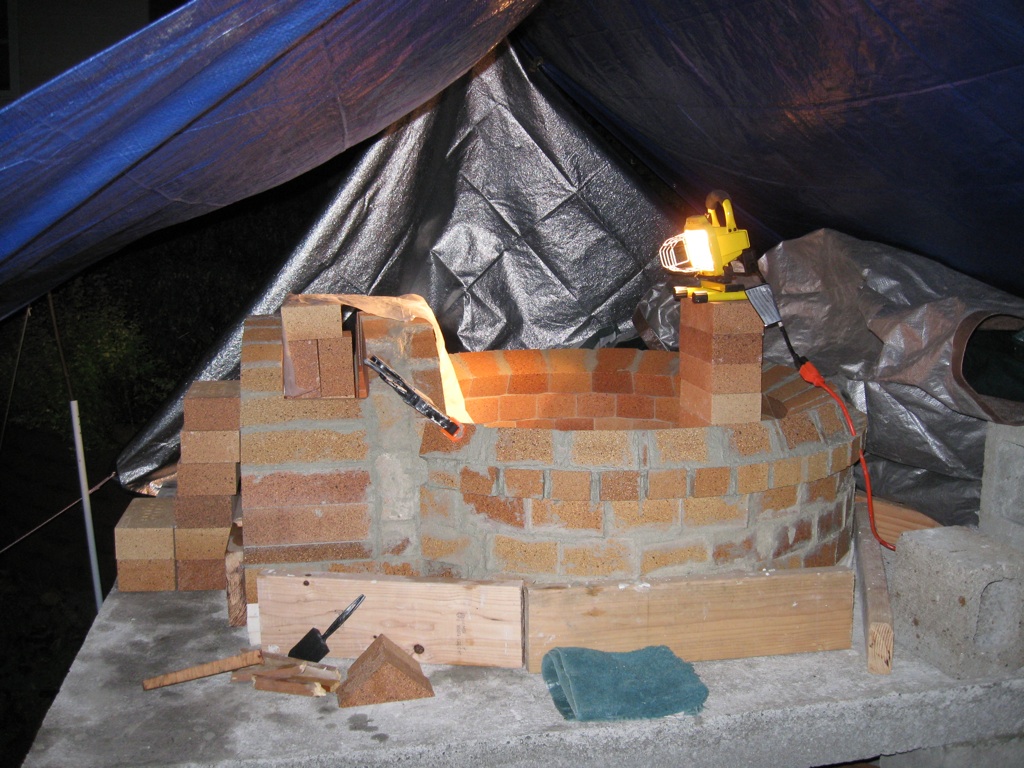
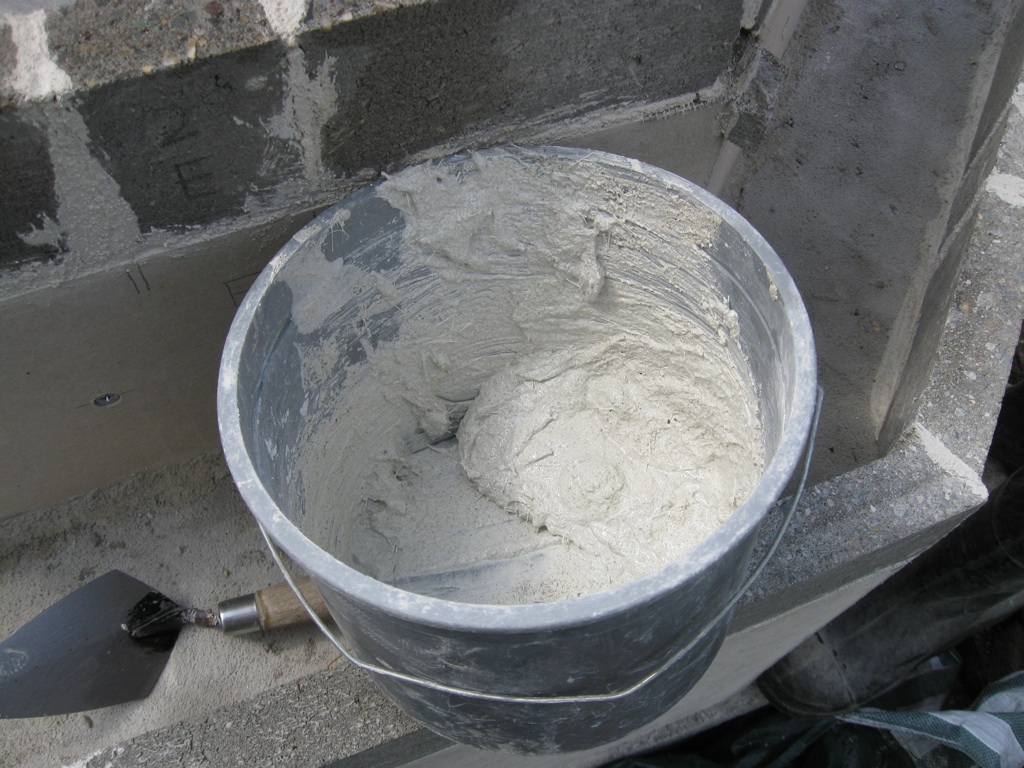
 In an effort to reduce work on-site at the hearth, which is uncomfortable and requires a lot of careful crouching and leaning, I mortared pairs of bricks together in a more convenient environment for later transport to the site...assuming they hold together. This shot represents my very first mortaring of the project; I'm not sure I mixed it to the proper consistency. I seem to have trouble gauging water when mixing these kinds of substances. I had ridiculous amounts of trouble with the concrete in earlier stages as well.
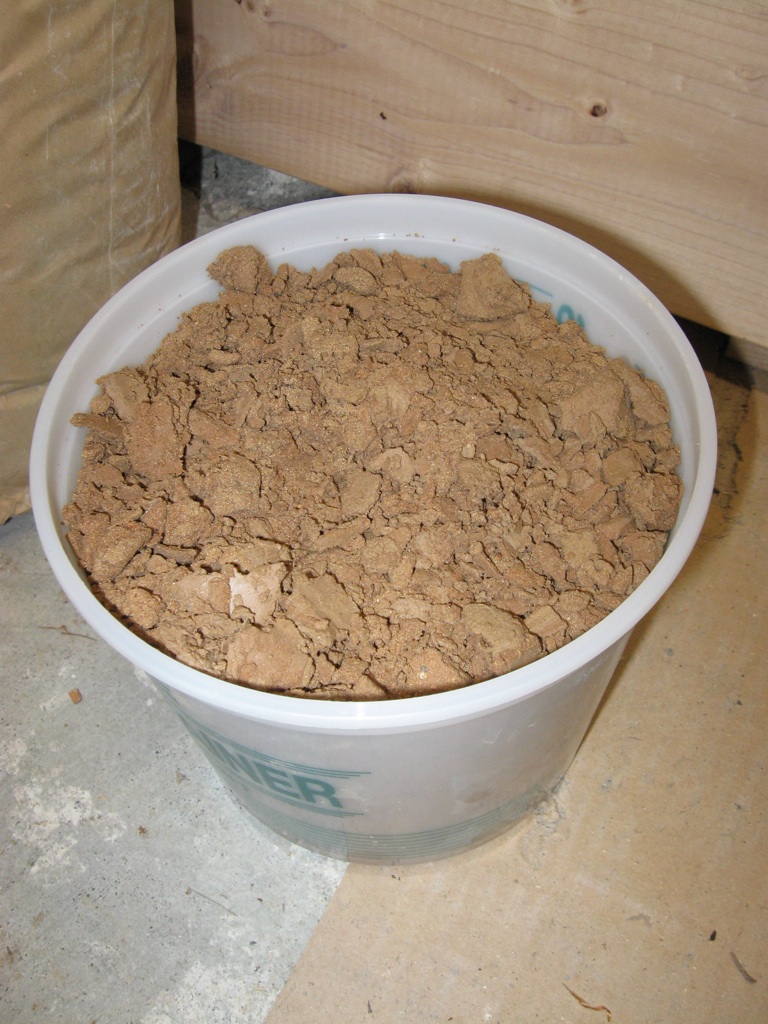
 I am collecting the residue from the tile-saw on the theory that is is useful for something. It is virtually identical to fireclay after all, although the consistency is much courser. 2.5 quarts shown here and I've got a long way to go.
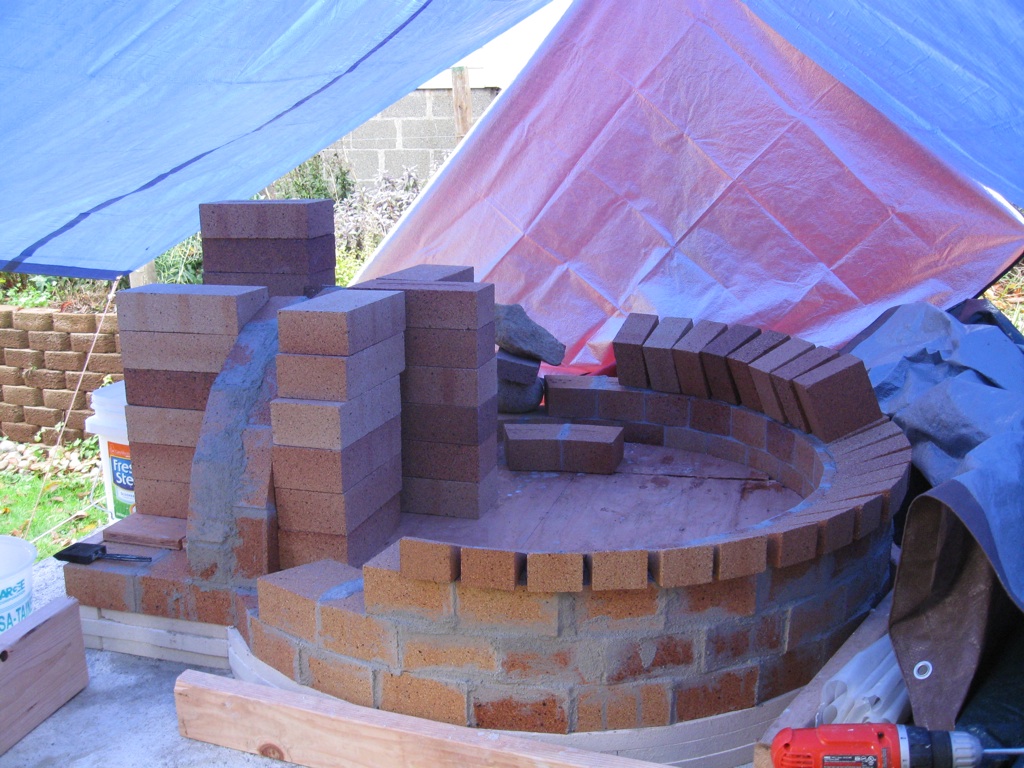
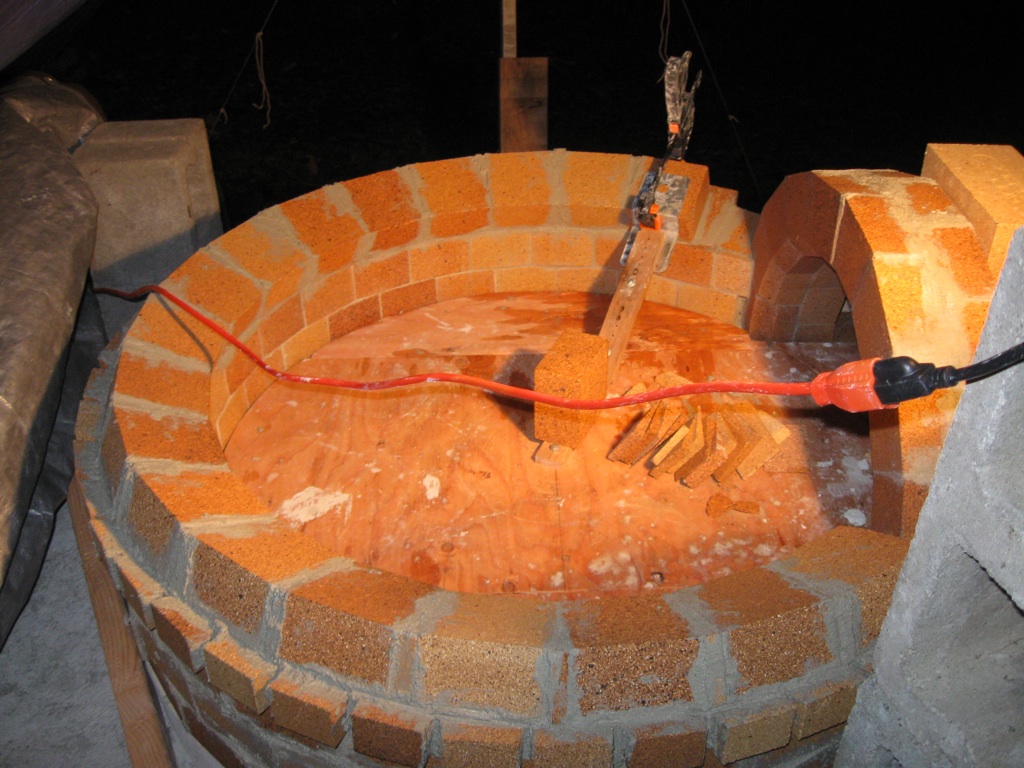
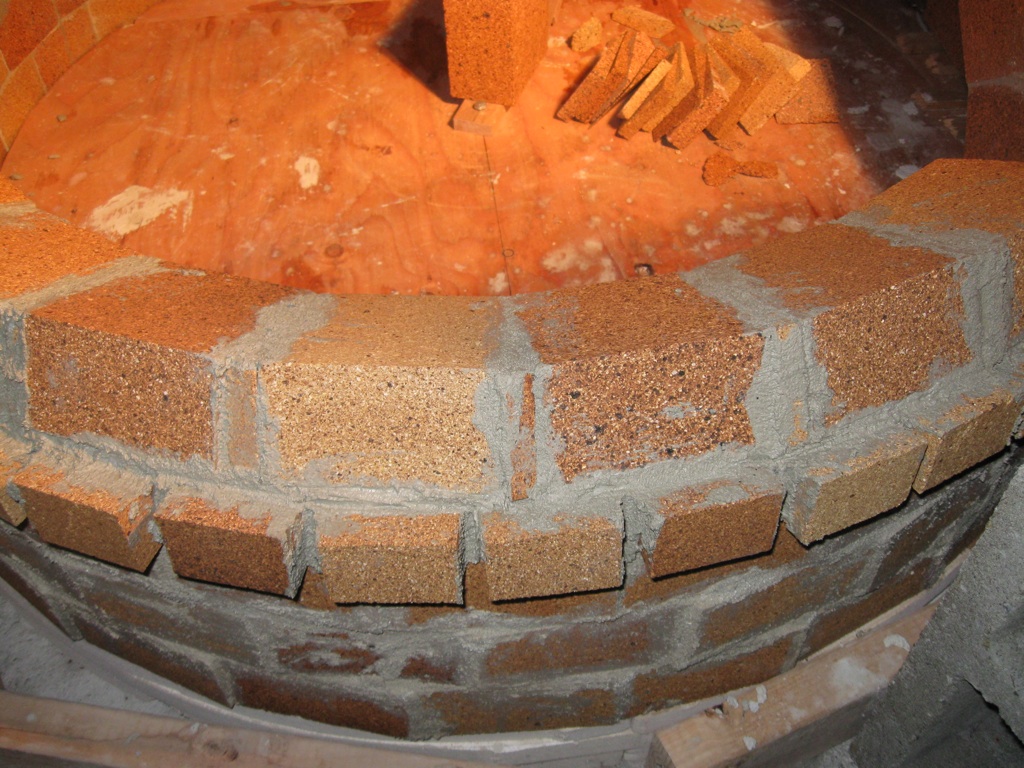
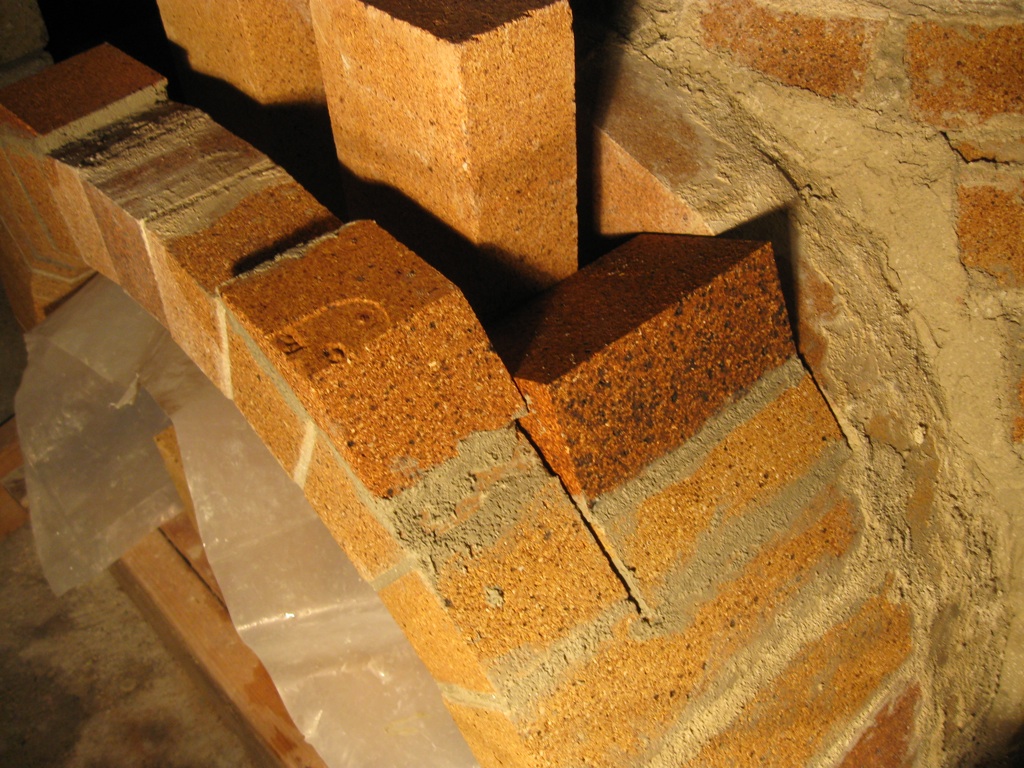
 Floor and first course done, first course mortared, except for one remaining piece where the course meets the entry way on one side.
 Second course done (except at the ends where it will merge with the arch, third course begun. If you look closely, you will notice that the first three courses (all vertical side-walls with no inward dome-curve) consist of right trapezoids instead of isosceles trapezoids. This approach permits me to generate two dome bricks from a single fire brick with a single cut instead of with three.
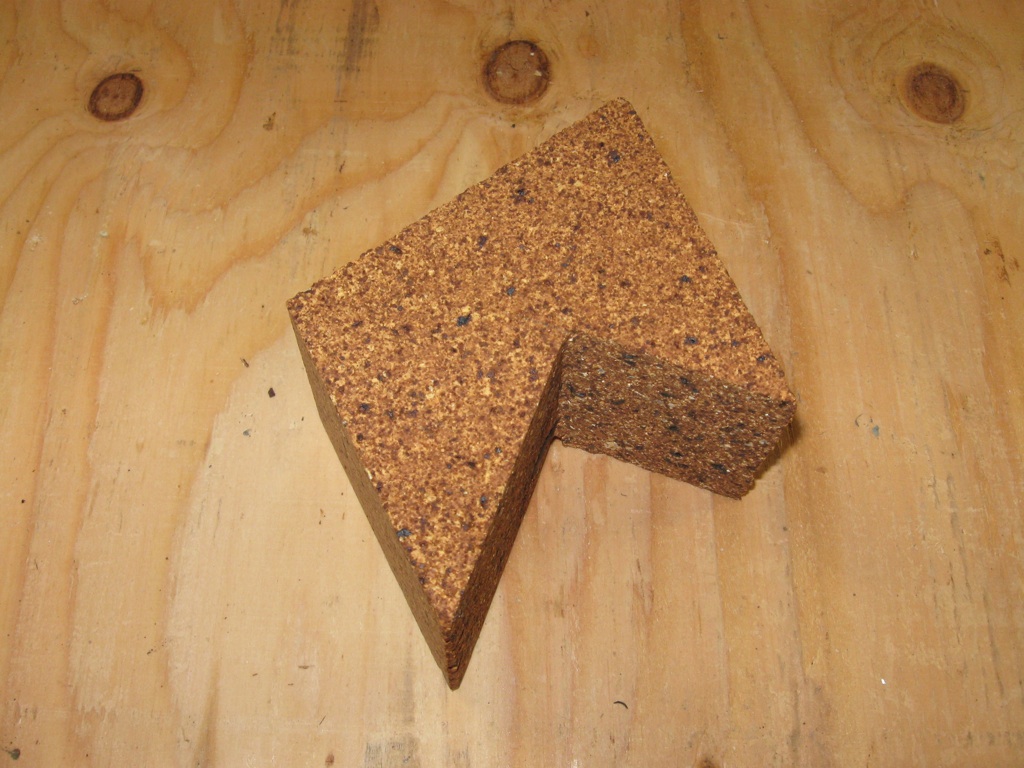
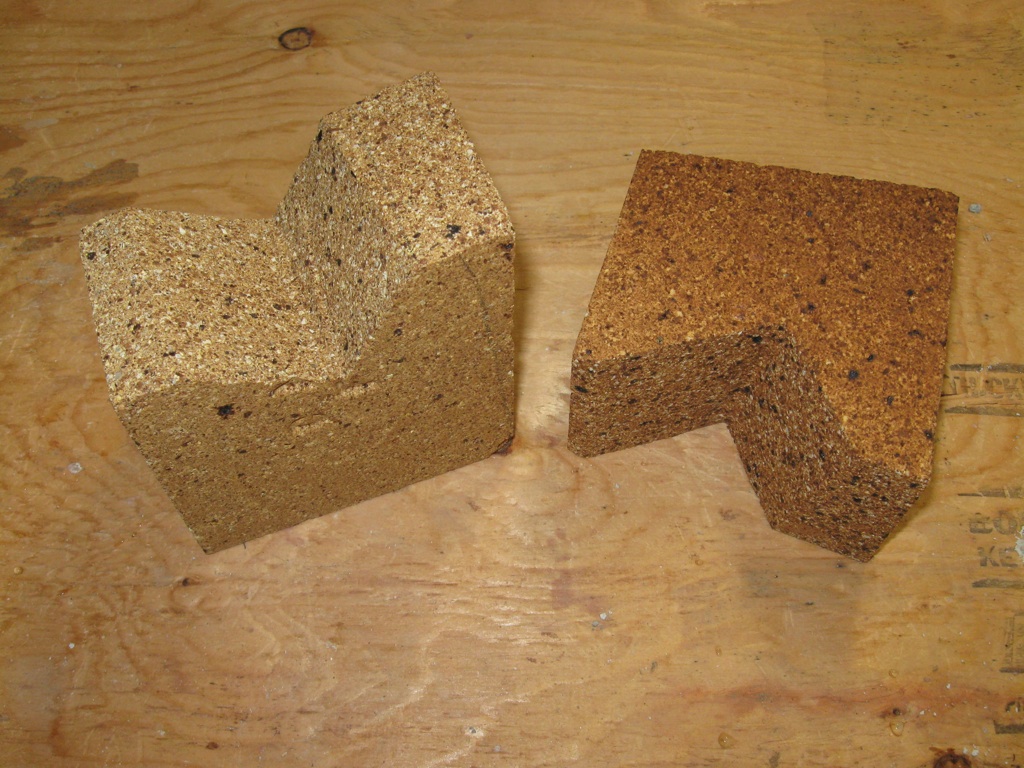
 One of my fancier brick cuts. There are some others too (see earlier floor photos). This will be the last brick at floor level. It completes the transition from the first round course to the entryway side-walls. You can see the hole in previous photos.
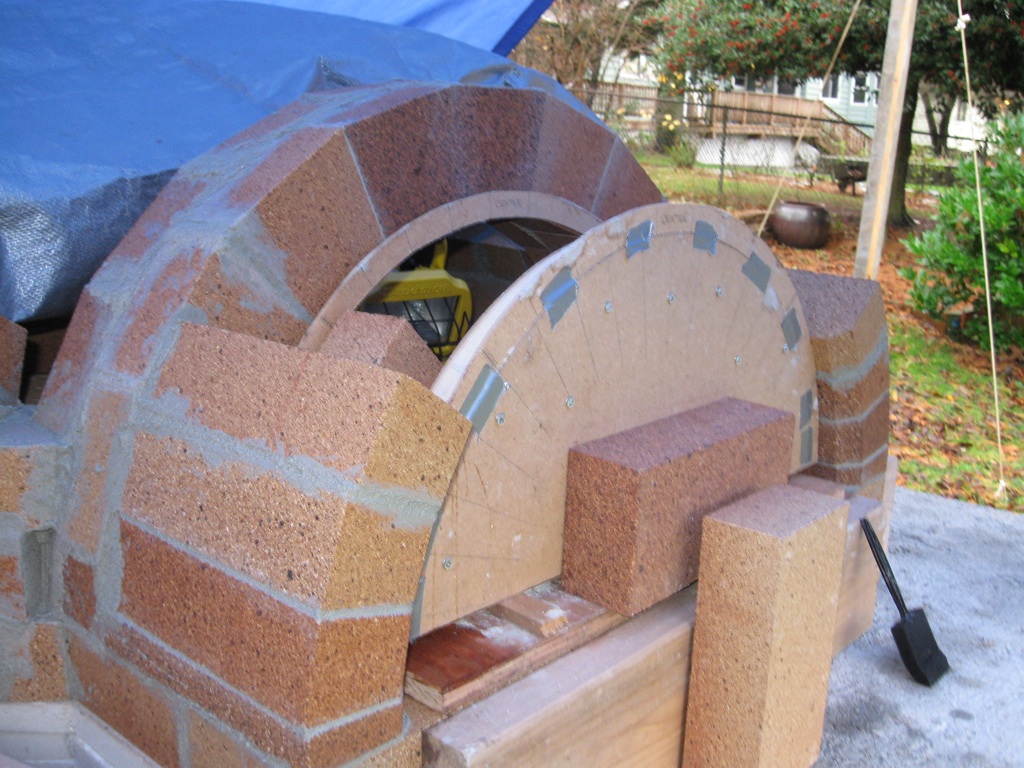
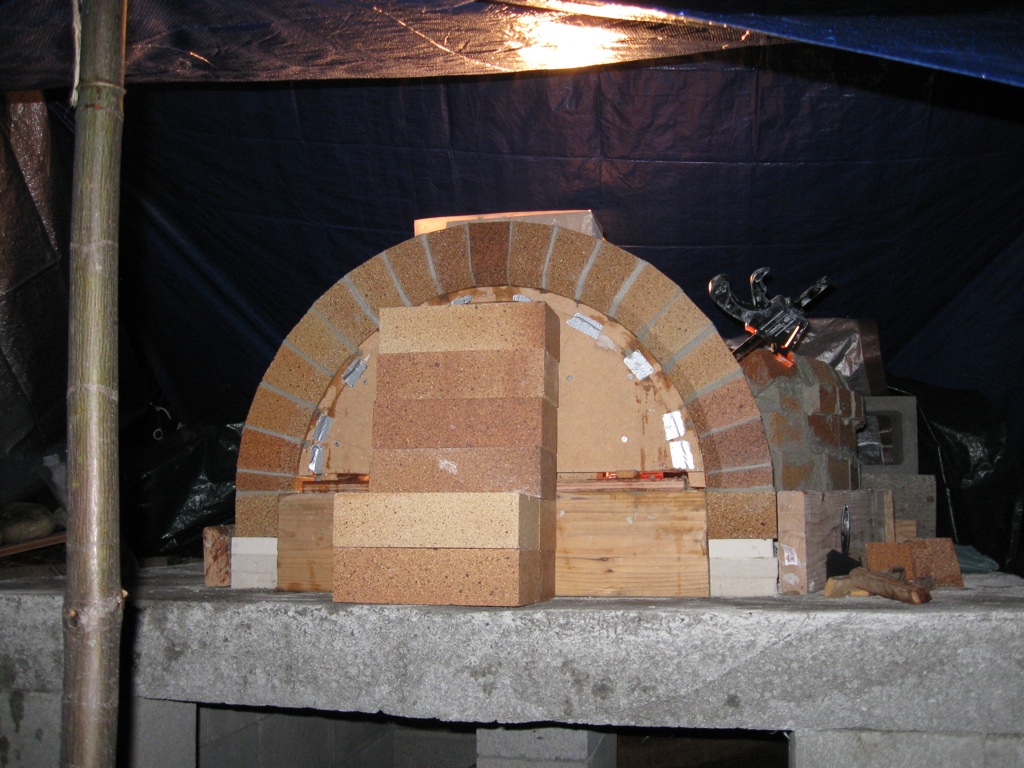
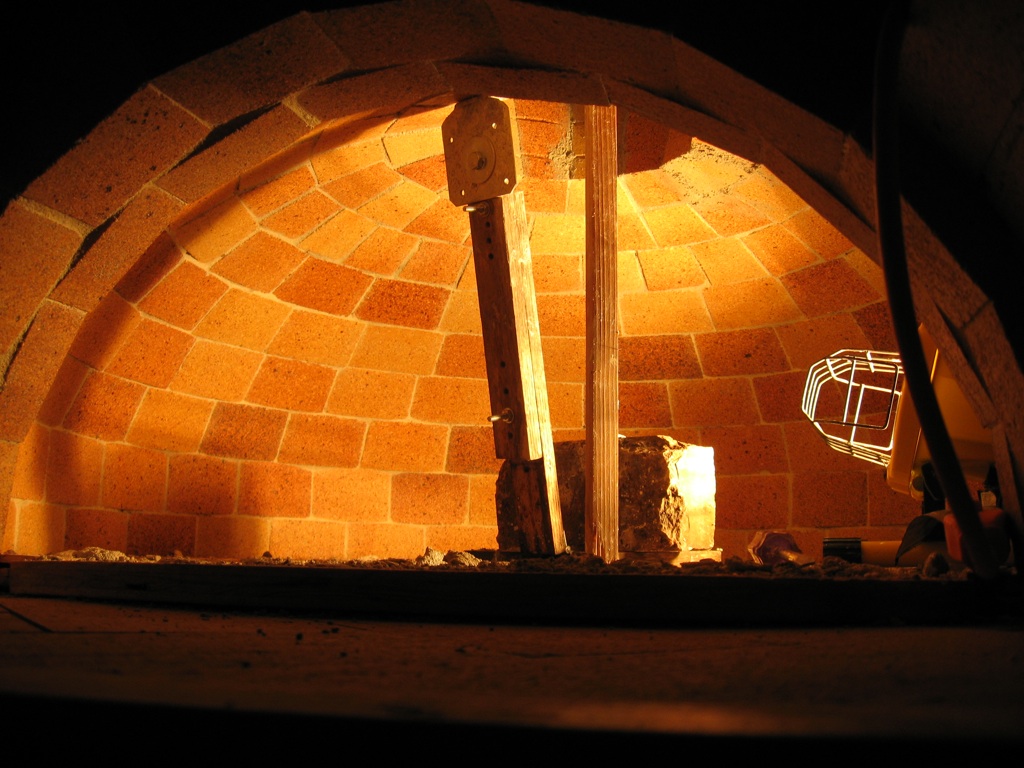
 The scaffolding form for the inner arch: two layers of masonite separated by 2x4s scraps. A strip will go over the edge as well, shown in later photos.
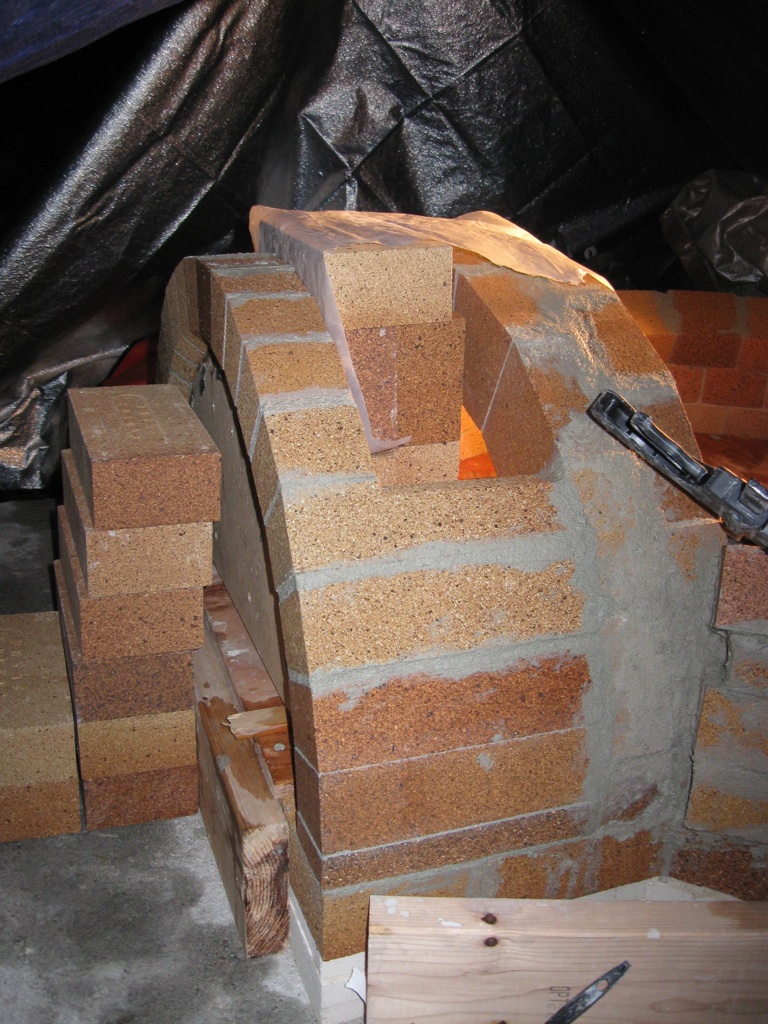
 The bricks for the inner-inner arch (the inner arch consists of two arches). Notice that I trimmed a wedge off the inside edge of these bricks (a bevel in effect), which will permit better air/smoke flow and provide a slightly wider angle of access. Later photos will show how this works.
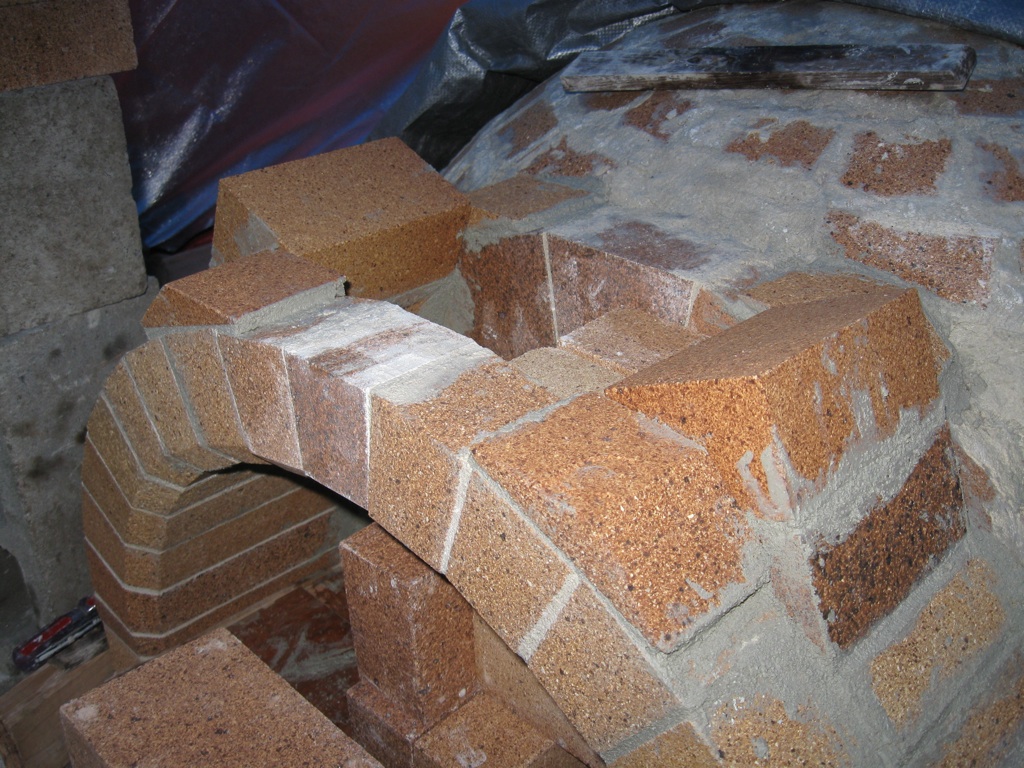
 Ready to build the arch.
 Building the inner-inner arch. If you look closely, you can see how those wedge-removals work now. The inside edge of the arch is thus beveled. Smoke will flow (from the ceiling) out the arch to the flue more easily as a result. Likewise, when reaching in with long-handled tools, the wedge-removal permits a wider angle of access.
 The inner-inner arch, almost entirely built. Despite my best efforts, the bricks did not align with the protractor on the form perfectly and the last brick doesn't quite fit. I will shave it and mortar it in place later.
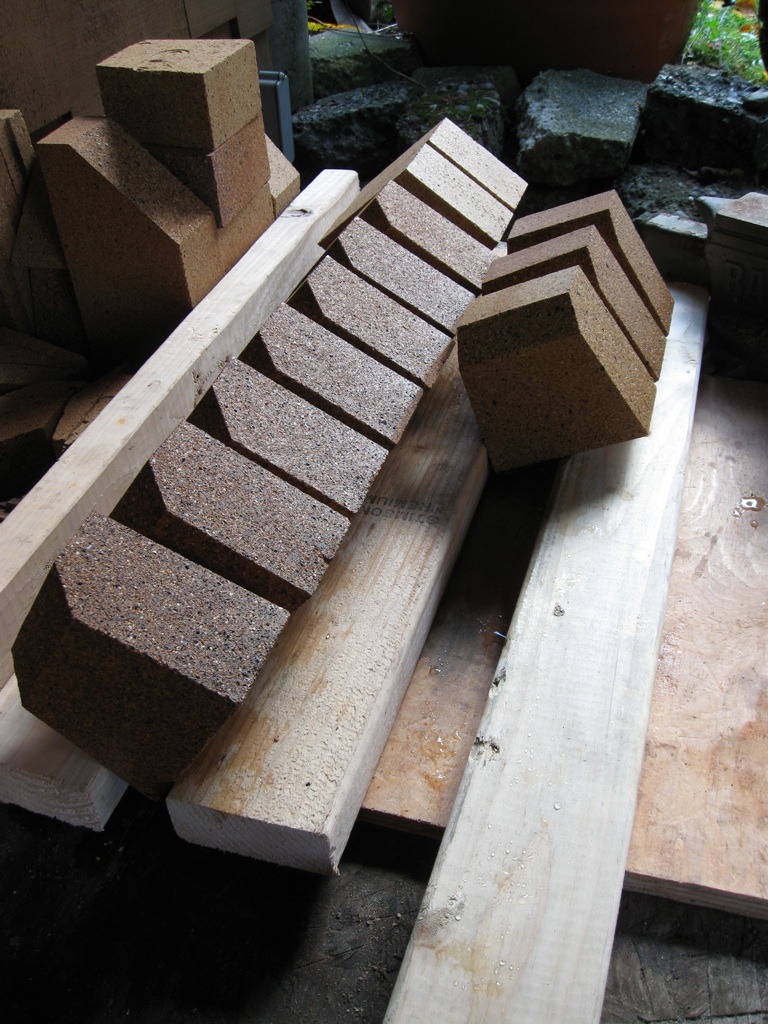
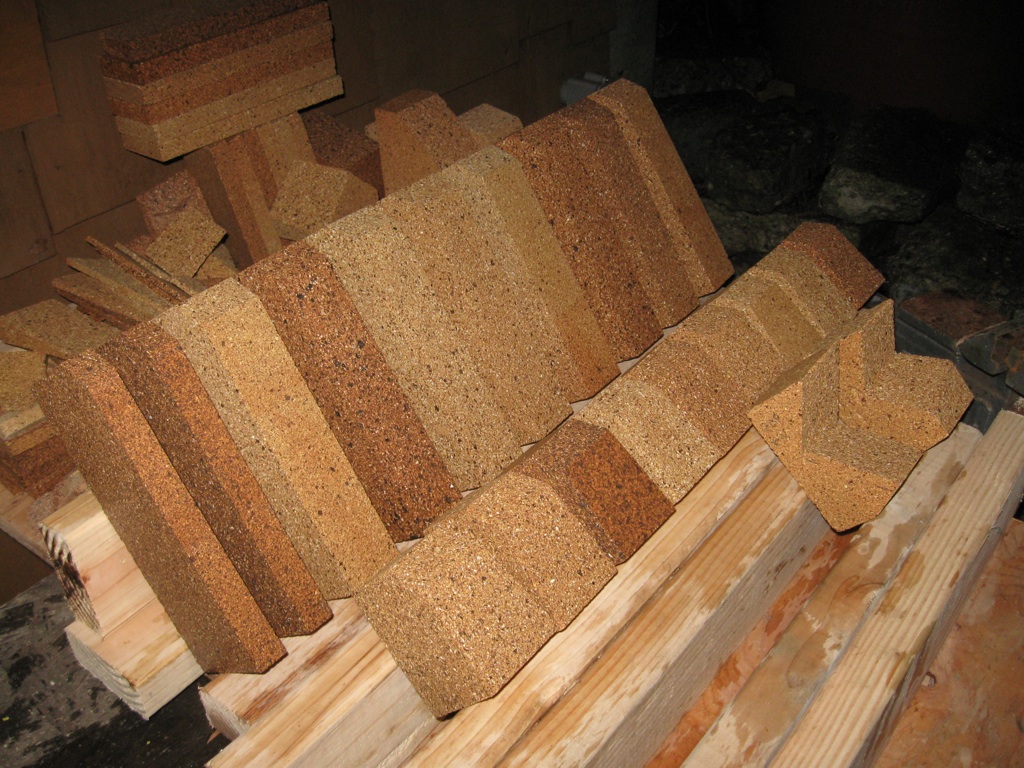
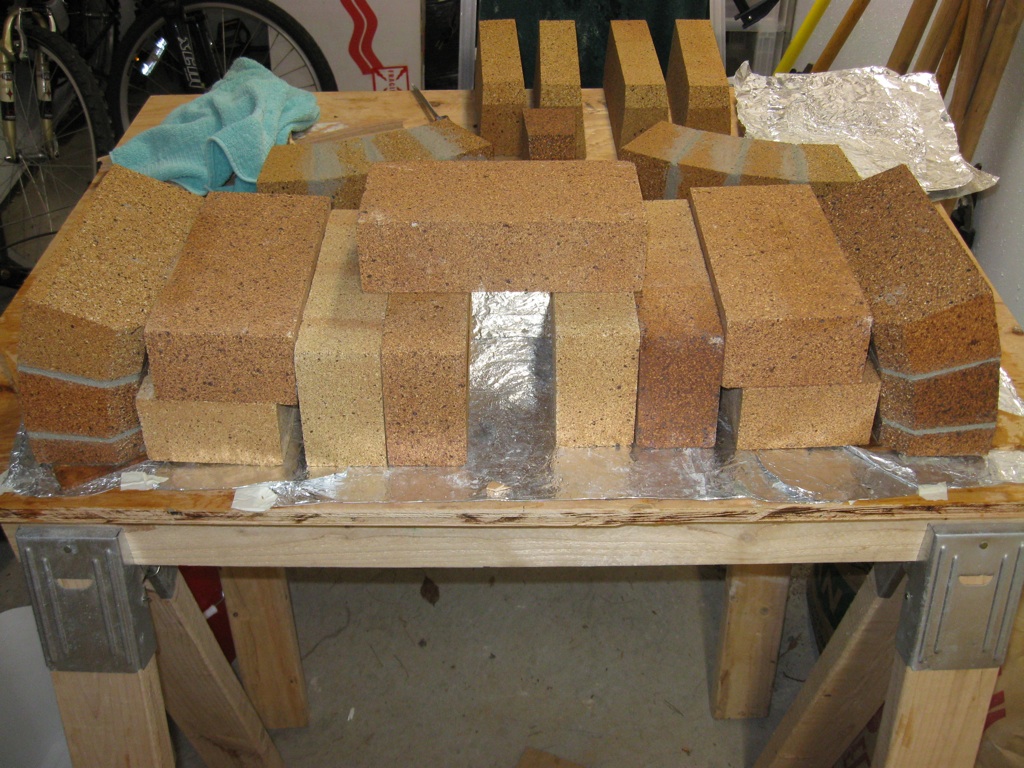
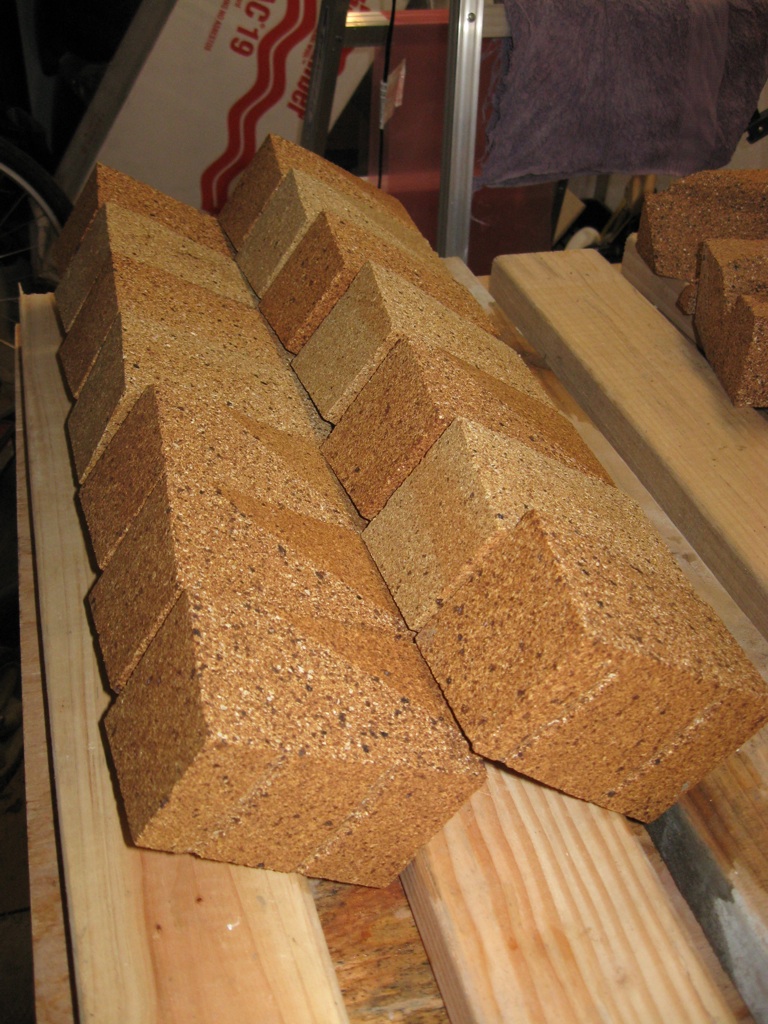
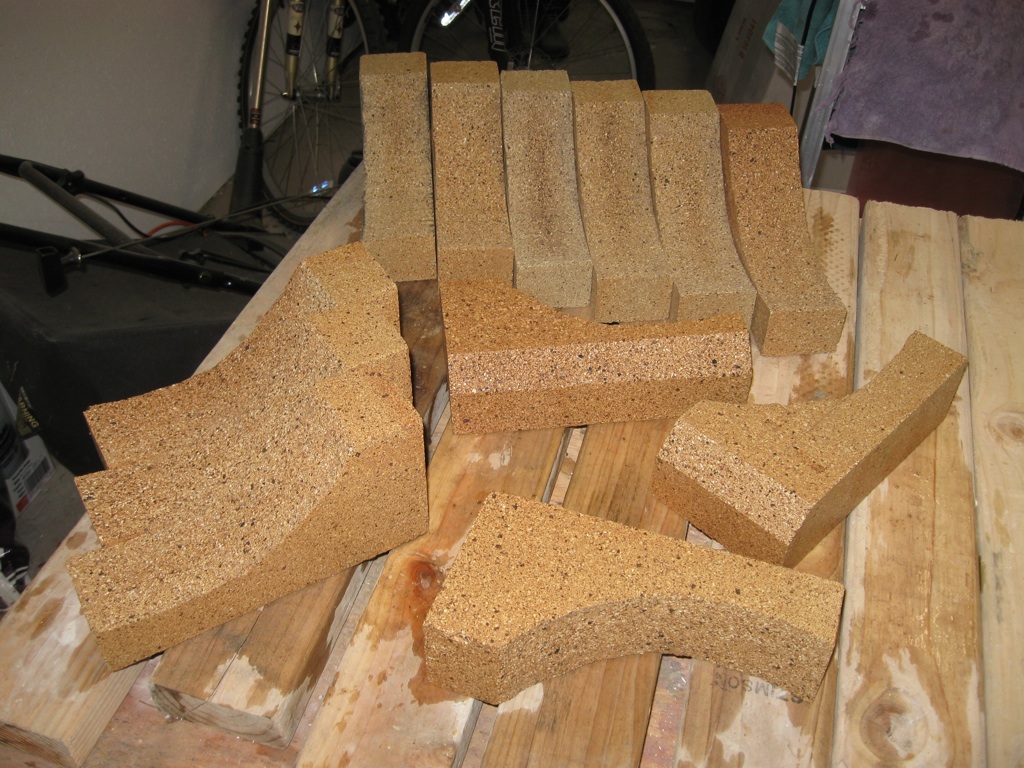
 More bricks drying. The tall bricks in the background are very subtlely tapered lengthwise and will comprise the outer arch. They were trimmed to 3 1/2" wide first so as to fit under the tile saw. The odd brick on the end is the final brick of the inner-inner arch (not really a keystone since that arch has a mortar gap at the center instead of a brick). I couldn't mortar it in with the rest of the arch because it was too tight. Had to give it a shave first. The numerous wedges in the foreground will form the transition from the vertical side wall to the first tilted dome course.
 The inner-inner arch (on the left side of the photo) being kept warm by a halogen worklight through the cold night. It has been dipping into the high thirties and I don't want to risk a freeze on fresh mortar.
 The outer-inner arch almost done, just needs a keystone, which fit too tightly despite my best efforts to conform to the protractor during construction. I'll shave it and try again.
 The outer-inner arch almost done.
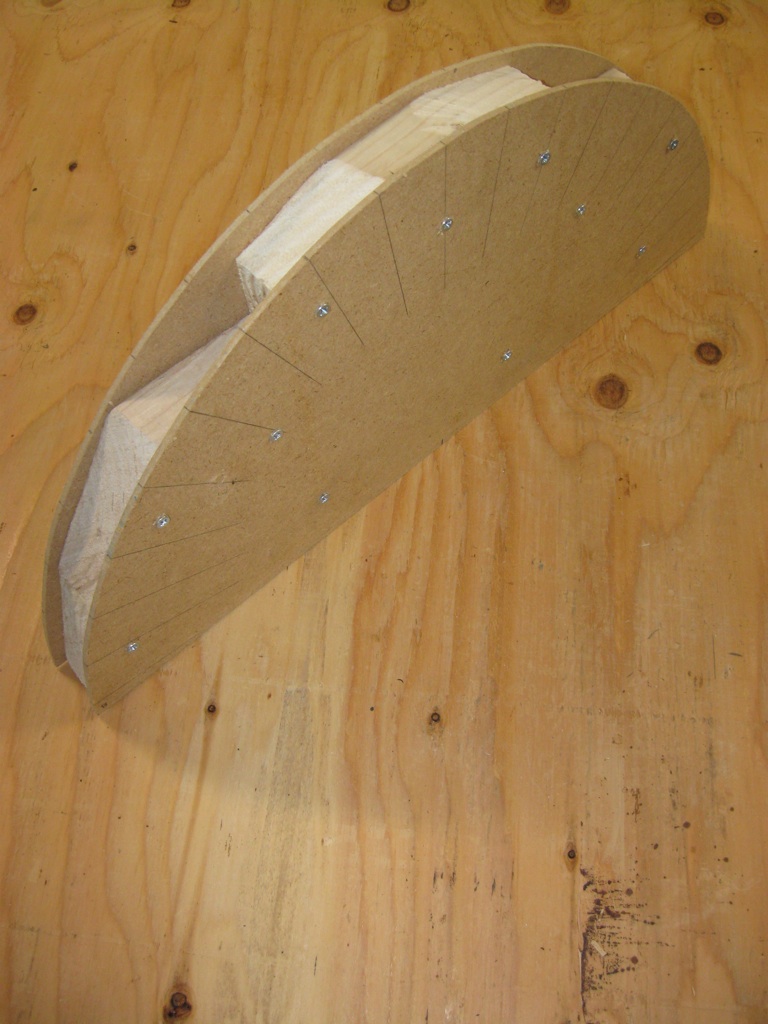
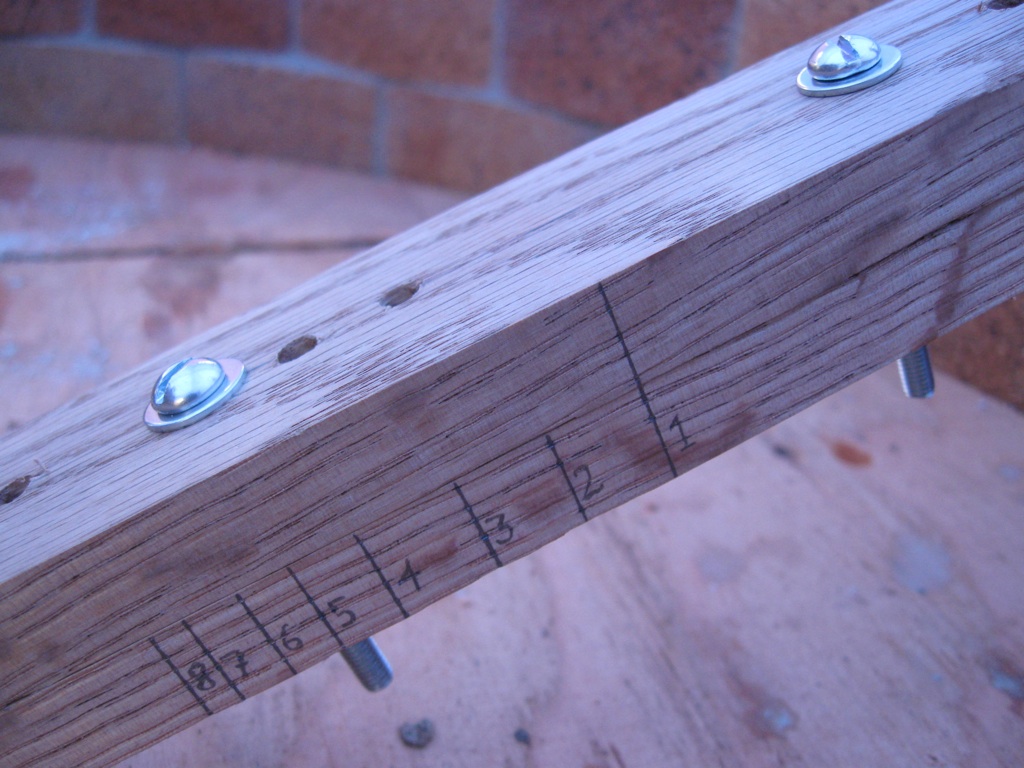
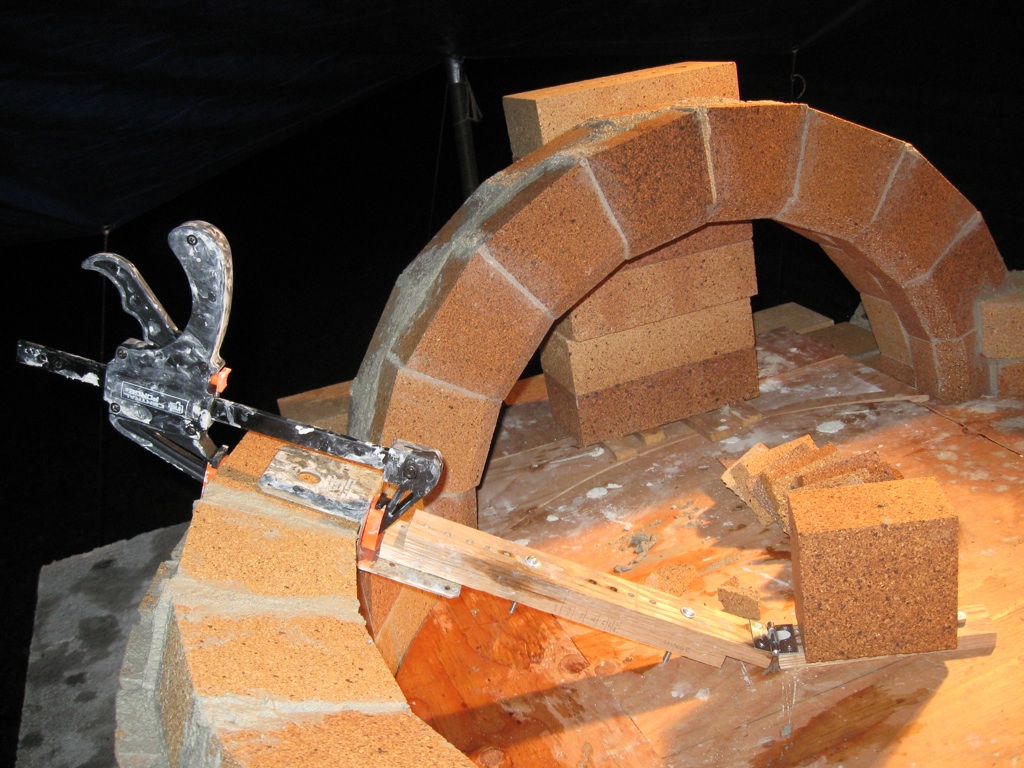
 The brick-placement tool which permits perfect orientation of every brick in accordance with any desired dome profile such that the upper edge of one course perfectly aligns with the lower edge of the next higher course. The tool permits control over two parameters: the distance from the center of the floor to the point of intersection between the brick's radial axis and the floor, and the distance from that intersection point to the inner face of the brick.
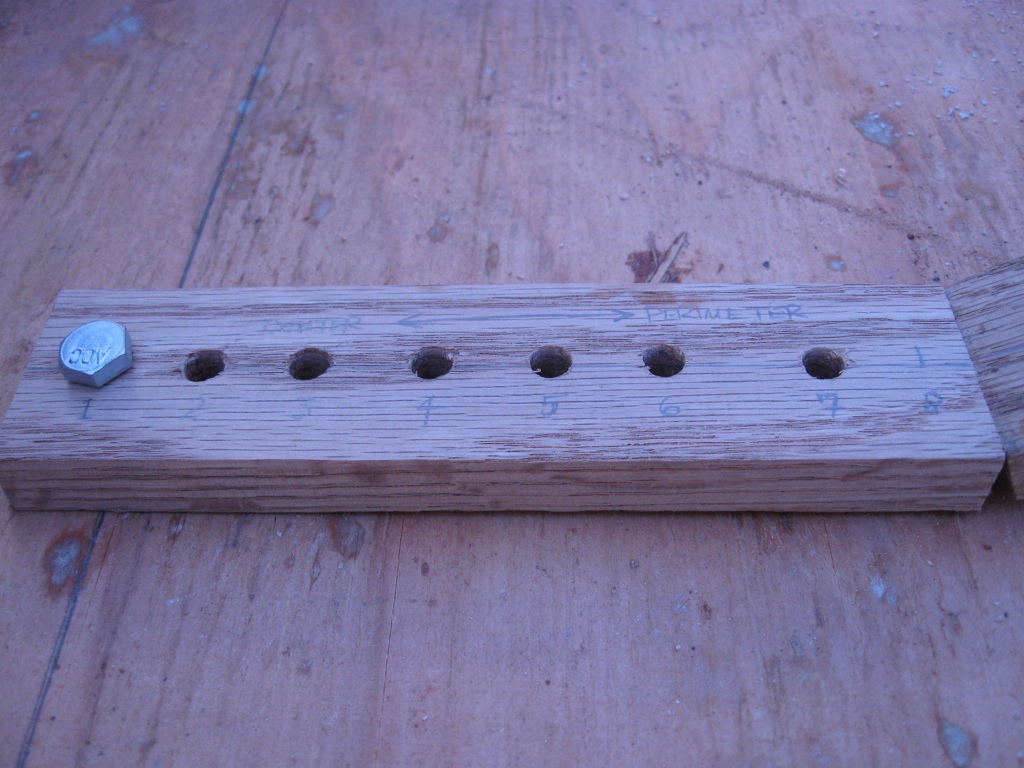
 The brick-placement tool.
 The brick-placement tool.
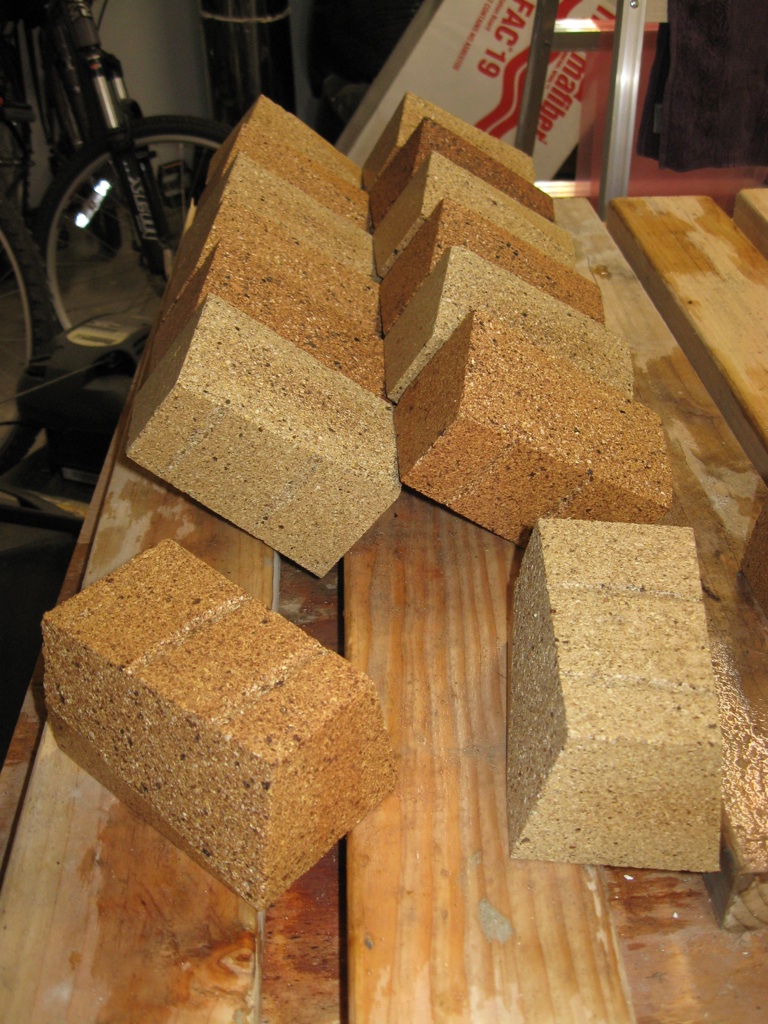
 Wedges which will provide support for the transition from the vertical side-wall to the first tilted course.
 My fanciest cut bricks yet, intended as a merge between the side-wall and the inner arch. As complex as a mere notch would be, these cuts are actually slightly more complex than that, in that one side of the notch is actually slanted to fit the upward and inward curve of the arch.
 The first side-wall to inner arch merge-bricks mortared into position.
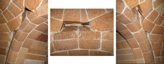
 The inner arch totally complete, both layers. However, I discovered upon removing the arch-form that the mortar gap between the two layers is woefully defficient as viewed from the underside of the arch, the crevice between disappointingly deep in some places...this despite the good appearance to the contrary along the outside of the arch. I will have to push fresh mortar into the gaps from the underside of the arch later.
 The bricks for the outer arch, fully cut...and the side-wall-to-arch merge-bricks for the next course. You will notice that I beveled the outer arch bricks in a similar fashion to the bricks of the inner-inner arch. In the case of the outer arch bricks however, I did not do this for any functional reason, but rather, because I very much like the resulting look. Hopefully later photos will prove that I am right.
 Pieces of the outer arch, prejoined in the basement for later transport to the site. I have decided, as with many earlier stages of the project, that it is much easier to join small groups of bricks away from the site on a convenient workbench and to reduce the amount of work at the site leaning over the hearth to various heights and depths in the dark, cold rain. However, it is crucial to give the mortar a few days to really harden. Attempting to move joined bricks after one day is risky since they can easily break apart at that point.
 Version two of the brick placement tool, which joins the lower arm of the radial strut to the center strut with a hinge. This required fully recalculating the lengths and pin-hole positions, and reconstructing two of the three arms from new bare pieces. I can now choose whichever version of the tool I ultimately want to use, as they are both fully built and capable of achieving the task.
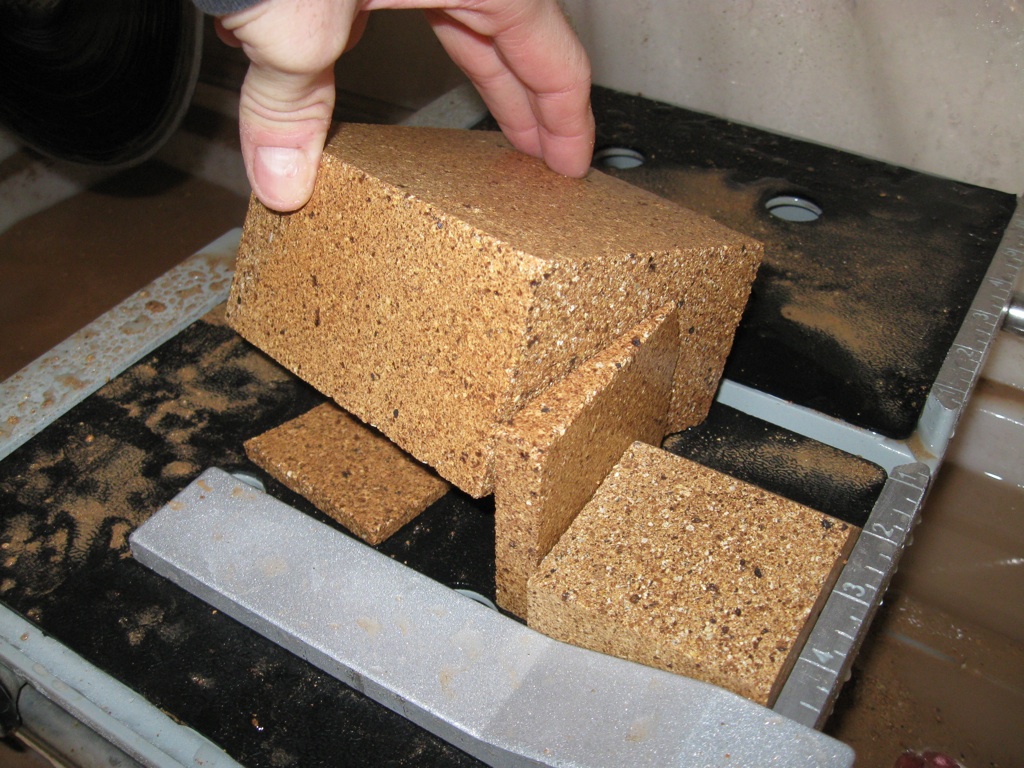
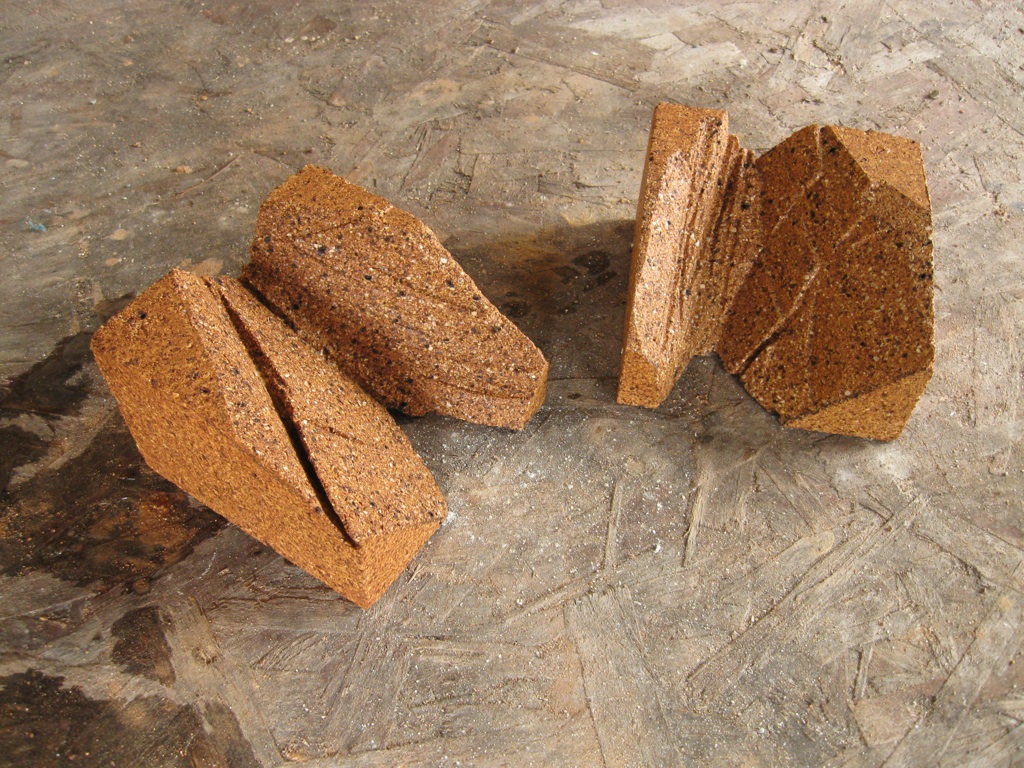
 This photo shows how I cut the bricks for the first tilted course. To shave precisely the correct triangle off the corners, the brick must be rotated in yaw so as to shift the far corner by 1/2", the rotated in roll so as to lift the far edge by 1/4". A schematic diagram of this cut is shown in an earlier picture.
 Cutting the bricks for the first tilted course.
 The perfect brick for the first tilted course.
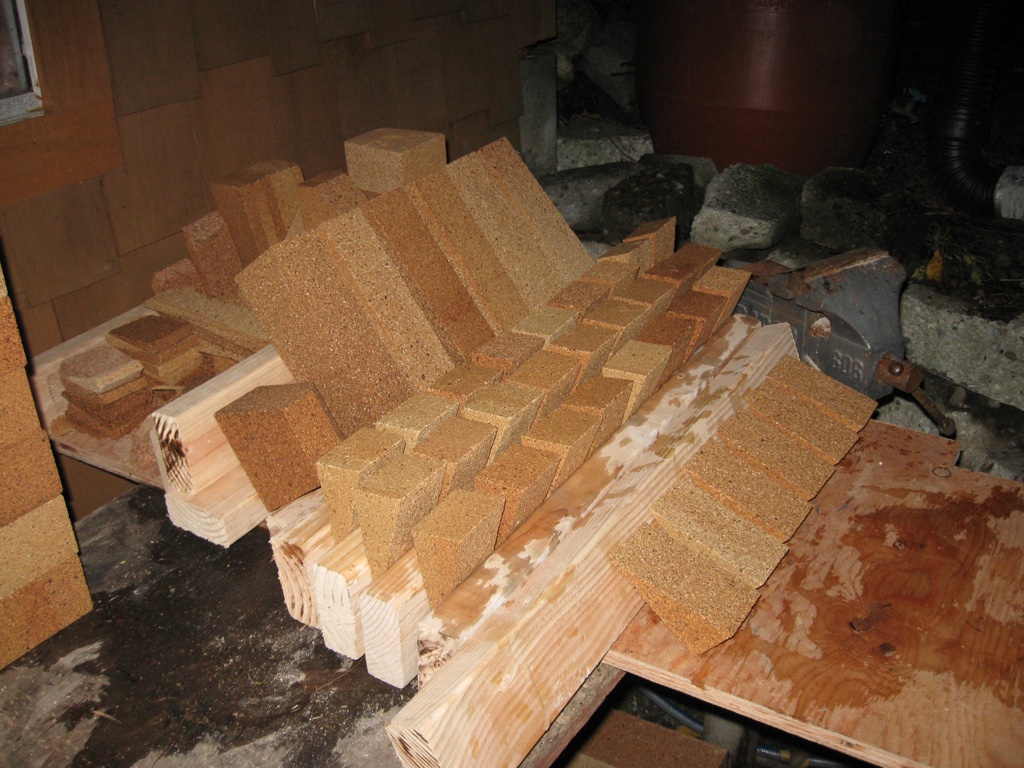
 A pile of bricks for the first tilted course.
 Pieces of the outer arch, prejoined in the basement for later transport to the site.
 Pieces of the outer arch, prejoined in the basement for later transport to the site, cleaned up. I usually clean the mortar about twenty-four hours after setting it. Doing so earlier risks breaking the joint. Doing so later is too difficult. However, in the case of the outer facade of the outer arch, I gingerly cleaned it up immediatley after setting it to make sure I could get it really clean, for aesthetic purposes of course.
 The first tilted course, all bricks except arch merges on either end.
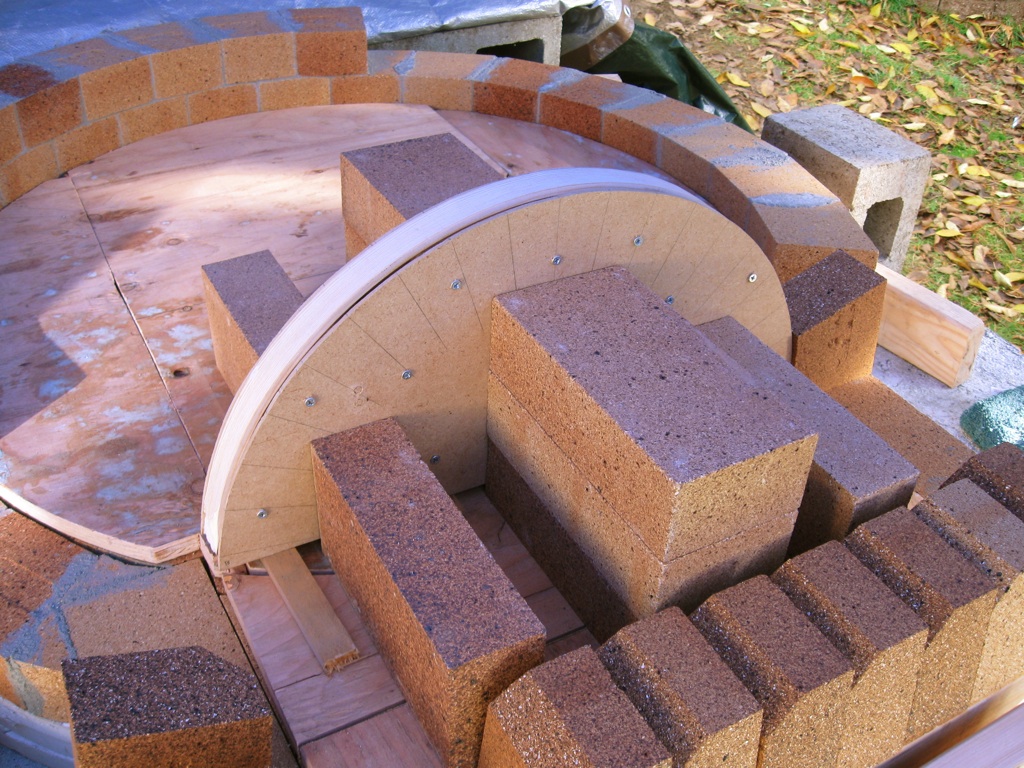
 The brick placement tool in action.
 I inserted scrap brick wedges from earlier cuts into the gaps between adjacent bricks to partially alleviate large mortar gaps. I will try to do this for the entire oven, but probably only to the extent that I have sufficient scraps for the purpose. If I run out at some point, I probably won't cut up fresh bricks to create such wedges. I have a lot of scraps though, I don't anticipate running out.
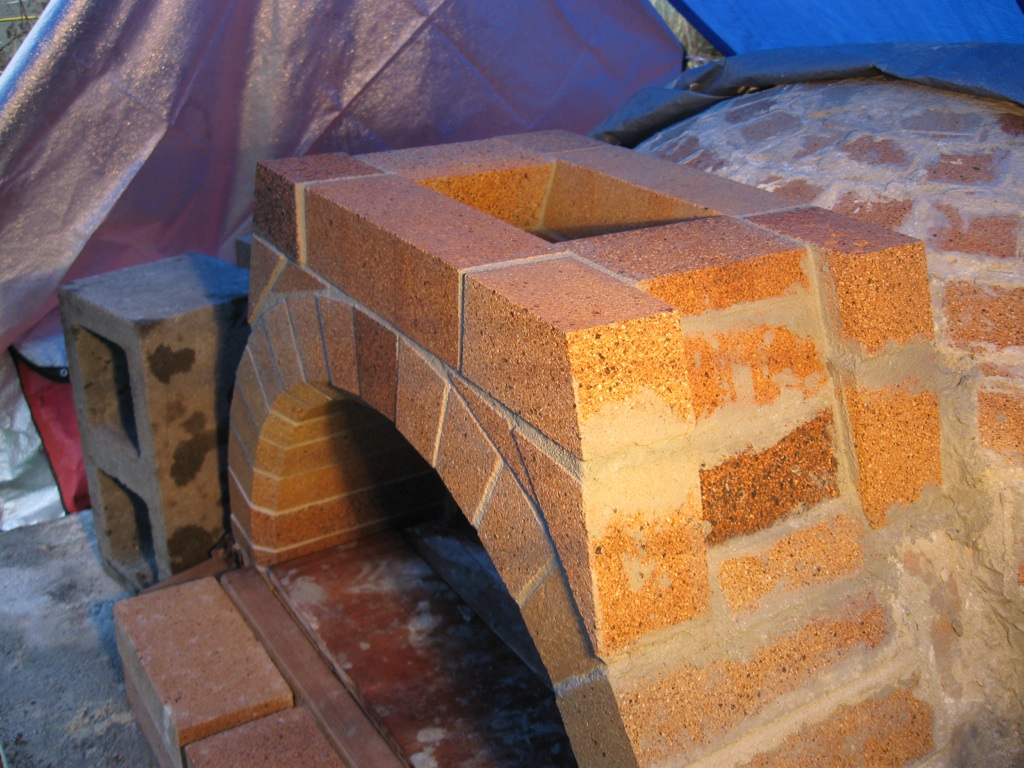
 The outer arch, partially built. Note that what you see in this photo represents a single mortar job on-site since the lowest four bricks came from the basement as a single block (see earlier photos).
 First tilted coursed done, including inner-arch merges. Outer arch done.
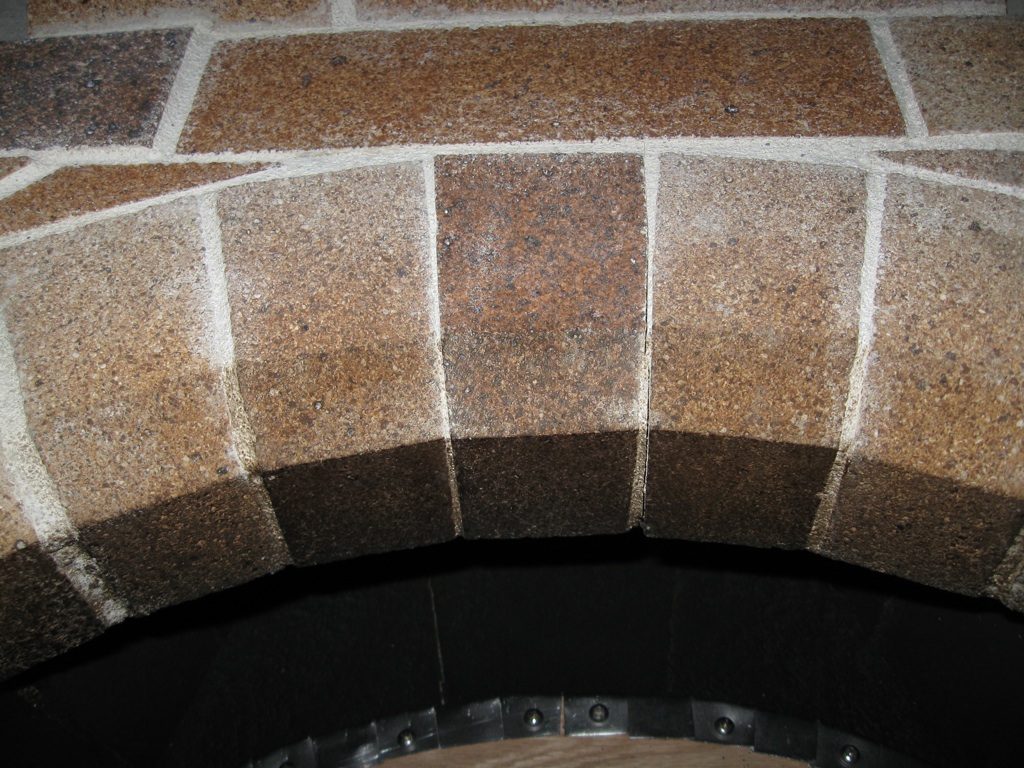
 The outer arch done. This didn't require too many mortar jobs on-site since many of the pieces came as single pre-joined blocks from the basement (see earlier photos). BTW, the dark-light-dark-light-dark color fade isn't an accident. Once I realized that the arch bricks had such color variation, I positioned them as aesthetically as possible.
 The outer arch done.
 I cut a two-thirds length corner off the highest full-depth brick of the outer arch, as shown. This was a last minute decision the night before I built the outer arch. I'm hoping doing this will somewhat alleviate the shear stress between the vent side-wall and the highest arch brick, which being rather steep will not be a very good load-bearing joint. By cutting the vent side-wall to notch over that last brick I should be able to improve the situation a bit.
 The second tilted course done.
 The second tilted course done.
 Some details of my technique. First, I shove brick wedges into all possible gaps. Namely, vertically between adjacent bricks of a given course and horizontally between a brick and the brick below it. In addition, starting with the second course, I am gouging oblique slices out of the tops (and bottoms although you can't see it) of the bricks, with the gouge pointing out from the oven, such that any gravitational pressure of the brick to slide radially will catch against the mortar. This is basically unnecessary as I am also cutting my bricks such that they are pretty much self-supporting...but I'm paranoid, so such as it is.
 Bricks for the third course. The triangles removed from the front corners are progressively more aggressive for each course and starting with the second course the lower and upper faces are gouged so the brick will "bite" the mortar and reduce the risk of sliding along the radial axis.
 The third tilted course done.
 Bricks for the fourth tilted course.
 The fourth course, minus arch merges. Nice smoldering volcano effect with the halogen inside and the warm mortar steaming in the freezing air.
 Arch merge bricks for the fourth course, by far the toughest cuts yet.
 Template for the fifth course bricks.
 Fifth course bricks, ready to go.
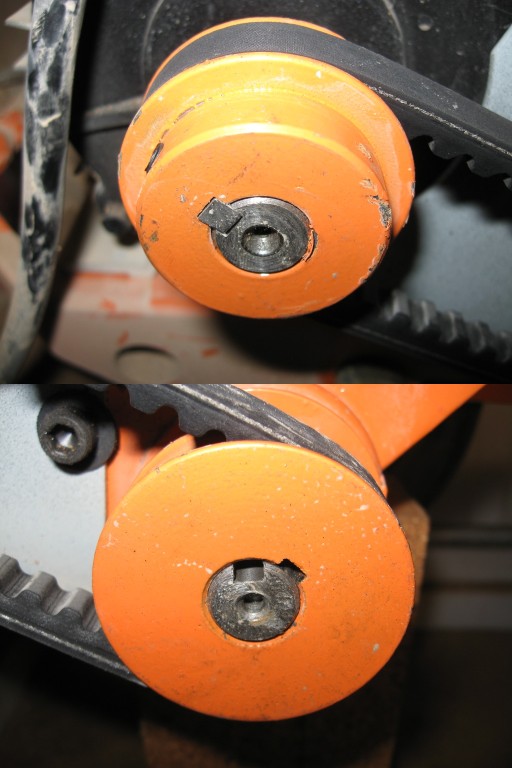
 Gah! My tile saw broke. The motor spindle (top) is okay. The blade spindle, however, is busted. The "key" (the square piece that locks the spindle to the shaft) is gone. I thought I had sheared through and disintegrated it by pushing too hard (the key is designed to fail before other more expensive or dangerous components, much like a fuse) so I bought a new one for seventy cents. Then I found the old one on the floor, which means I didn't push the saw too hard after all; the key just popped out. Oh well.
 Fifth course, almost done. This is the first course constructed with one-third bricks instead of one-half bricks. It will have the most individual bricks and any course and will be the first to appear complete from above (it will span the arch), although I had to just barely notch the bottom of the last brick to get it to fit right.
 Fifth course, almost done.
 Sixth course bricks.
 Sixth course under construction.
 Six course almost done.
 Seventh course bricks.
 Seventh course almost done.
 Seventh course almost done, from the inside.
 Seventh course almost done, from the inside.
 Eighth course bricks. The seventh course keystone is also visible in the background.
 The seventh course was the first one for which cleaning the mortar from the interior grout lines required reaching inside the oven through the entrance. Not comfortable.
 Eighth course, almost done.
 Eighth course, almost done.
 Eighth course, done.
 Eighth course, done. The stencil, top and bottom, for the keystone, is also shown.
 Eighth course, done.
 Eighth course, done.
 Two pieces that will form the keystone.
 Two pieces that will form the keystone.
 Two pieces that will form the keystone.
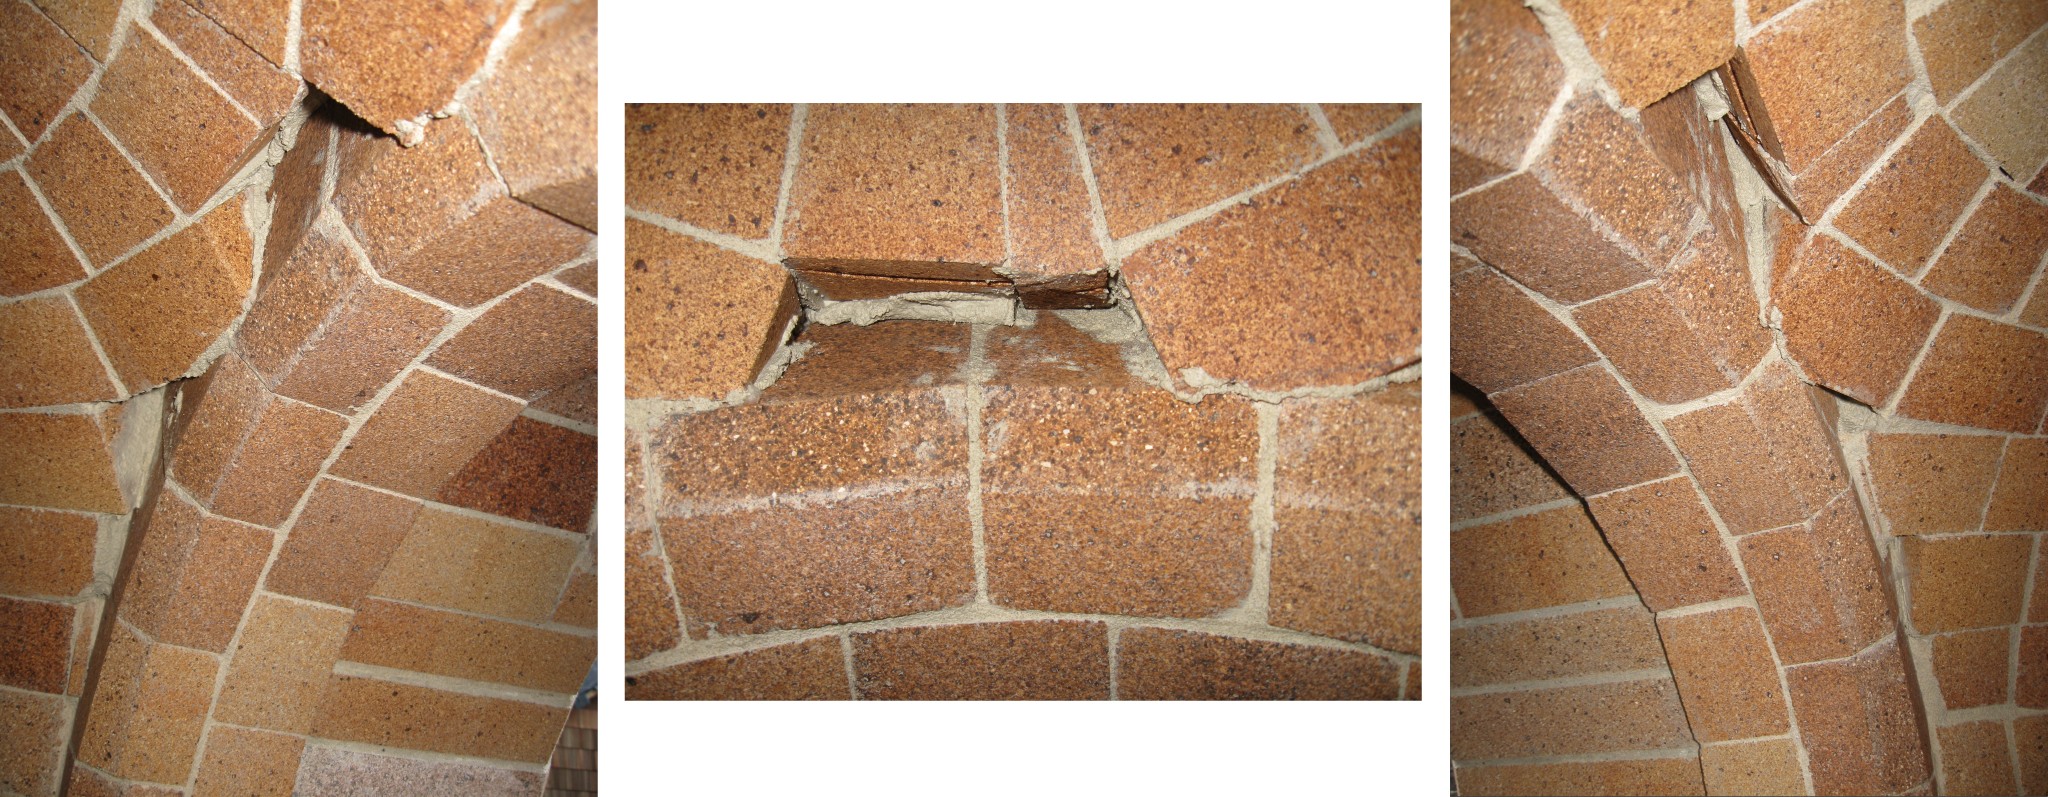
 While entering the oven to clean mortar from the inside faces, I hit the entry arch with my head and broke it in several places. The mortar seems to chip off with a screw-driver fairly easily, so I expect that I will be able to fix this without too much trouble. Nevertheless, it is a disappointment.
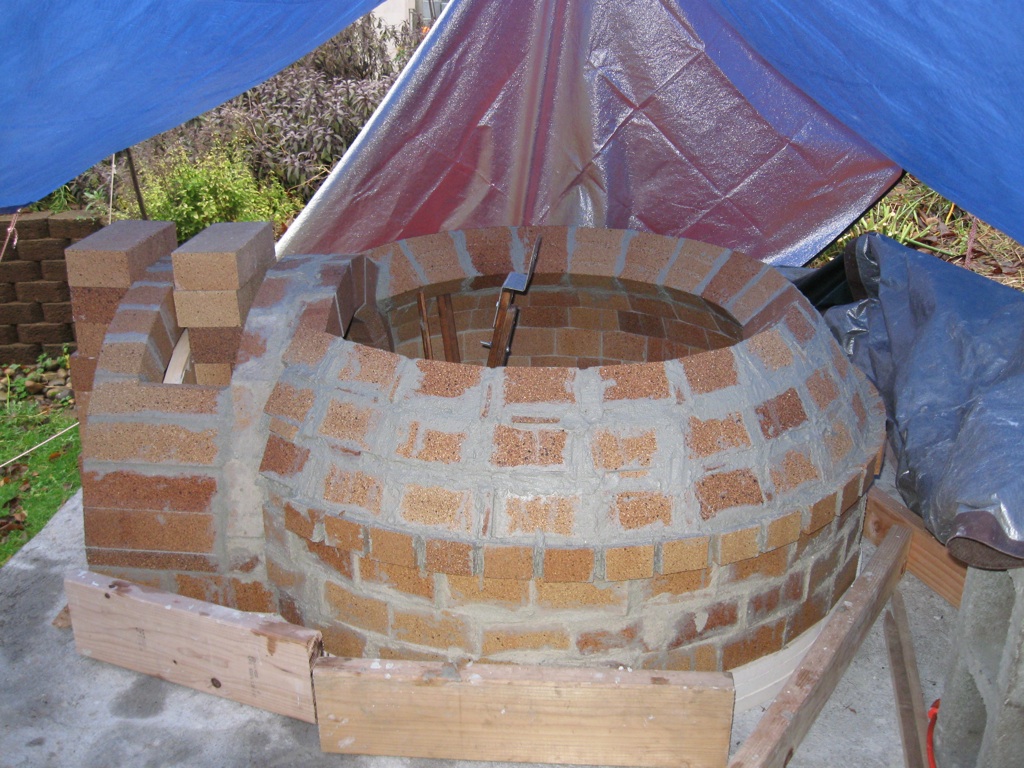
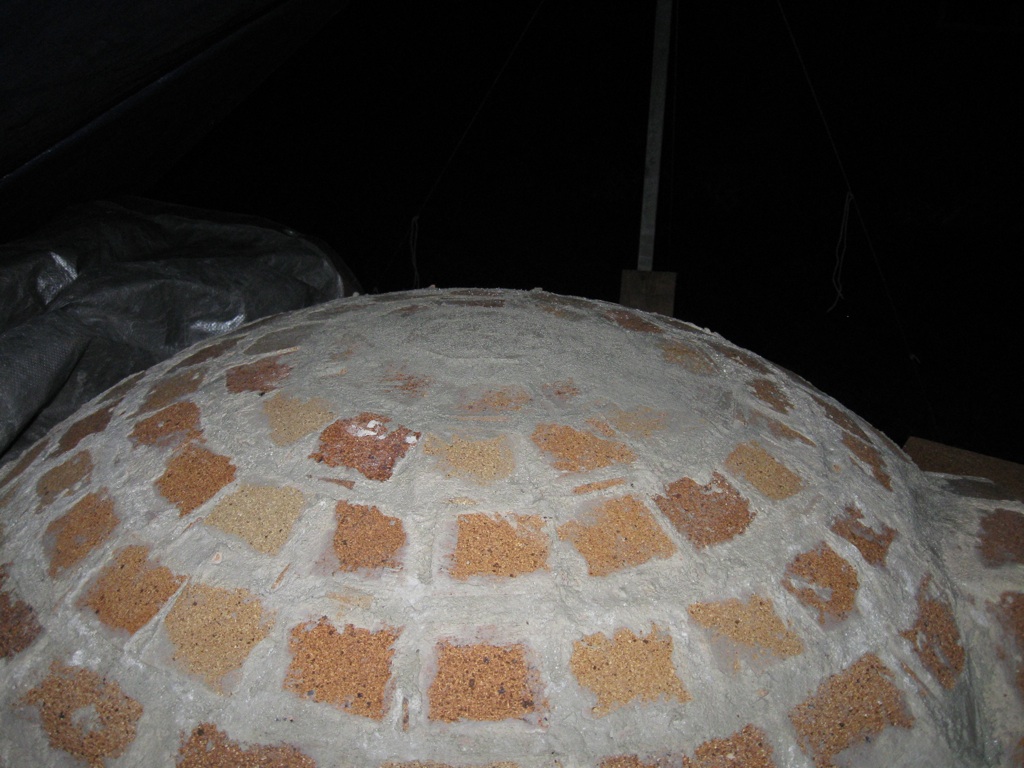
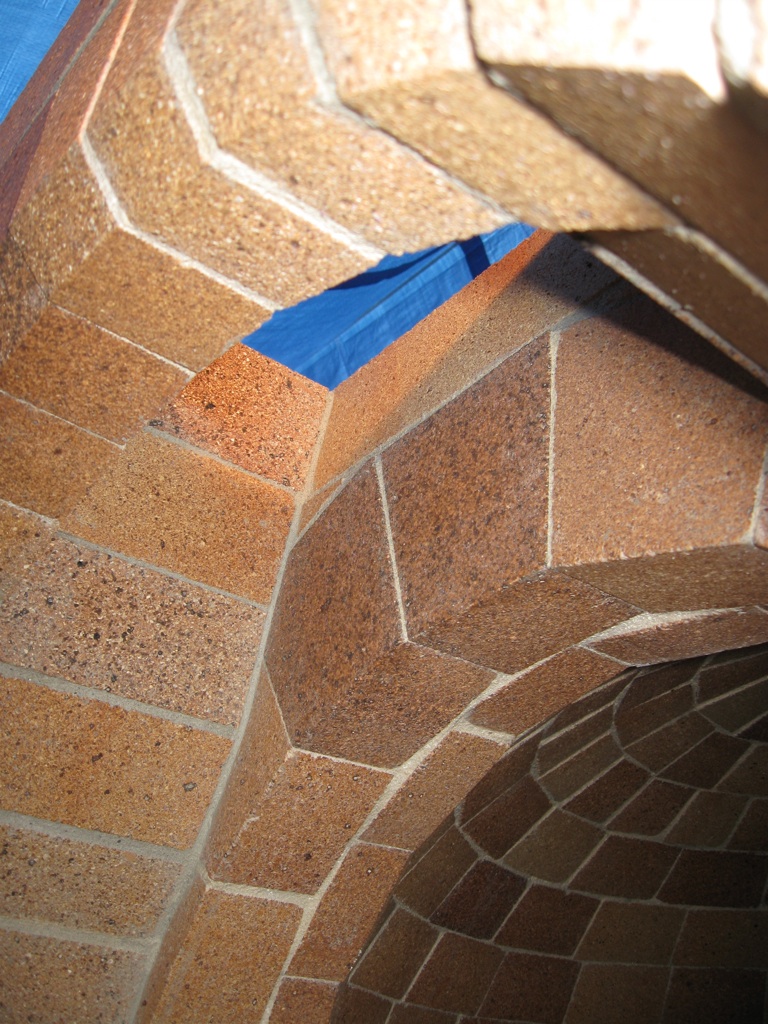
 I closed the dome!!!
 I closed the dome!!!
 I closed the dome!!!
 I closed the dome!!!
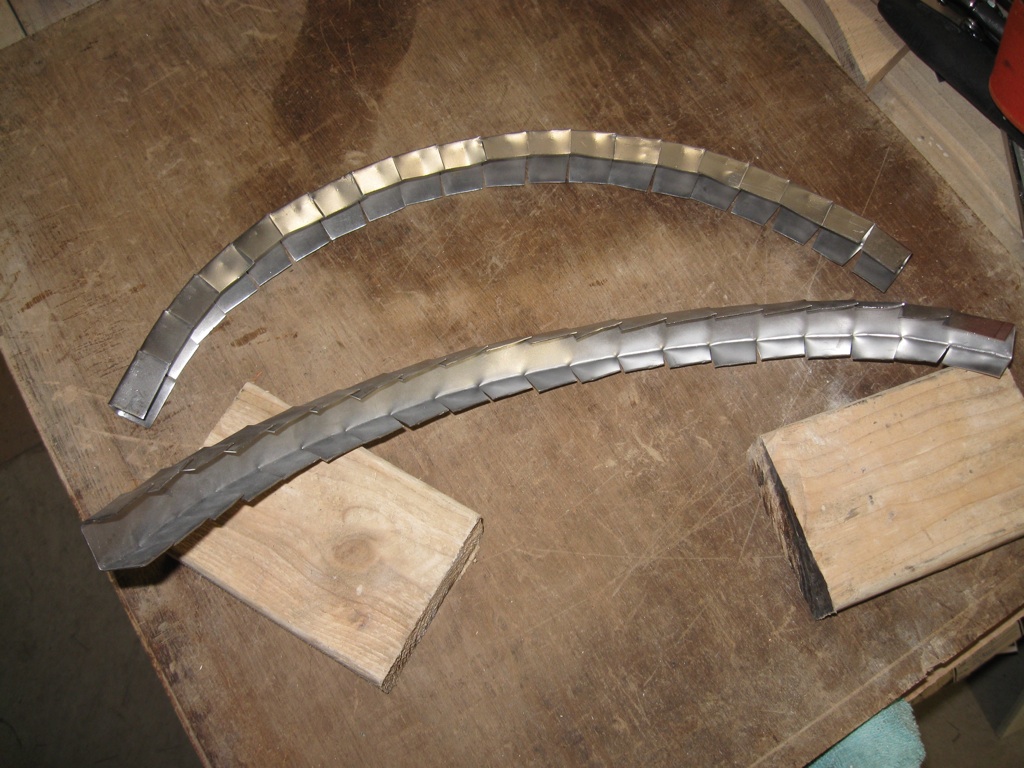
 Bricks that will comprise the vent.
 The vent under construction. Also, obviously, the broken entry arch has been rebuilt.
 The vent under construction.
 The vent under construction.
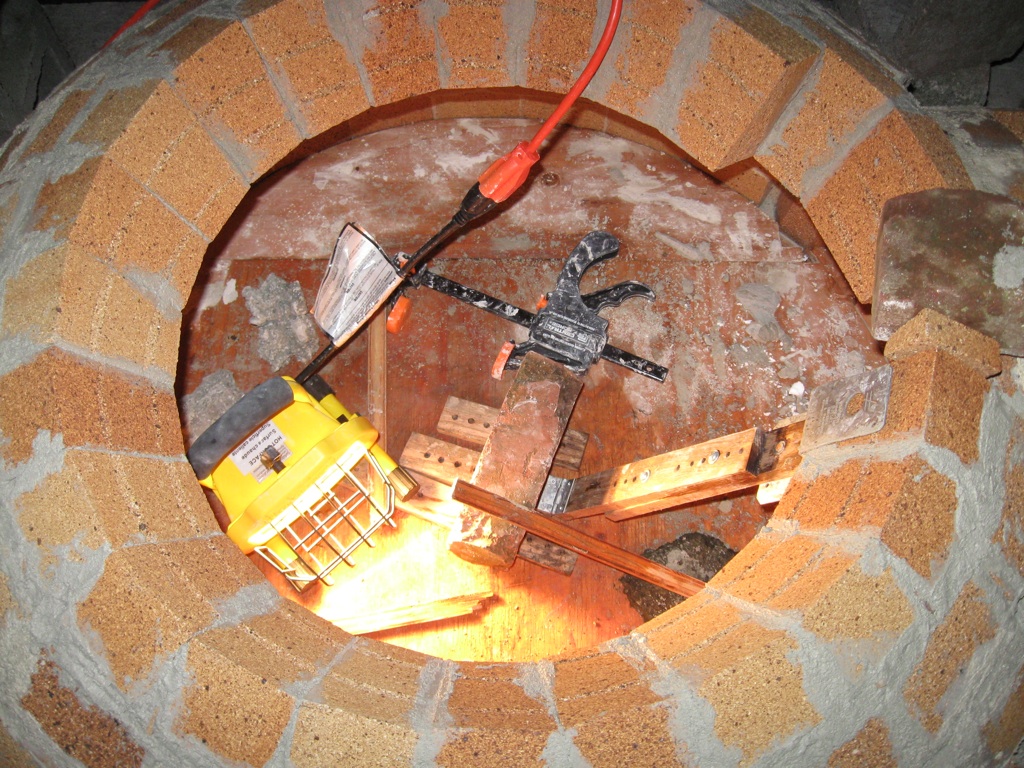
 The vent done.
 The vent done.
 The vent done.
 The vent done.
 The vent done.
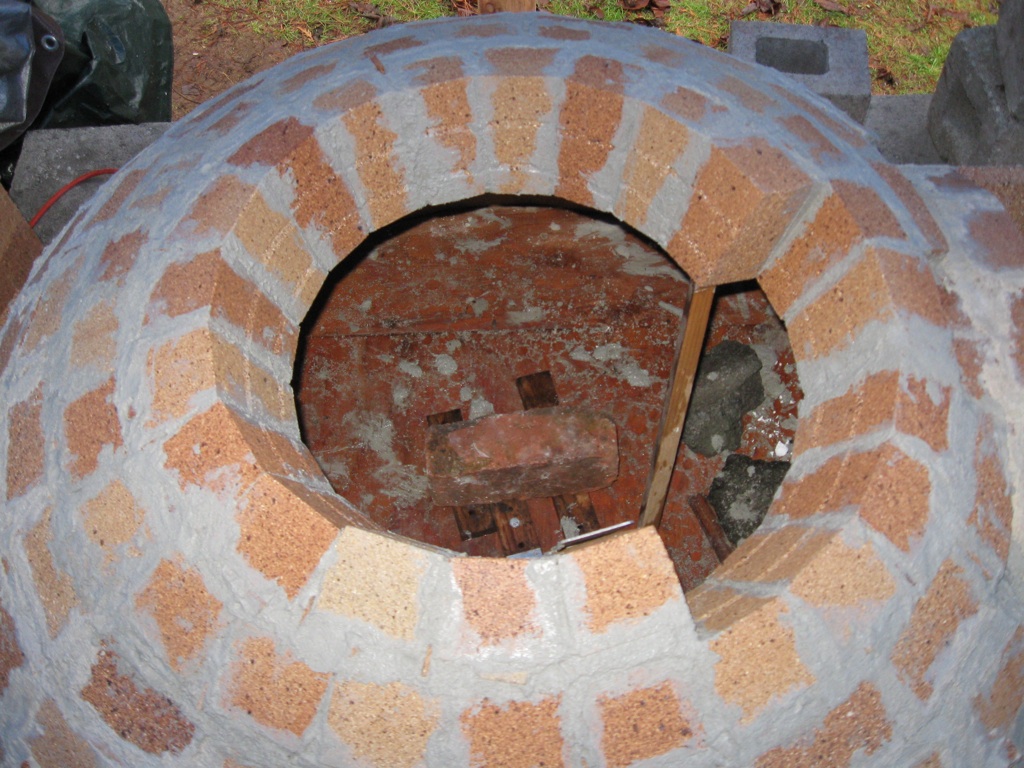
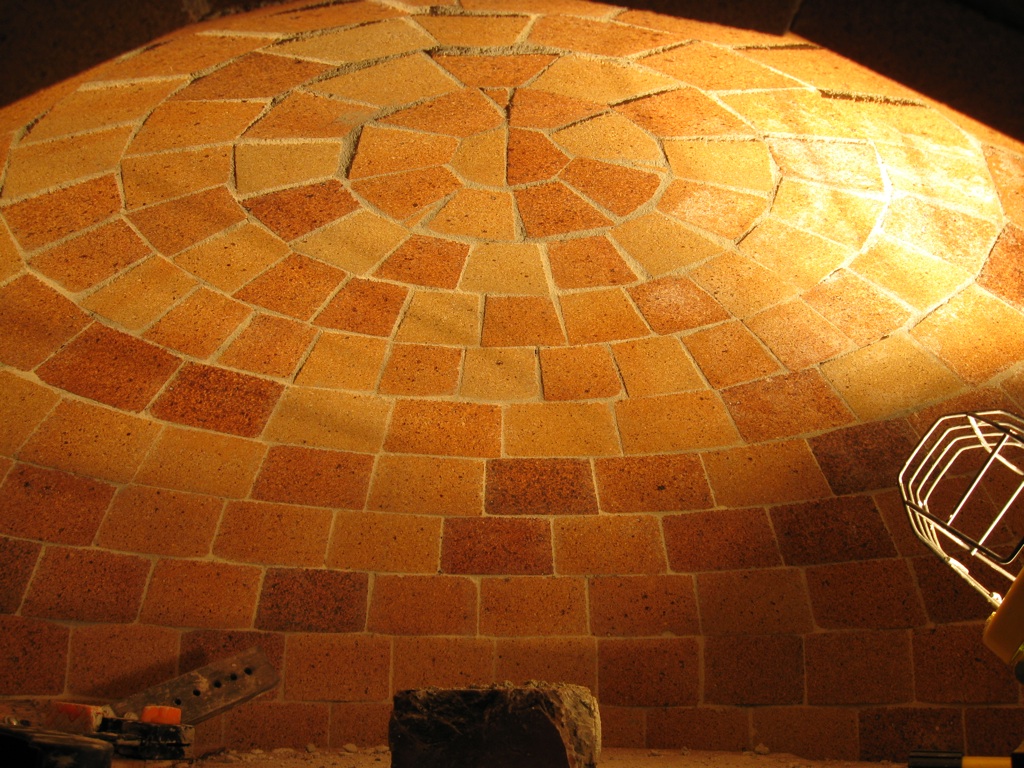
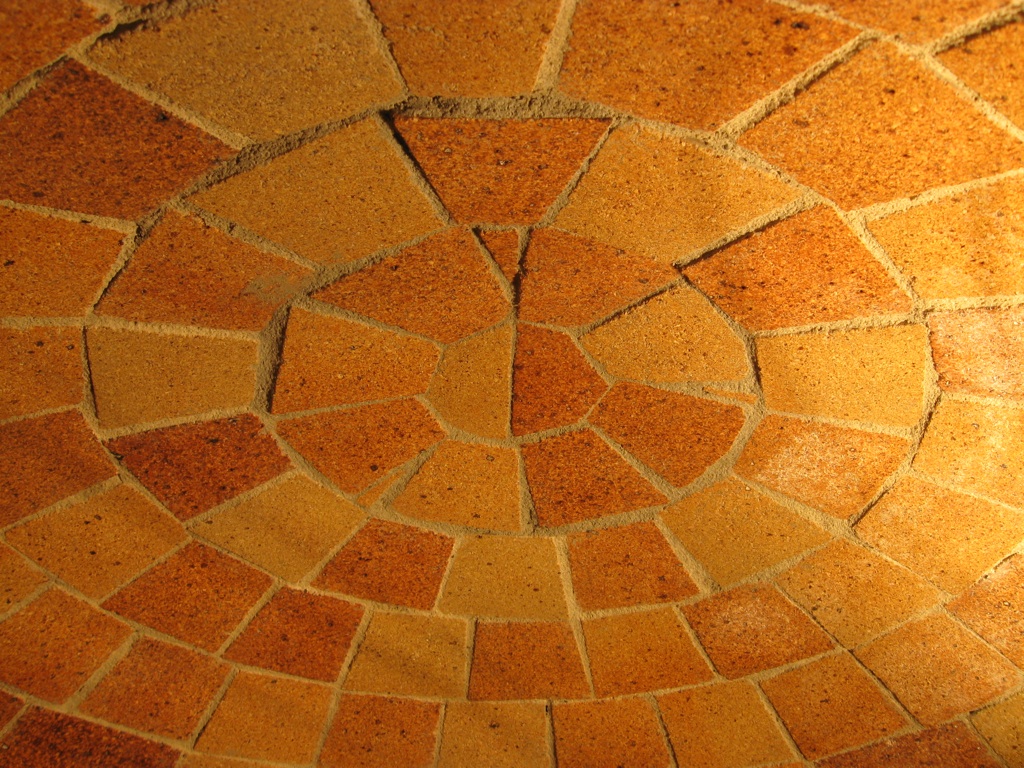
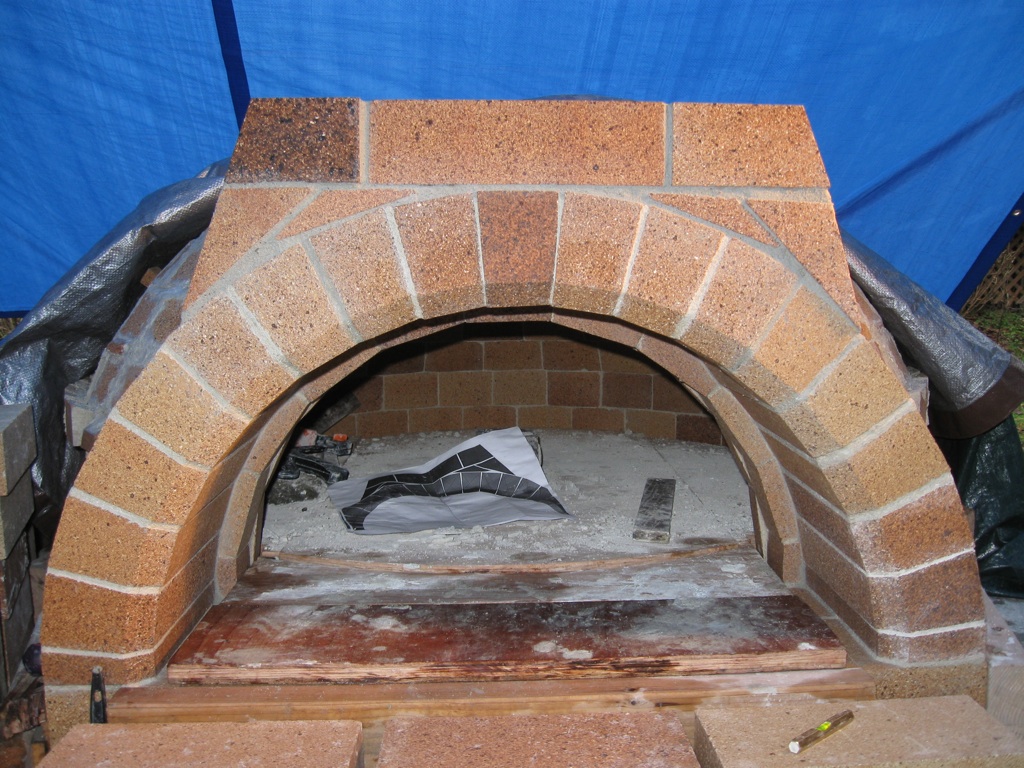
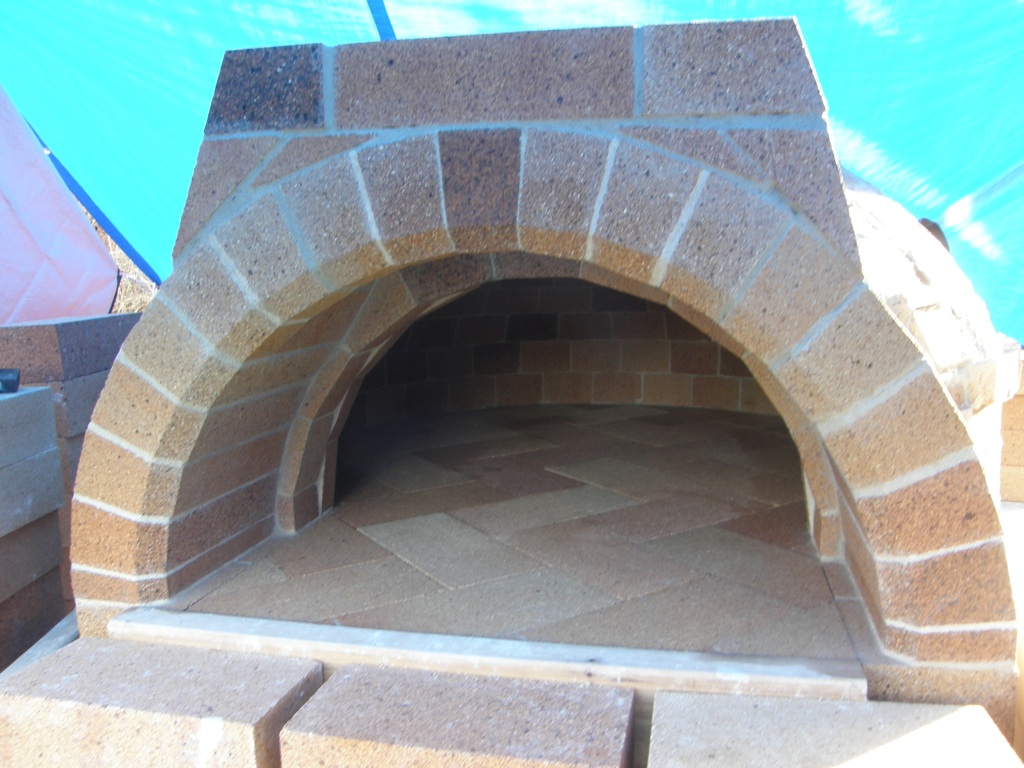
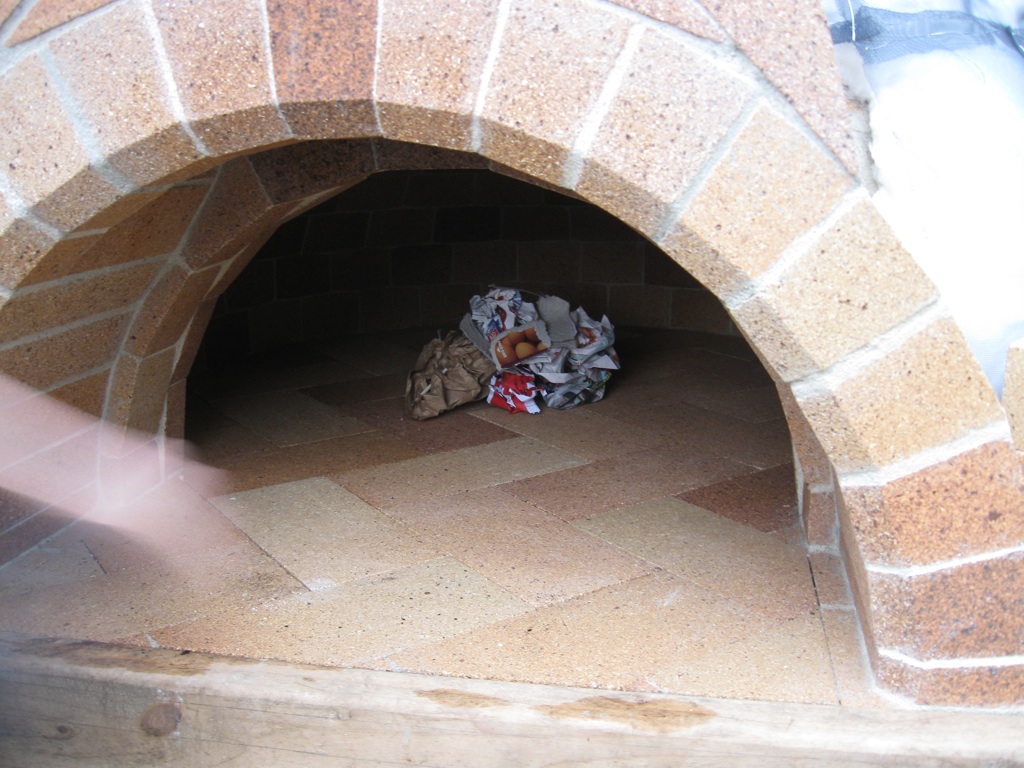
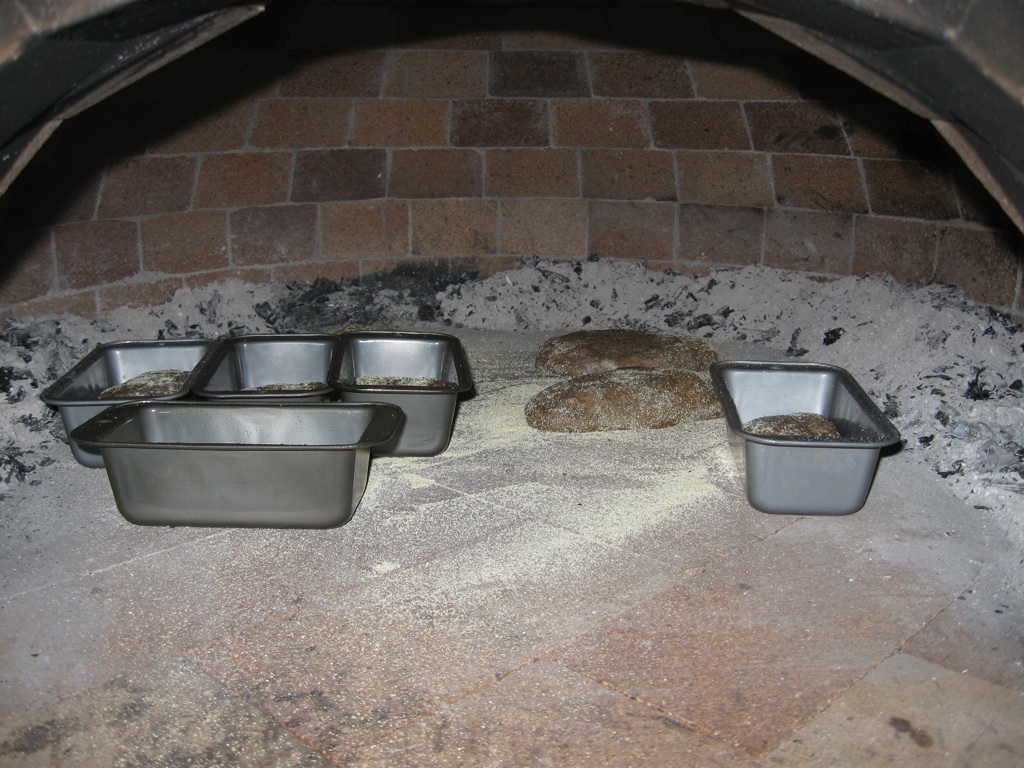
 First shot with the construction floor-boards removed, thus revealing the floor.
 Another shot showing the floor after removal of the construction floor-boards.
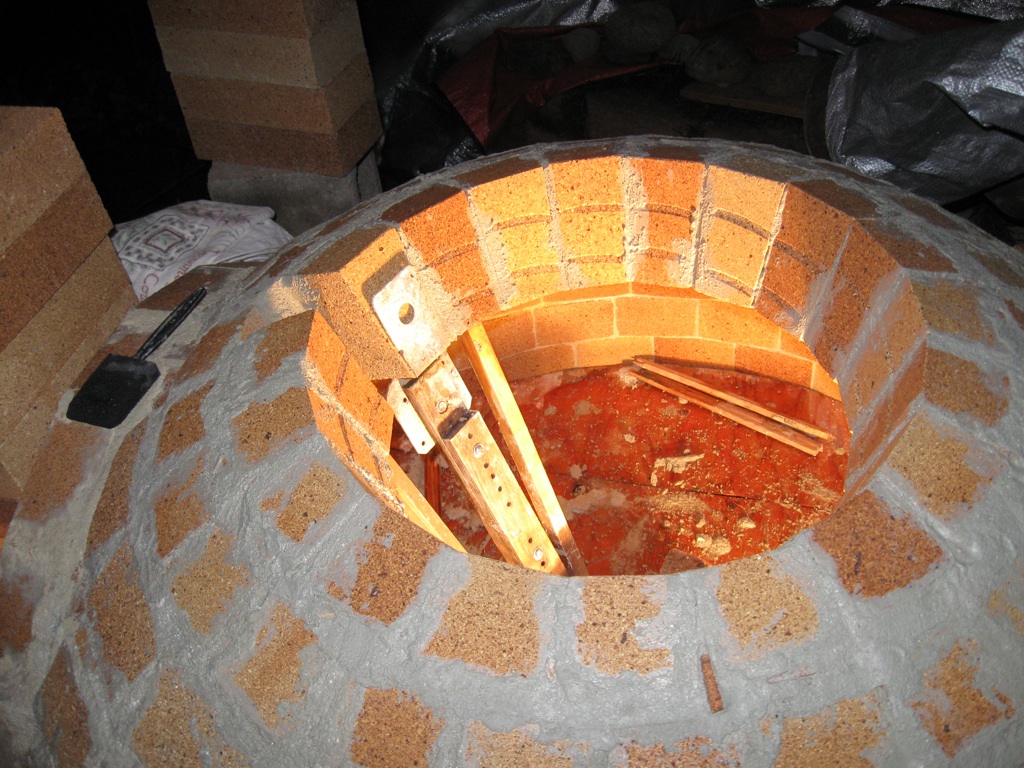
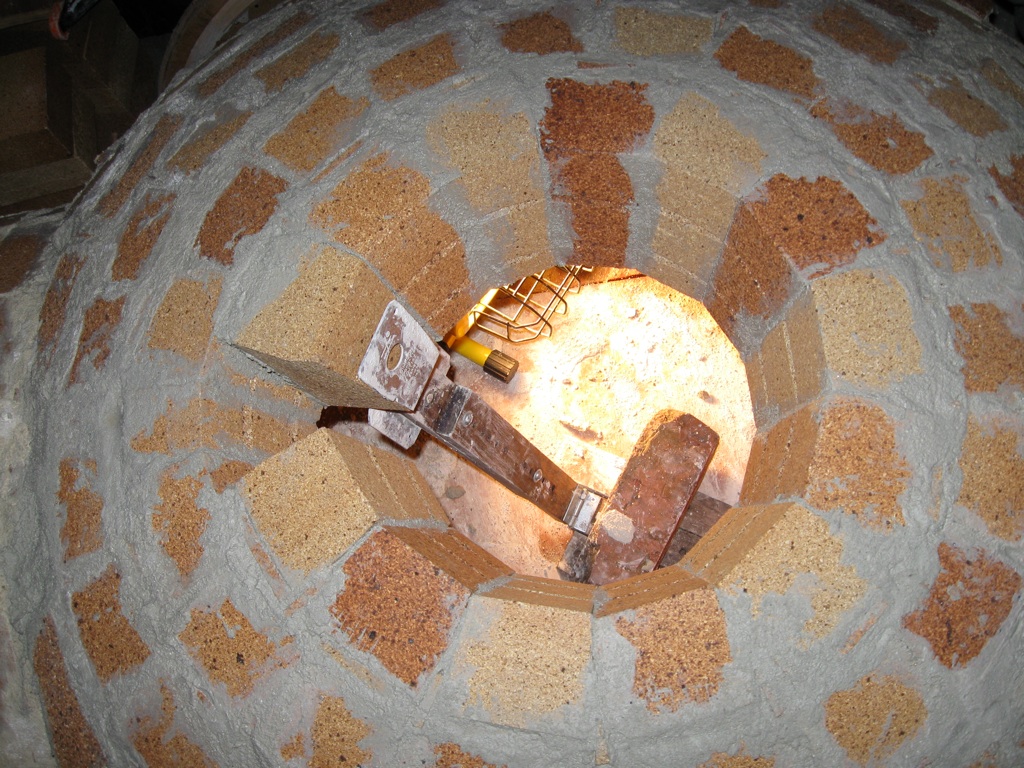
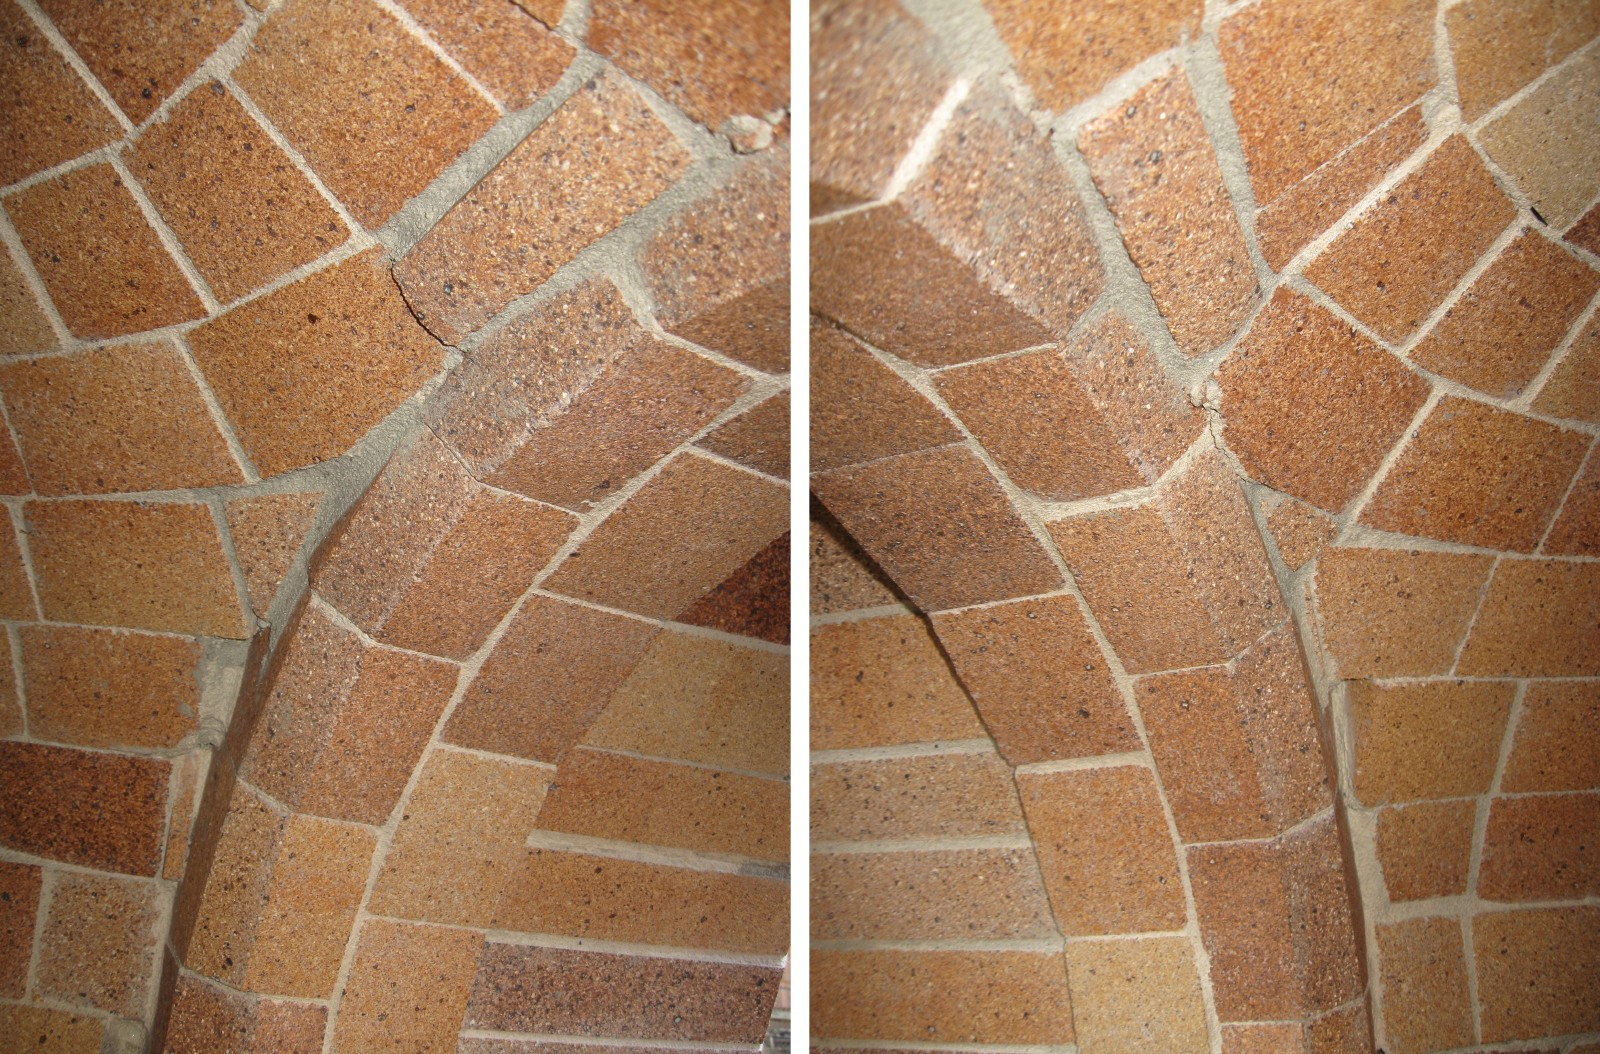
 A photo of the backside of the arch from the back of the oven toward the entrance. I haven't decided yet whether to fill the gaps. It might help smoke flow out the ceiling more smoothly, but wouldn't offer much structural support.
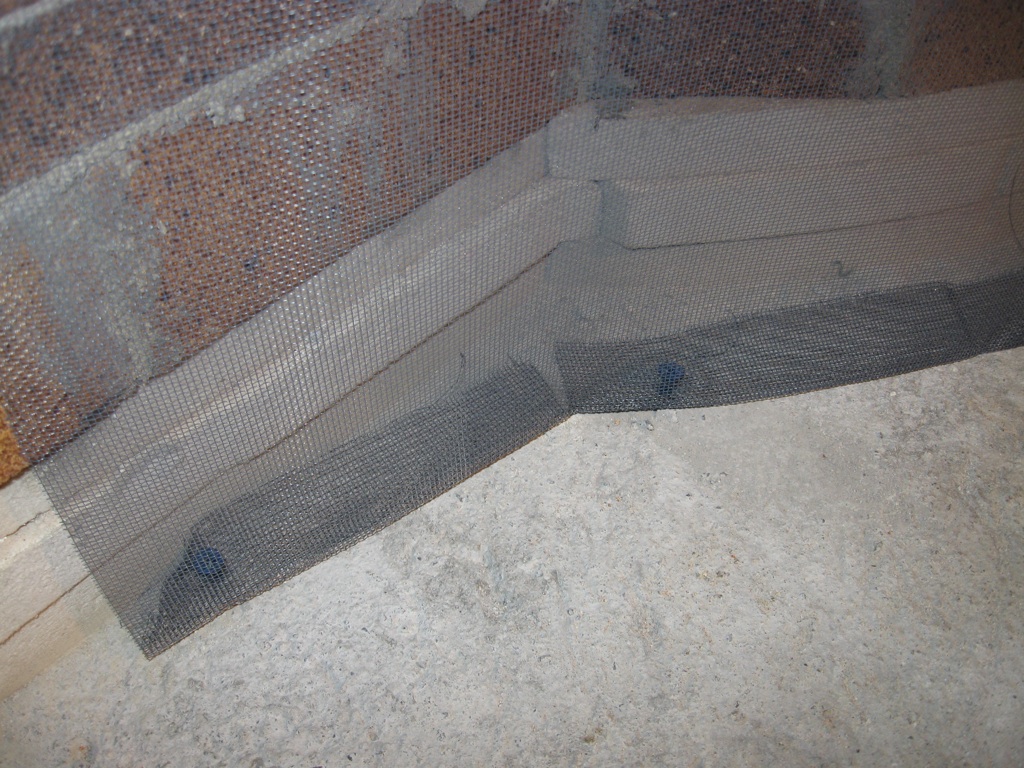
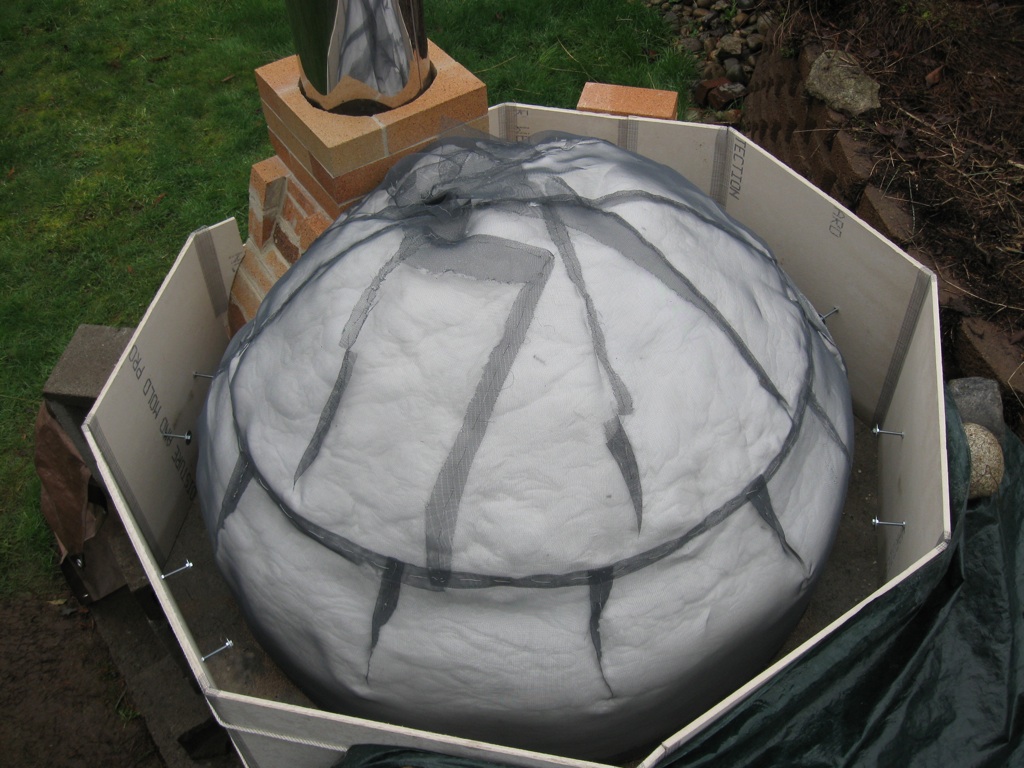
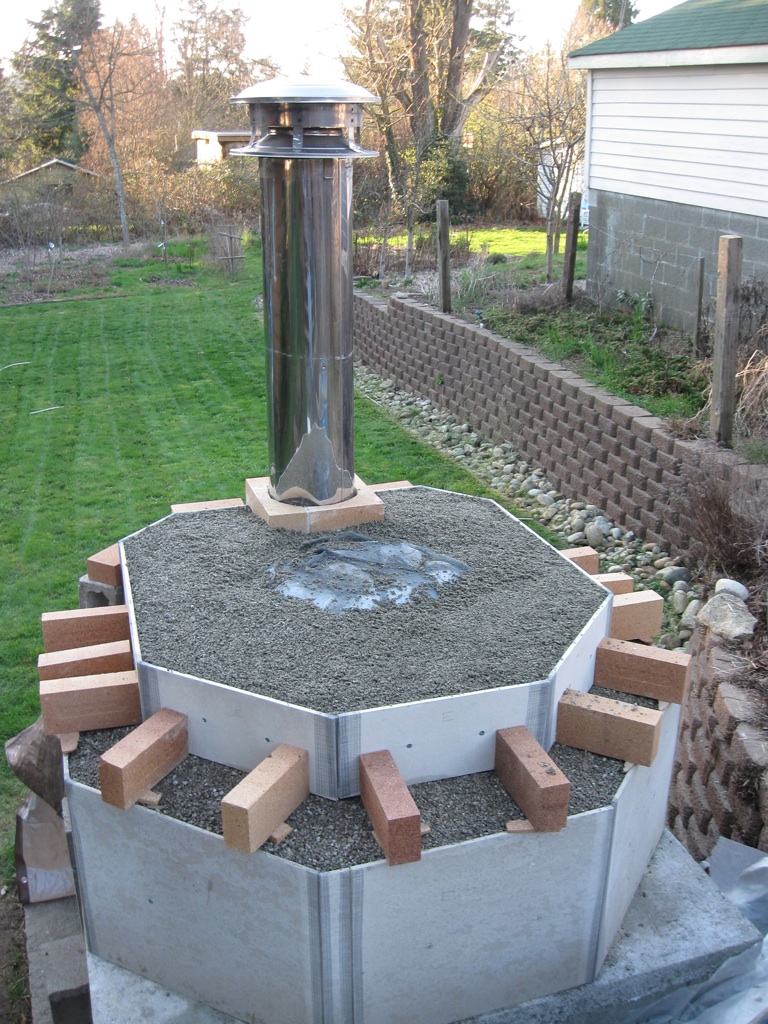
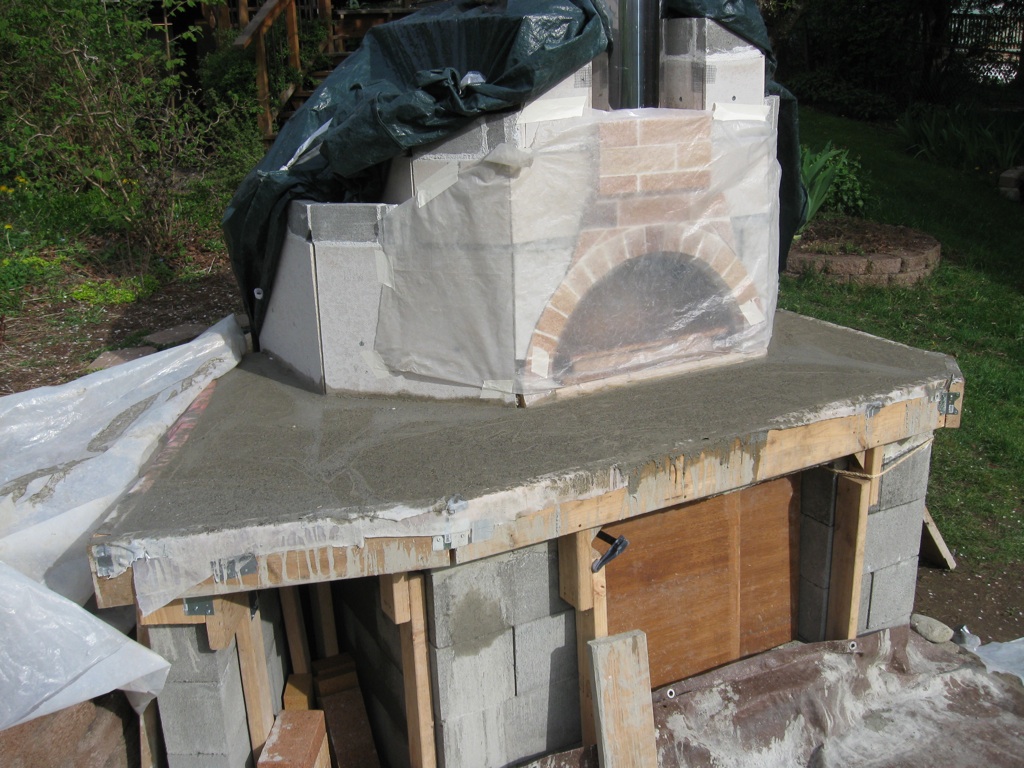
 The first layer of insulation will be a few inches of loose InsWool HP Bulk. This cage built out of screen-door screen will hold it in place. Actually, the bottom three inches (at and below the level of the InsBlock 19 boards) will be loose vermiculite.
 The cage for the InsWool HP Bulk is attached to the hearth with tapcons. Hopefully, when I pour a few inches of vermiculite in the bottom it won't work it's way out under those tabs, at least not before I get a change to do the next layer of construction.
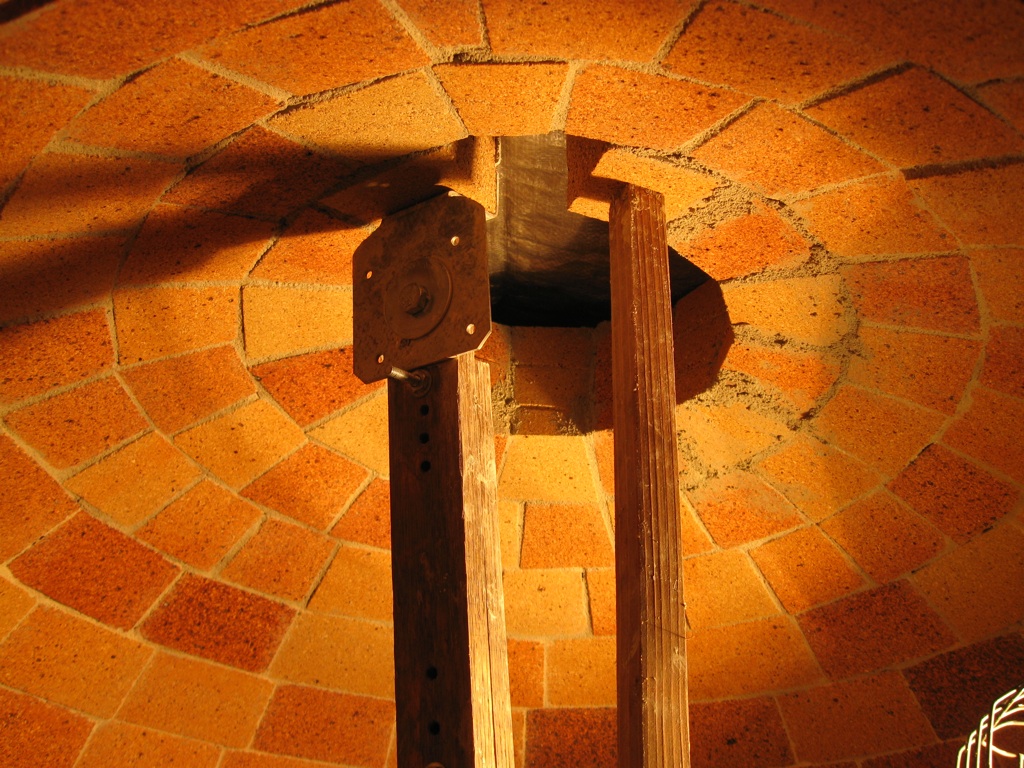
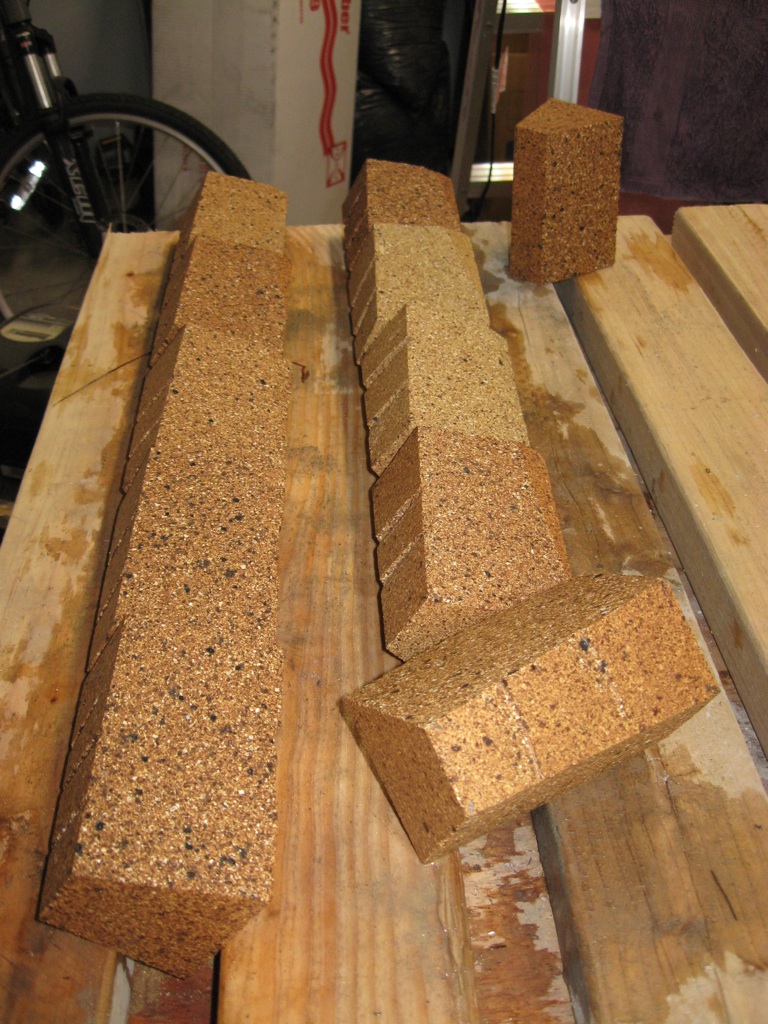
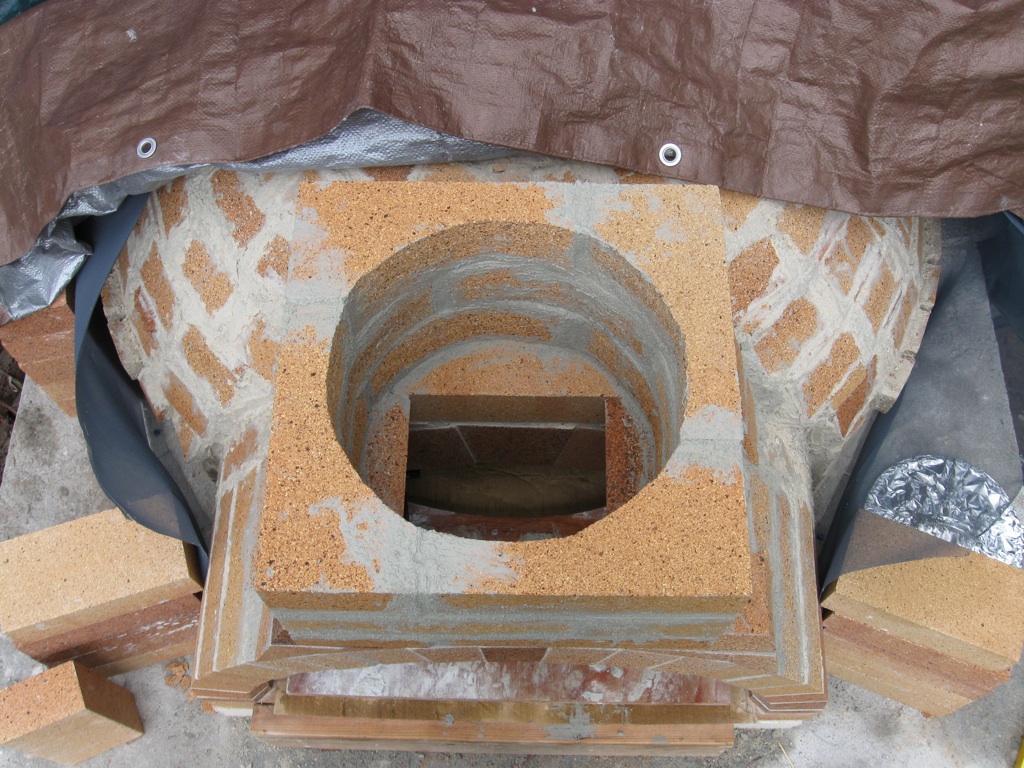
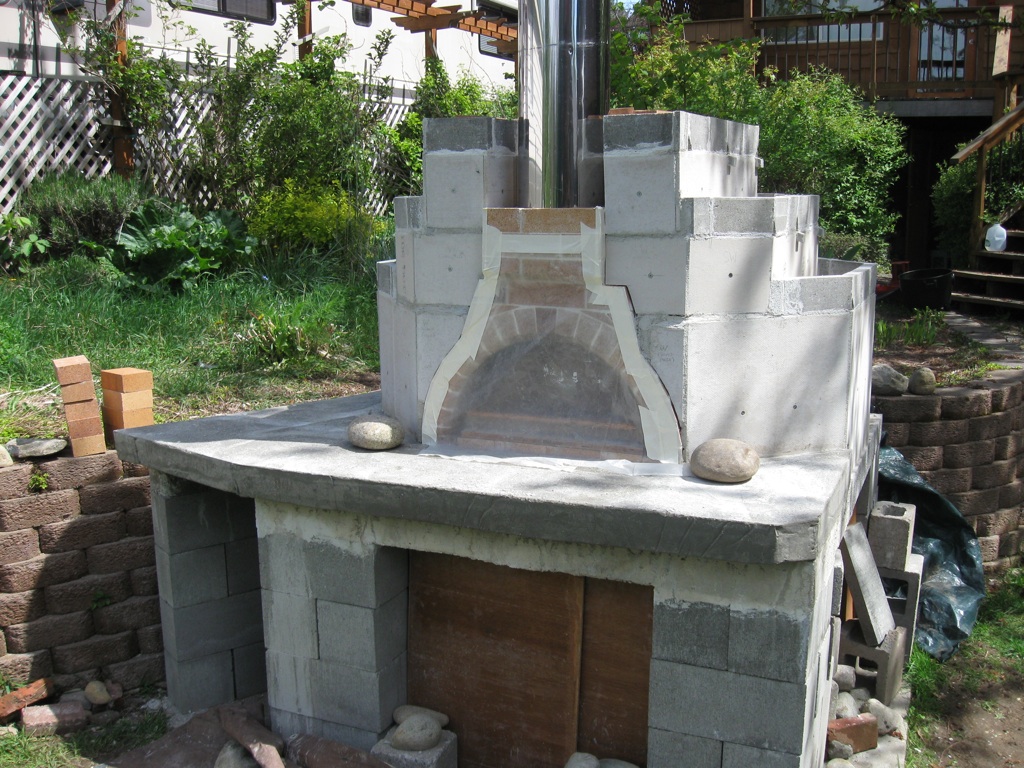
 The 8" double-walled stove pipe (10" exterior) will sit in a brick shoe on top of the vent. This photo shows one layer of three that will be used. These are the first bricks of the entire project that I used the angle grinder to construct. First I cut out the curve as much as possible with the tile/brick saw, then I ground it down to a uniform surface with the grinder. All former bricks were cut entirely with the saw.
 All bricks for the chimney shoe, three layers tall. Note that I beveled the edge of the two bricks that will protrude from the lowest level of the shoe out over the entry arch. Later photos will show how this works.
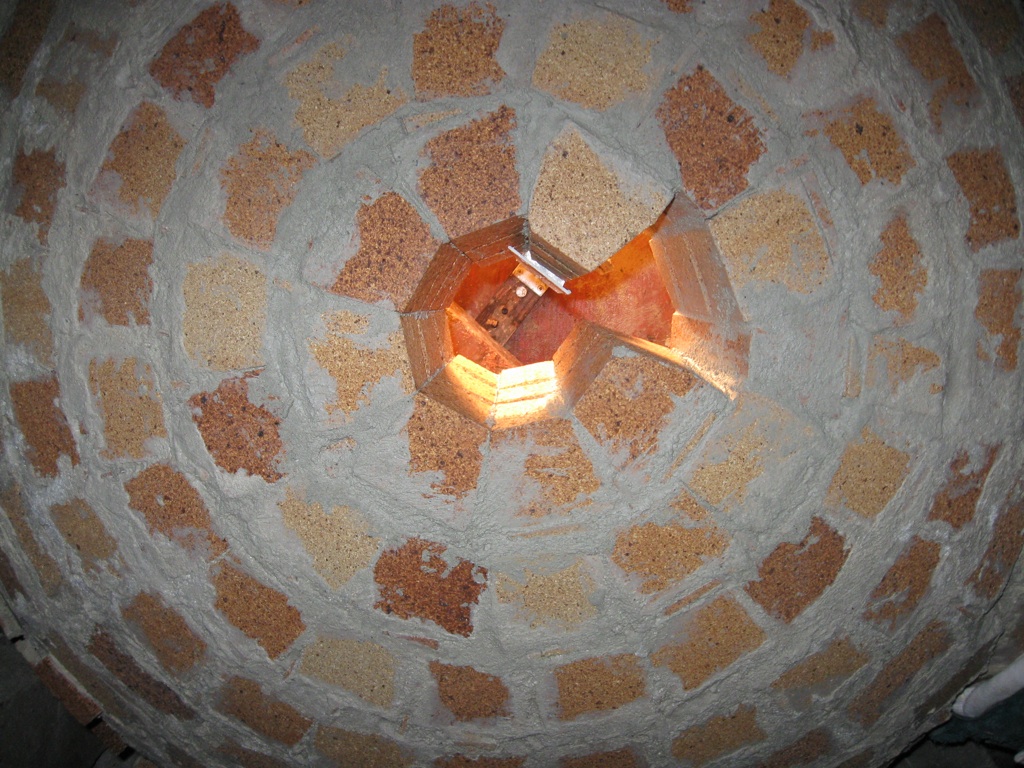
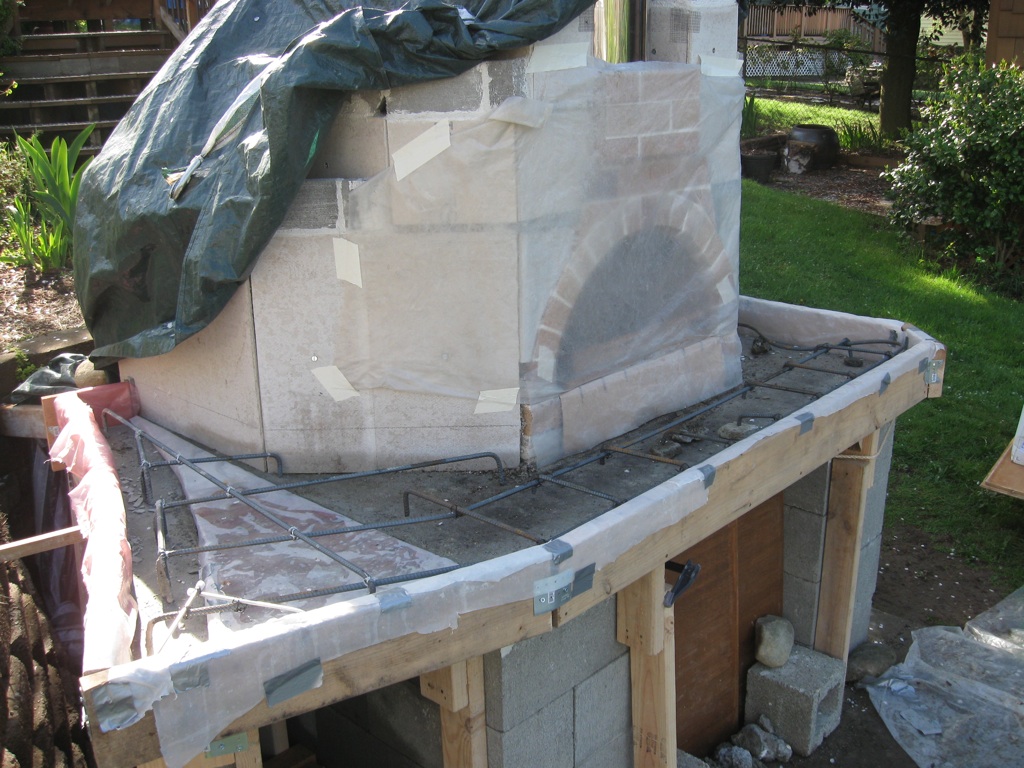
 The chimney shoe, freshly mortared. The vent (the triangles and the brick layer about them) suffers from two problems. The upper surface of the vent isn't level and the sides aren't symmetrical w.r.t. the centerline of the oven. The upper surface of the shoe is level, but the pipe will sit on the vent and will lean to the right, so I will have to brace it up with a layer of mortar inside the shoe on top of the vent. The symmetry problems will be dealt with when I build the enclosure.
 The chimney shoe, freshly mortared.
 Despite my best efforts, the upper surface of the vent is not perfectly level. However...see next photo...
 While the upper surface of the vent is not level (see previous photo) the upper surface of the chimney shoe is. I achieved this by tilting each of the three levels of the shoe a tad bit.
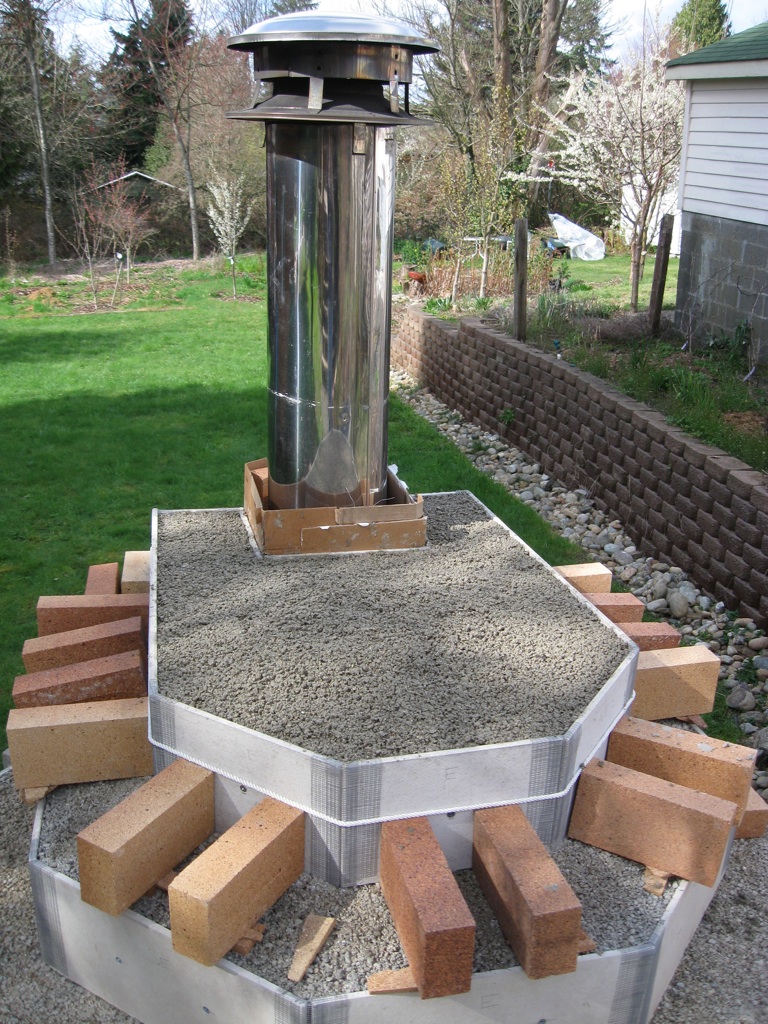
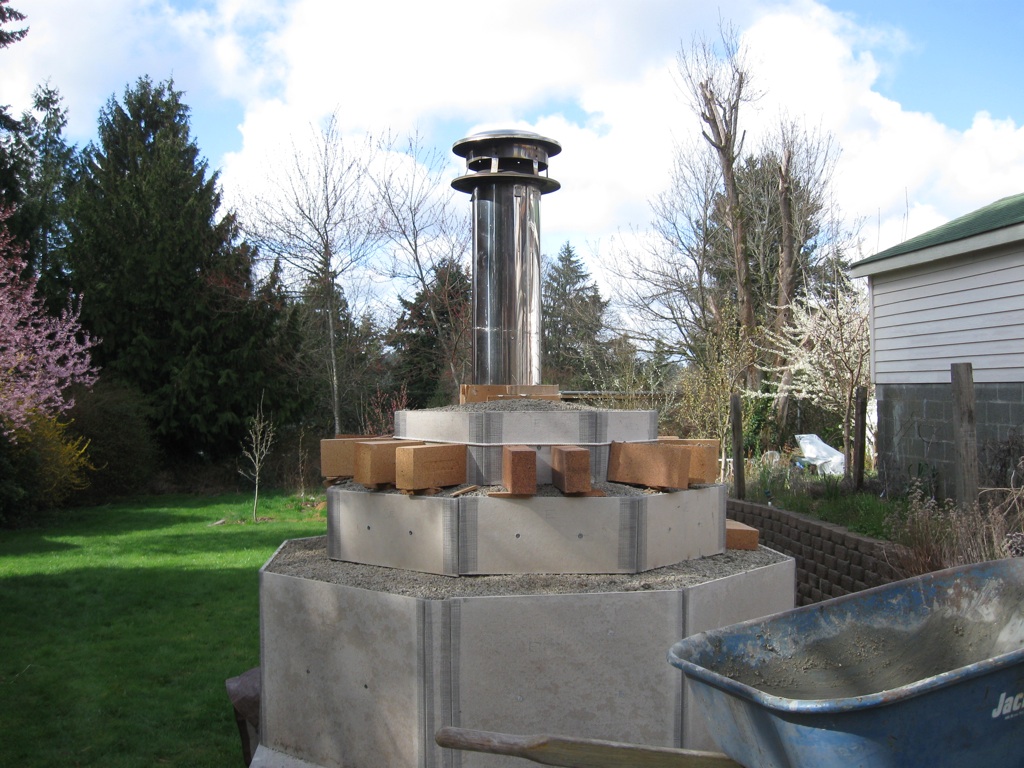
 The chimney shoe, freshly mortared. The 8" interior (10" exterior) double-walled stove pipe will sit in the shoe and on top of the vent.
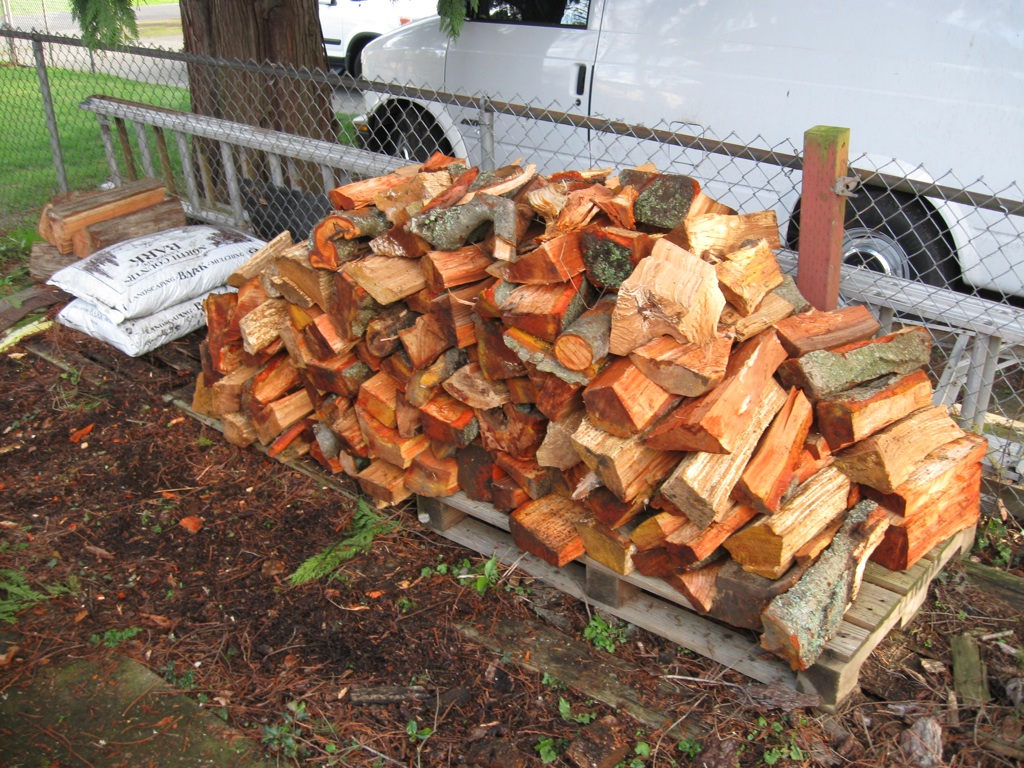
 I bought about a cord of firewood, half green maple, shown here, which I'll burn in a year after it seasons. The guy also gave me a few logs of cedar, visible in the background, which are less ideal for ovens but can be used to get fires started.
 I bought about a cord of firewood, half dry fir, ready to burn, shown here. The first curing fires are close! Mabe this weekend!
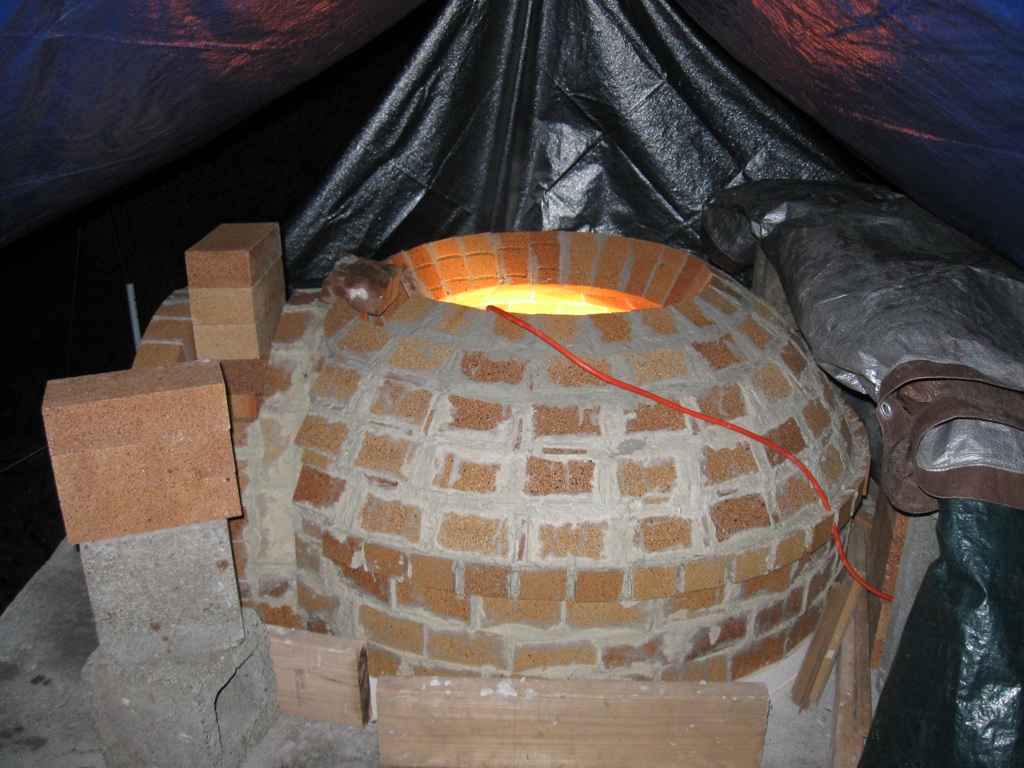
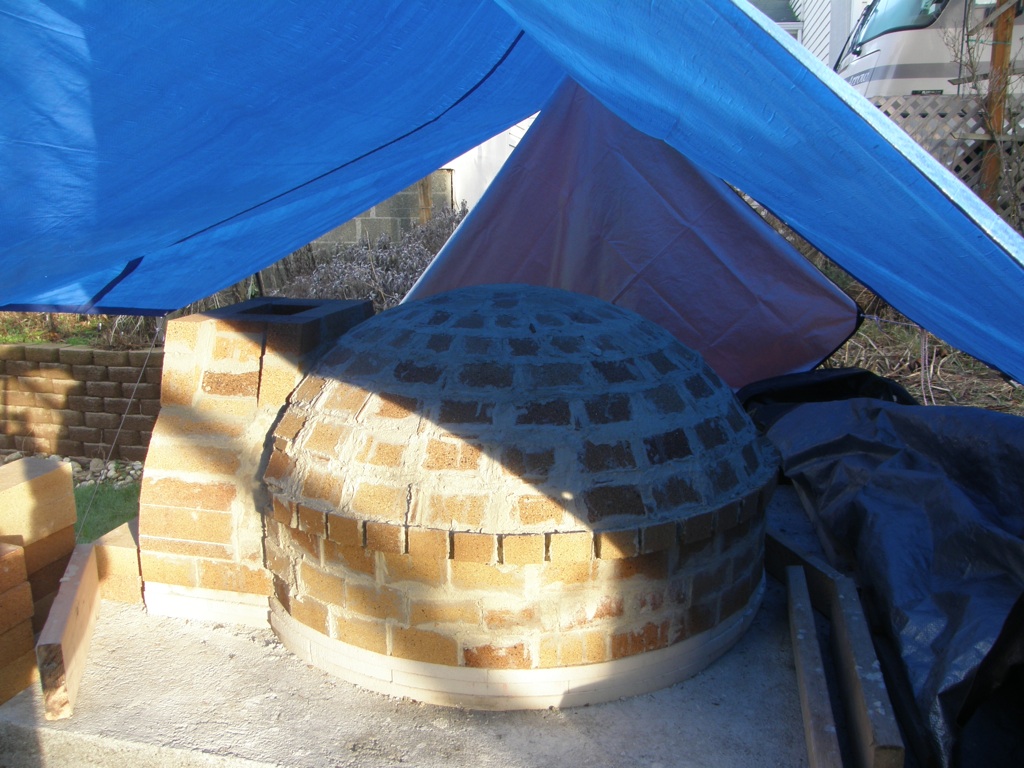
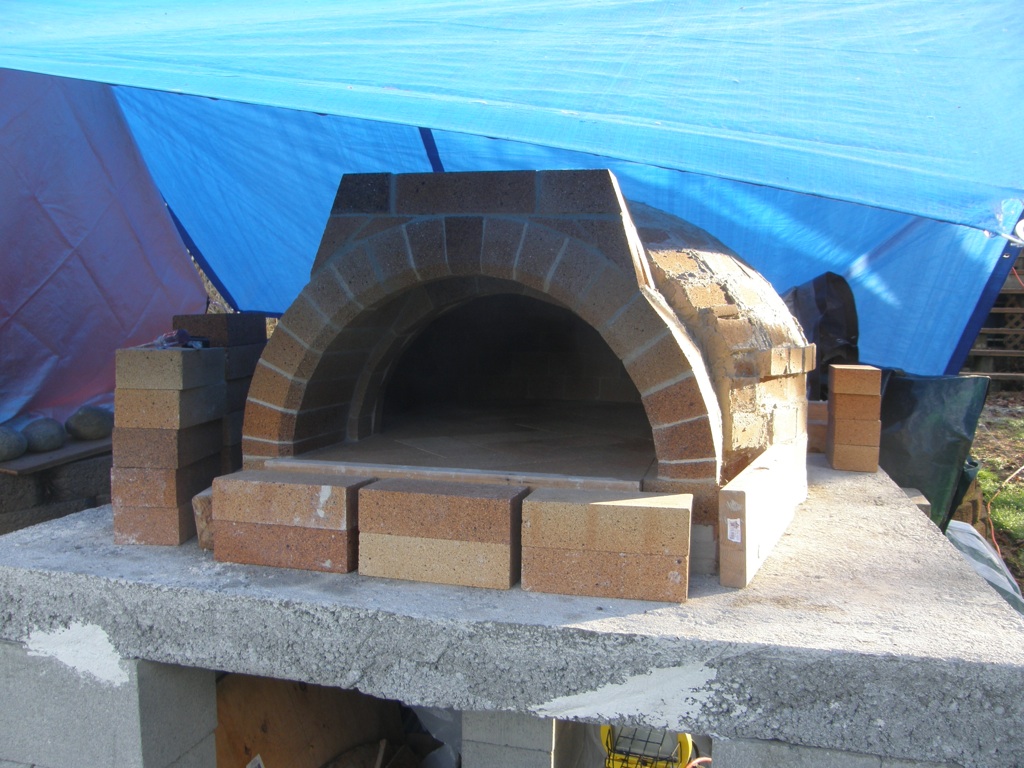
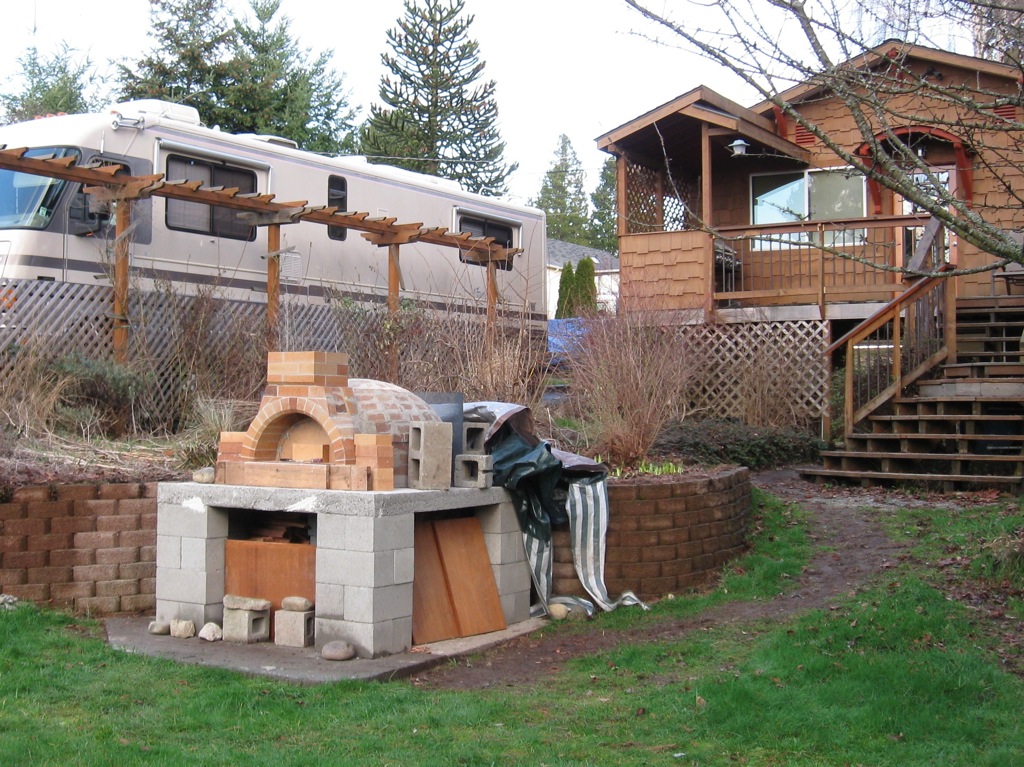
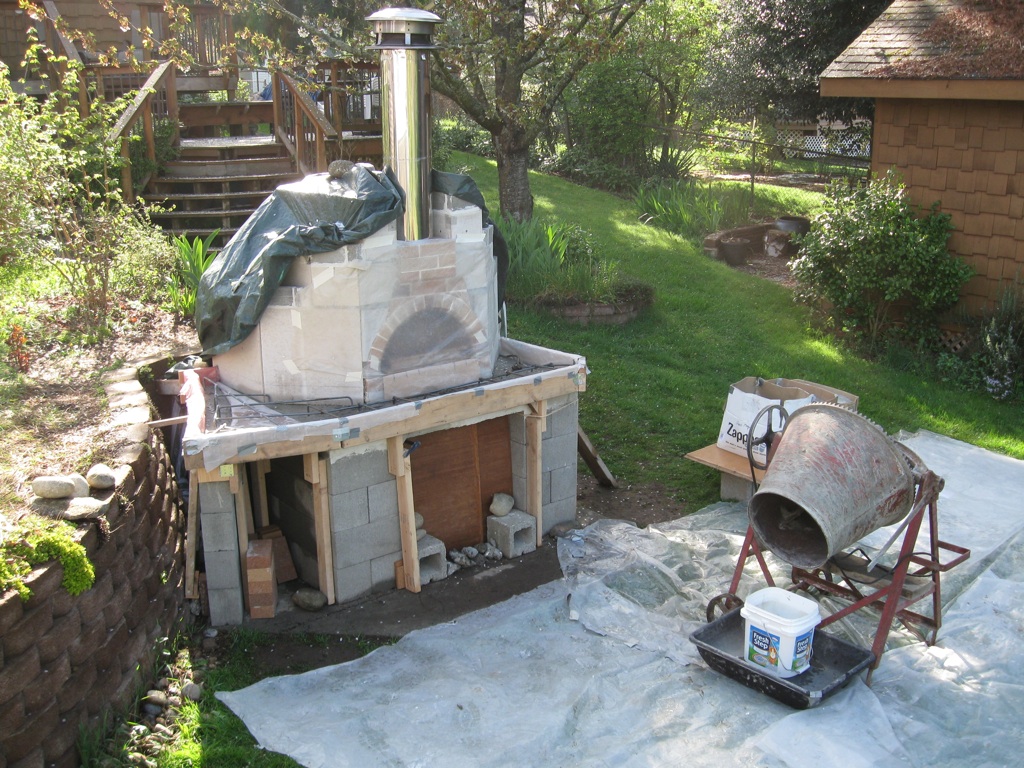
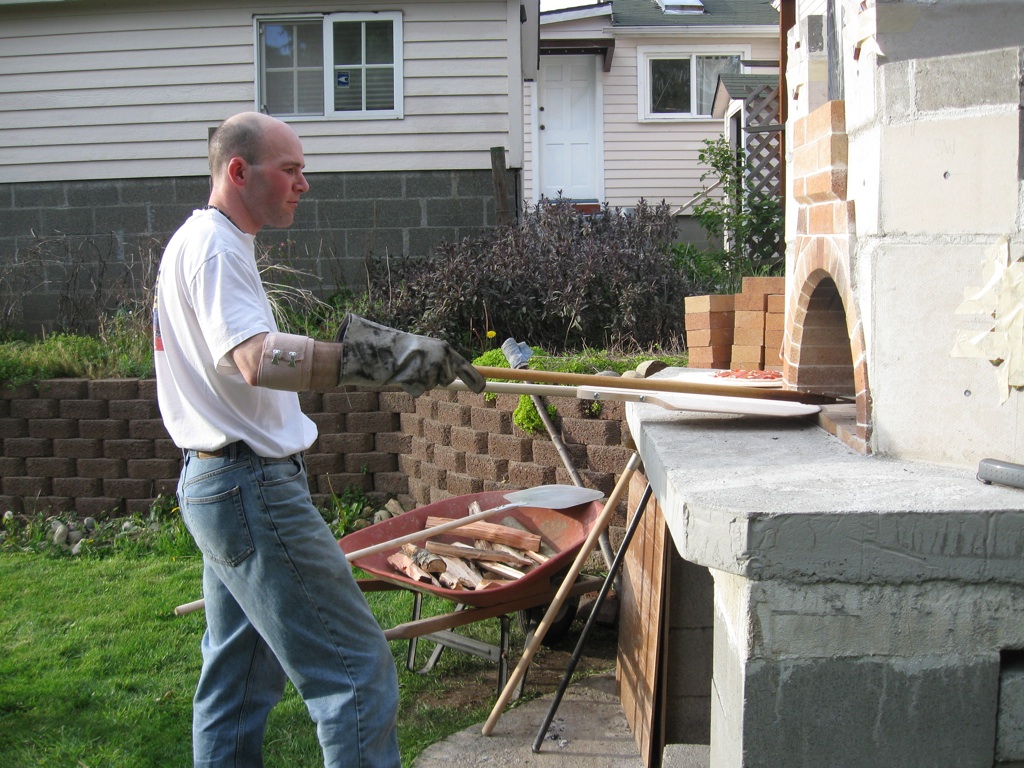
 I removed the suspended blue awning, partly to permit me to work on top of the dome more easily, but more crucially so I can place the stove pip in the shoe and light the sucker up!
 I poured three inches of loose vermiculite into the screen first, so as to save more of the InsWool HP Bulk for the top of the dome.
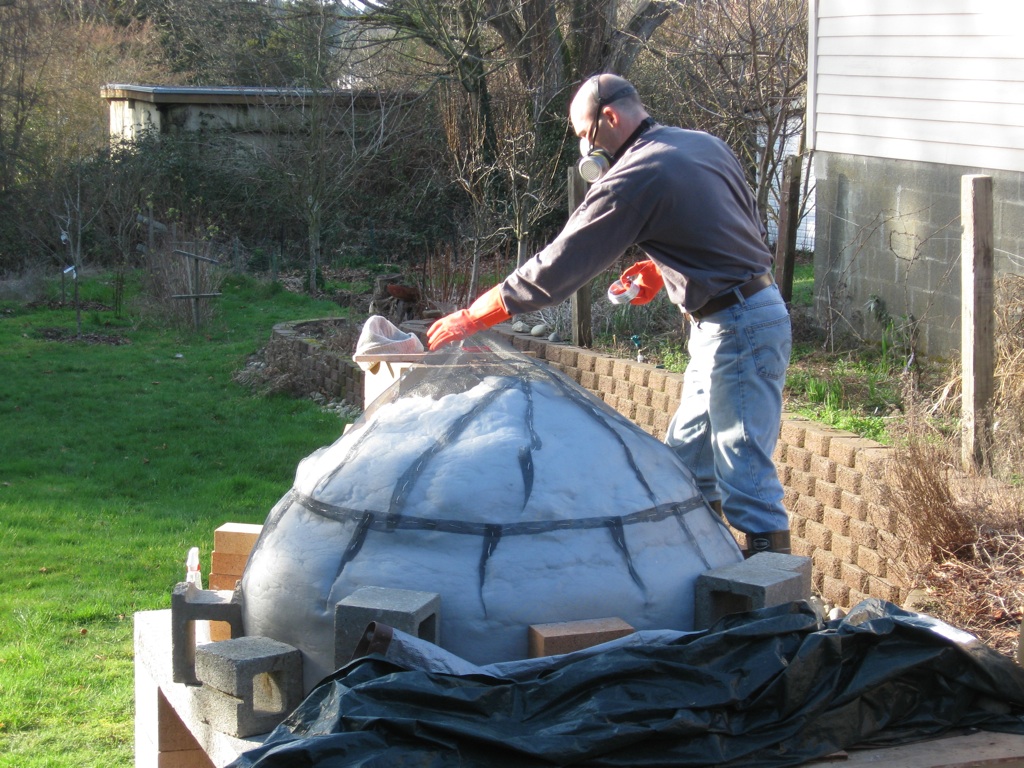
 Installing the InsWool HP Bulk insulation.
 InsWool HP Bulk partially installed, up the vertical side walls, but not into the dome transition.
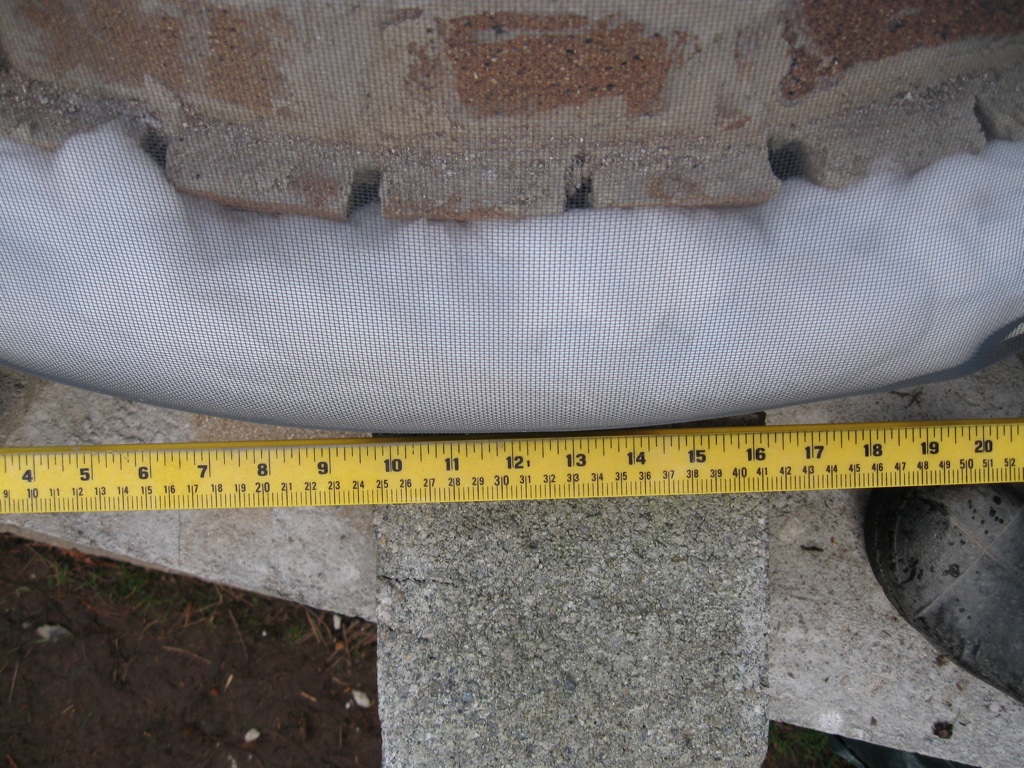
 The InsWool HP Bulk is three inches thick on the sidewalls.
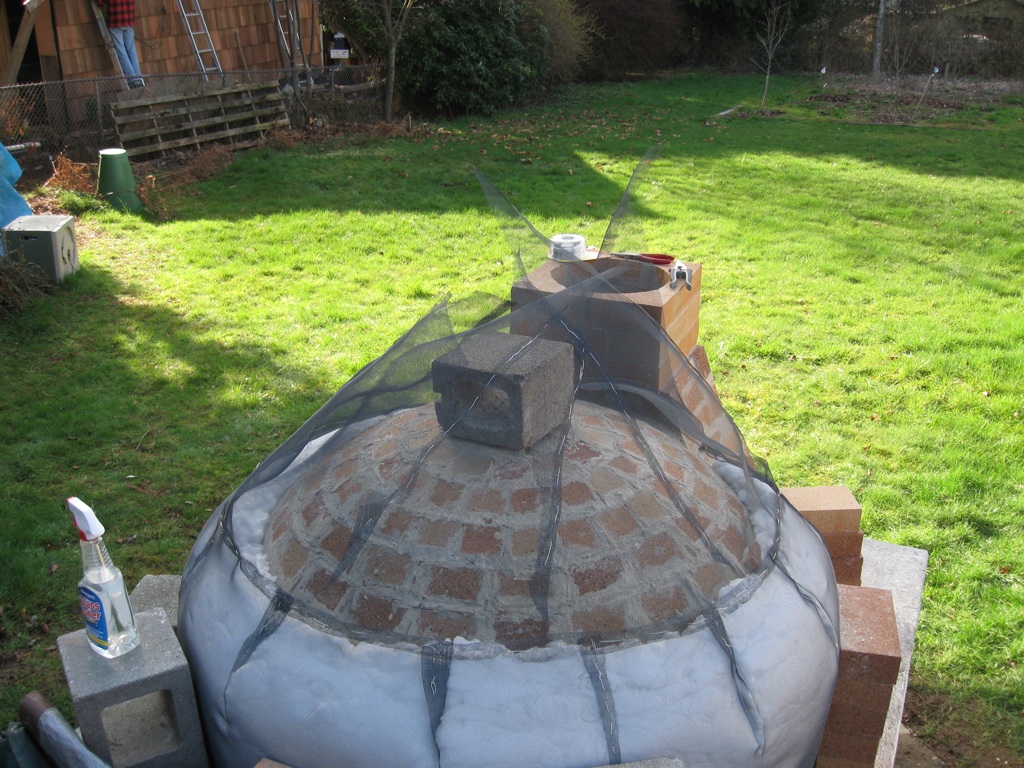
 Sewing the screen into a dome shape was excrutiating. Just about killed my back.
 Installing the InsWool HP Bulk insulation.
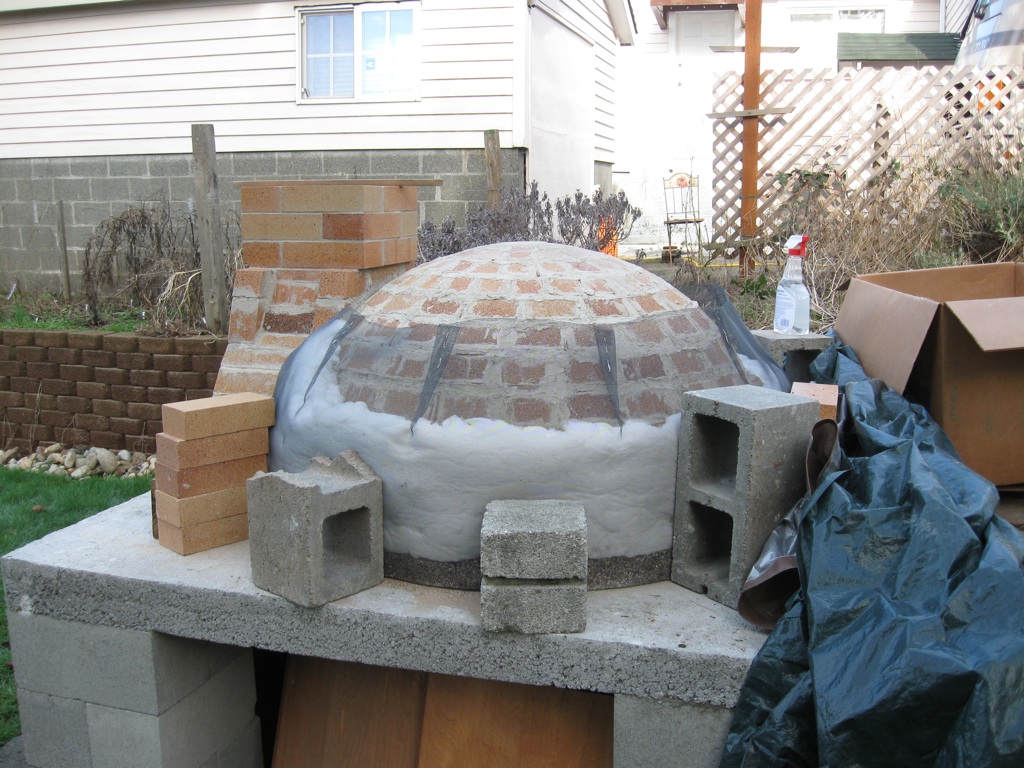
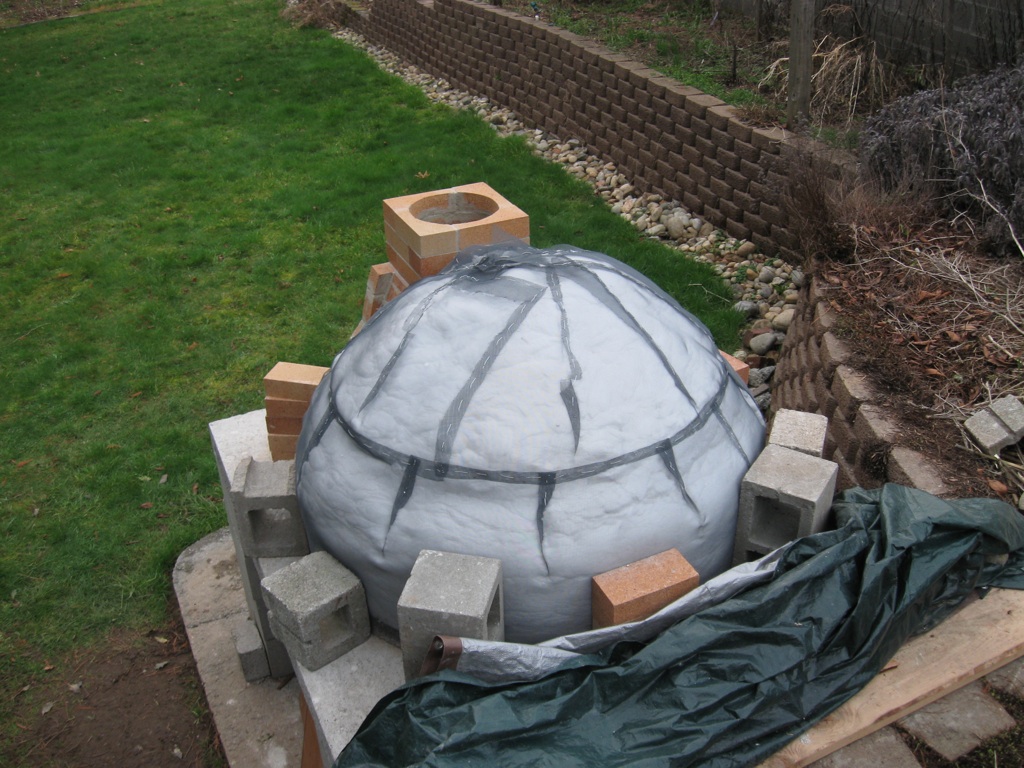
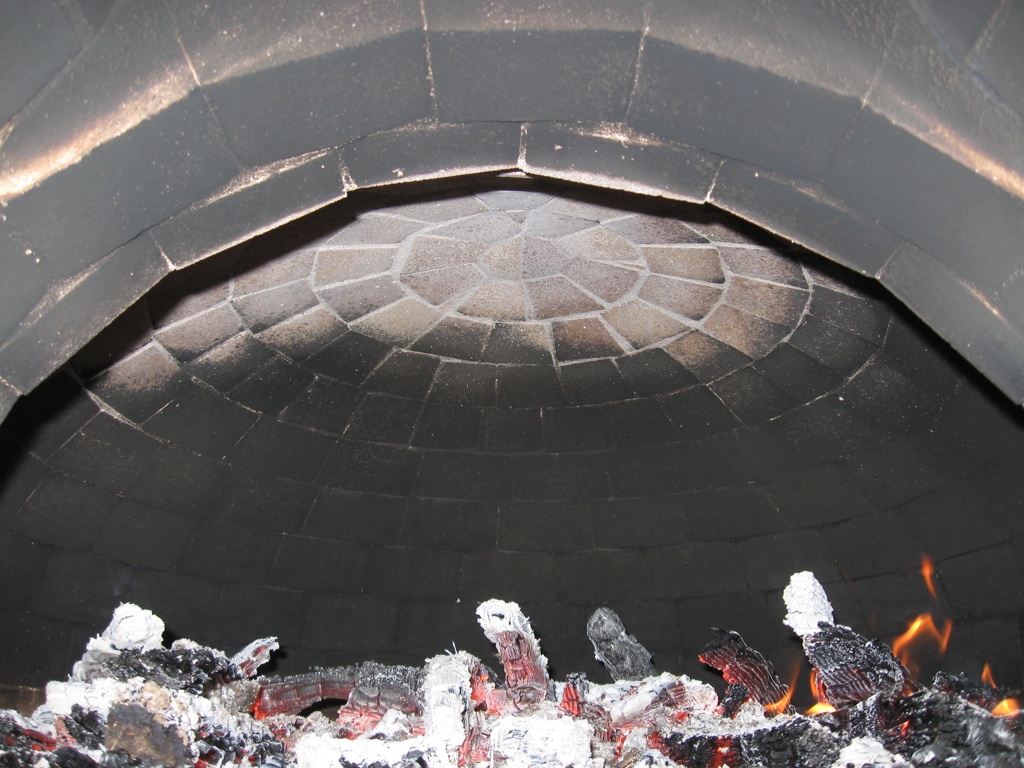
 The InsWool HP Bulk fully installed. It is about three inches thick on the sidewalls and six inches thick at the apex. However, it is more densely packed on the sidewalls (I was running low toward the end), so the insulation may be approximately equivalent. Ideally, it would be considerablly more insulated at the apex.
 The InsWool HP Bulk fully installed.
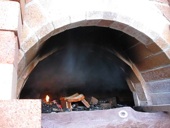
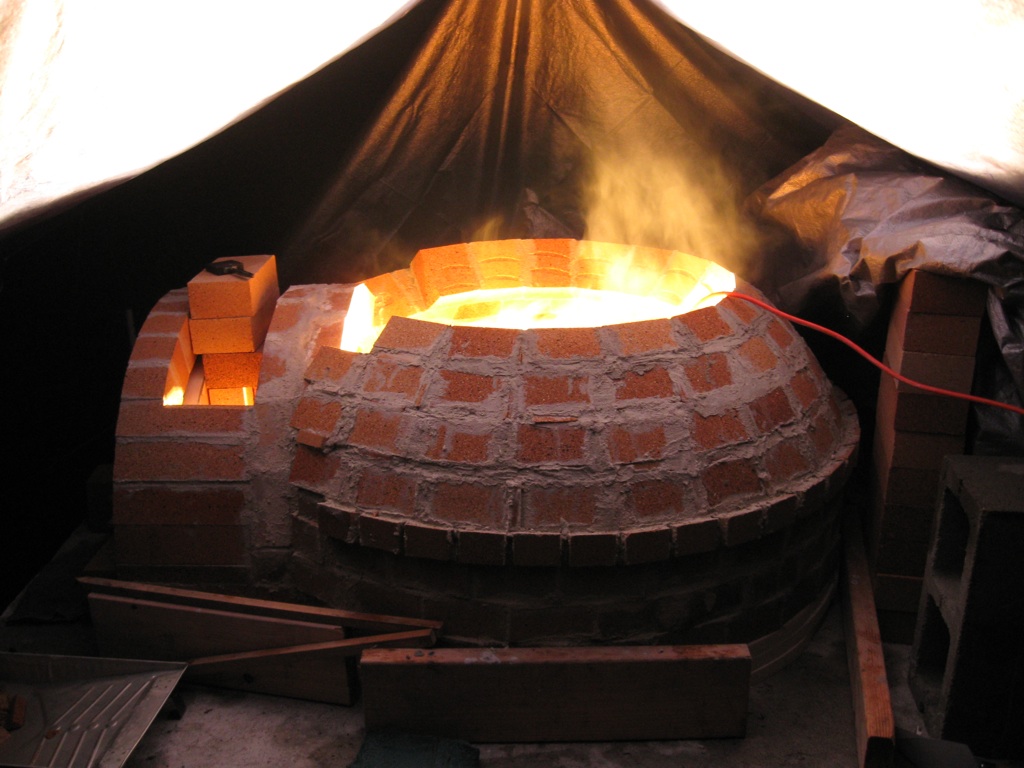
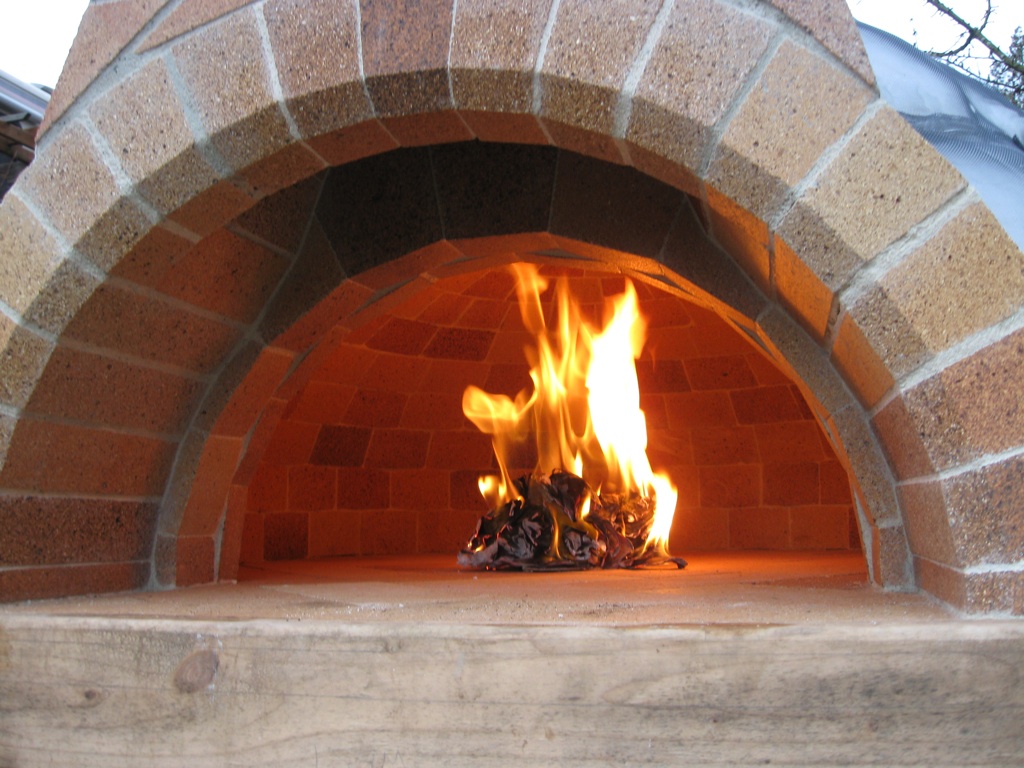
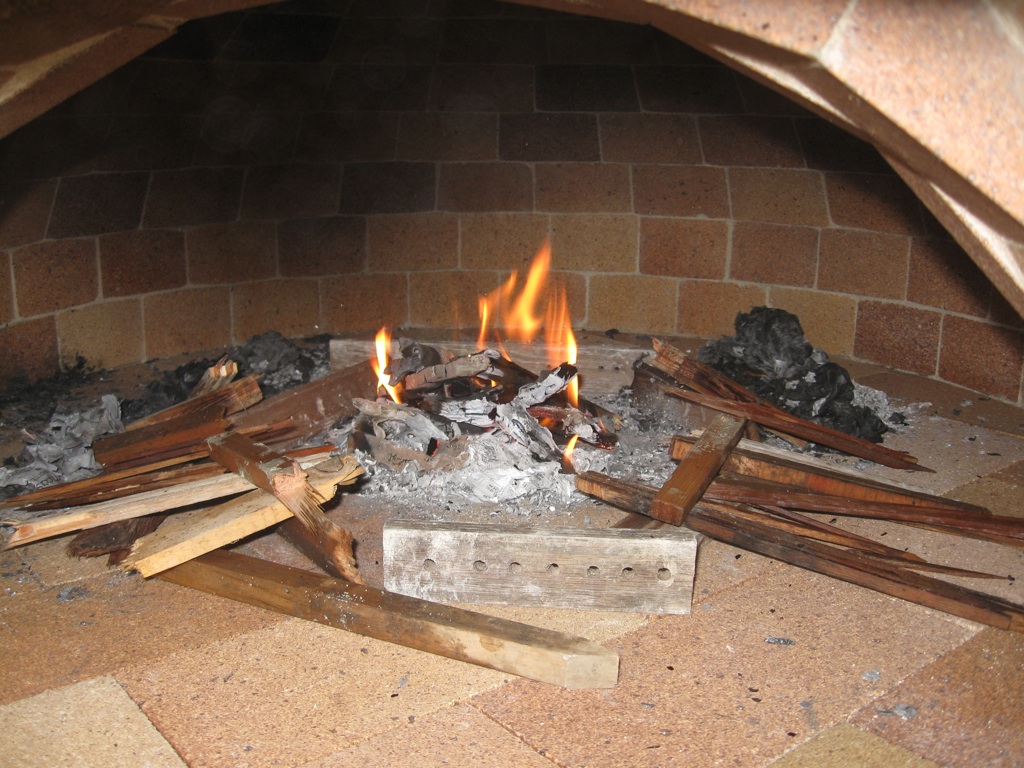
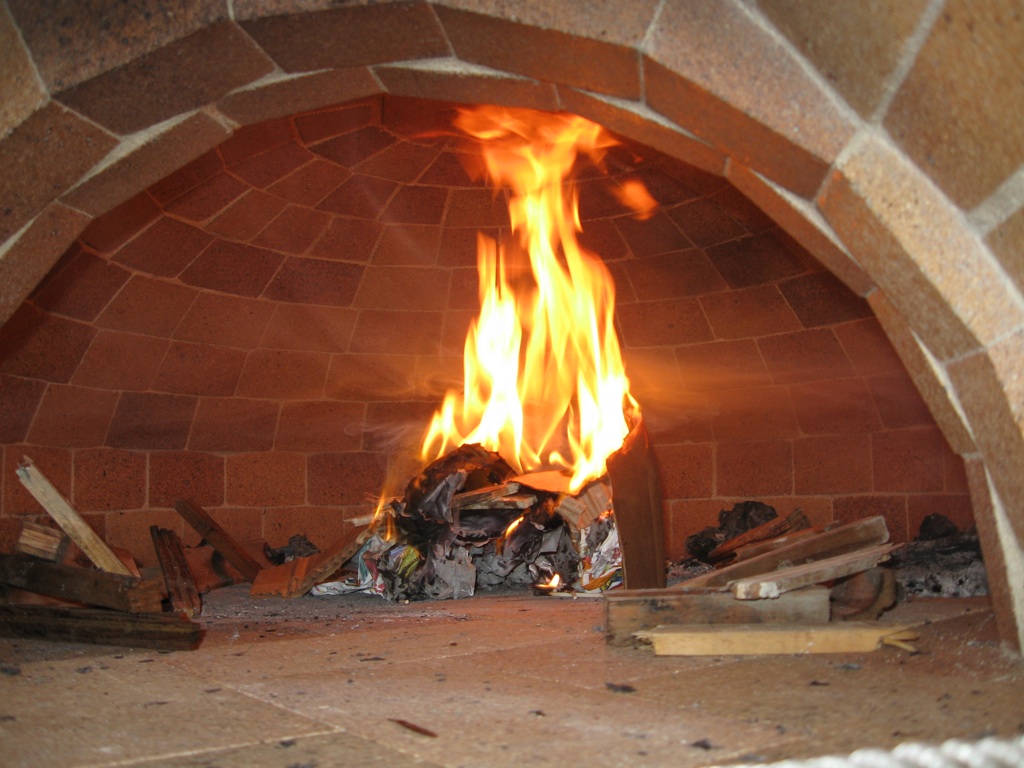
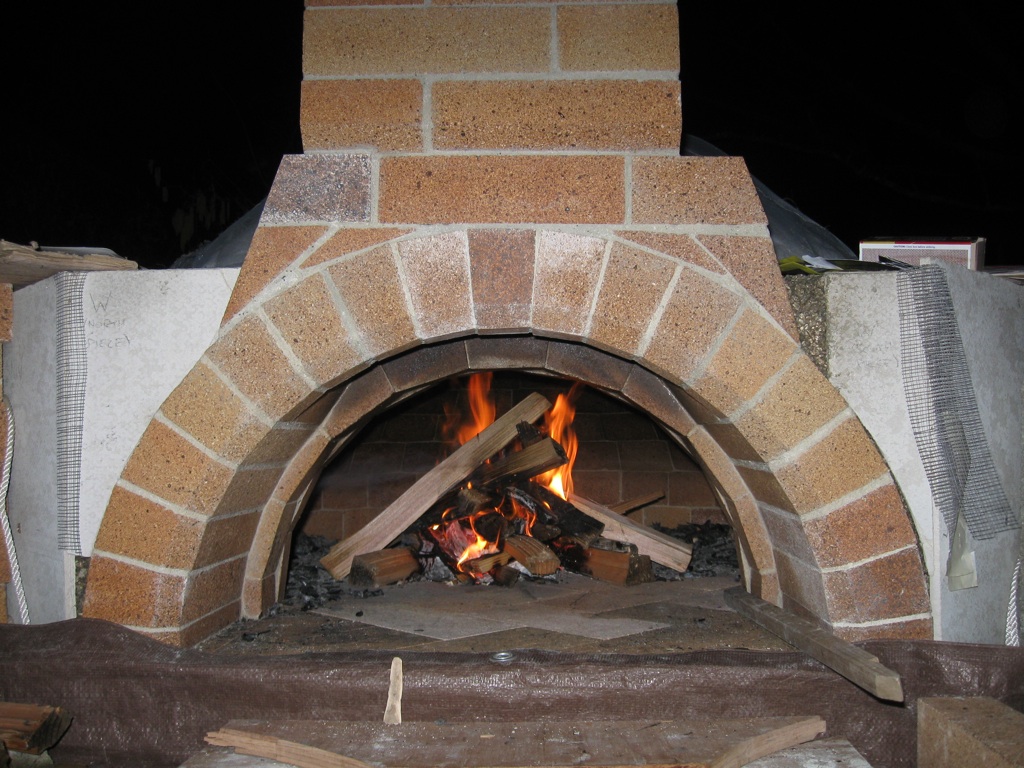
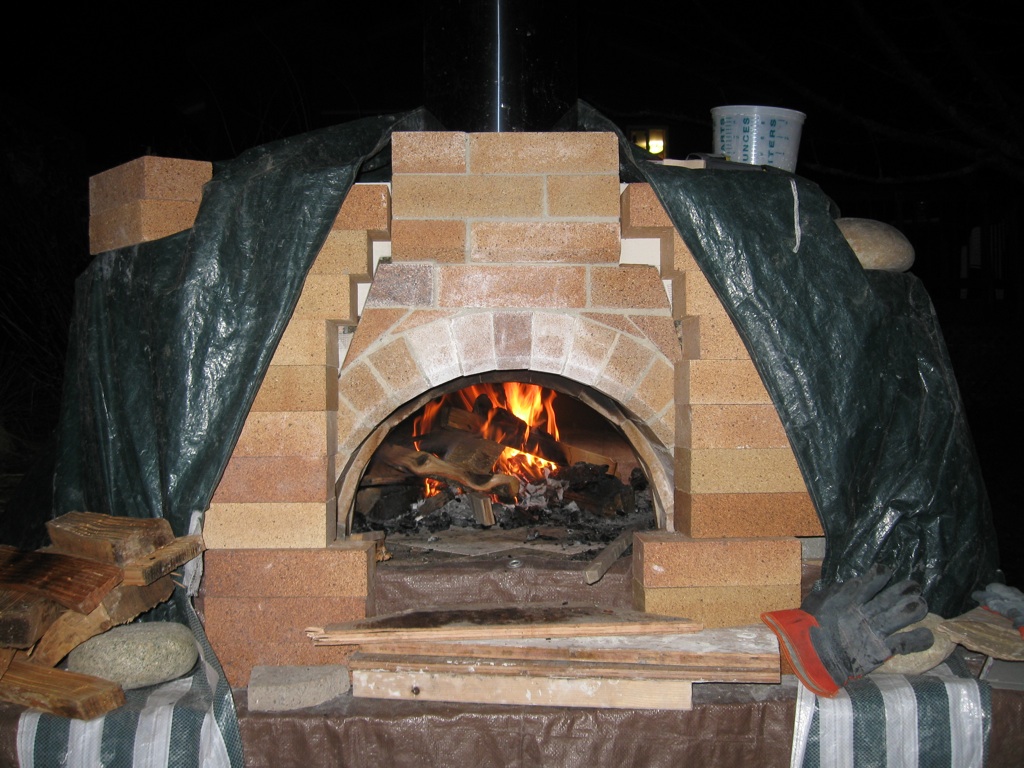
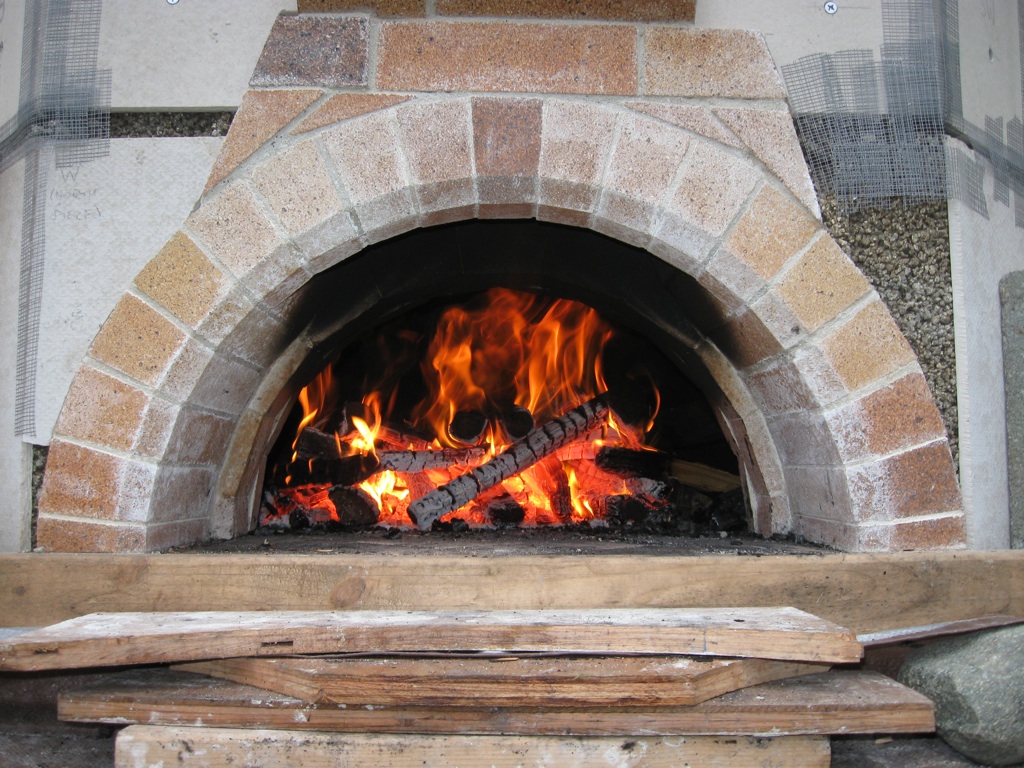
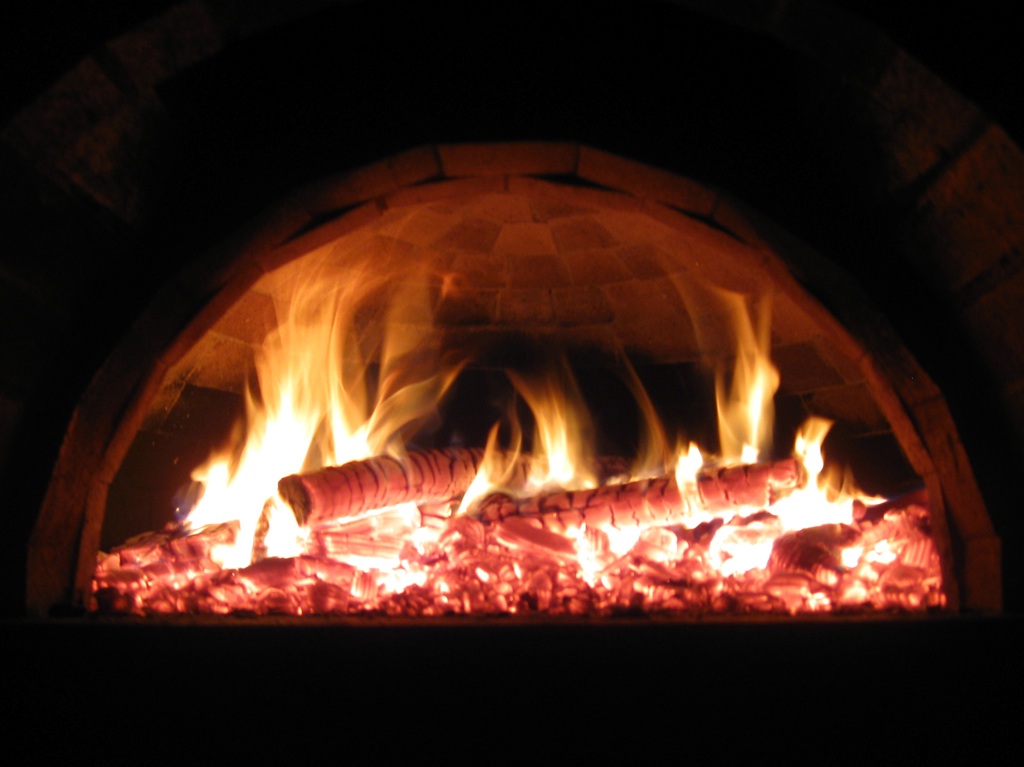
 First curing fire. The idea here is to progressively increase the fires by about 100 degrees each over a period of a week.
 First curing fire.
 First curing fire.
 First curing fire.
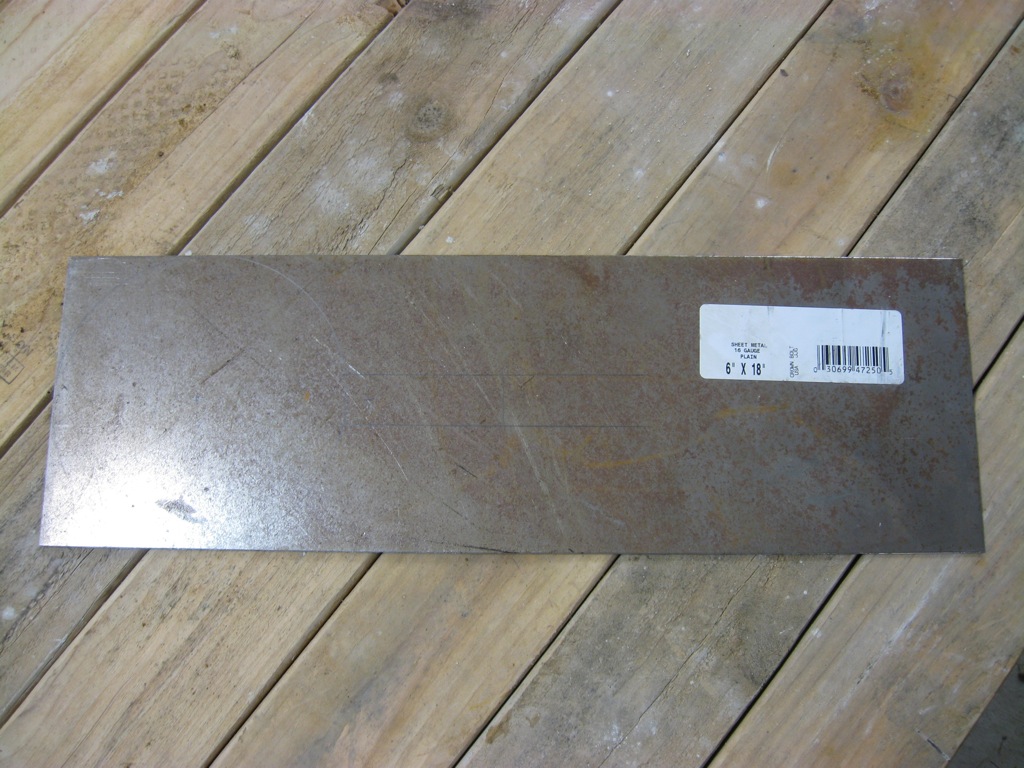
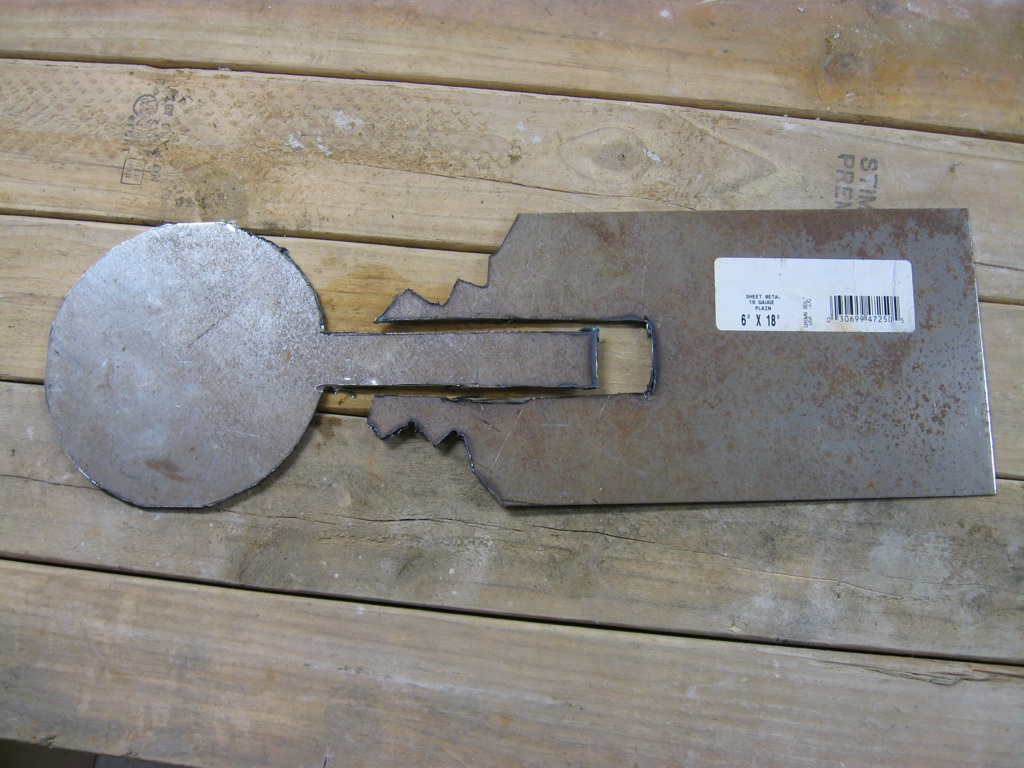
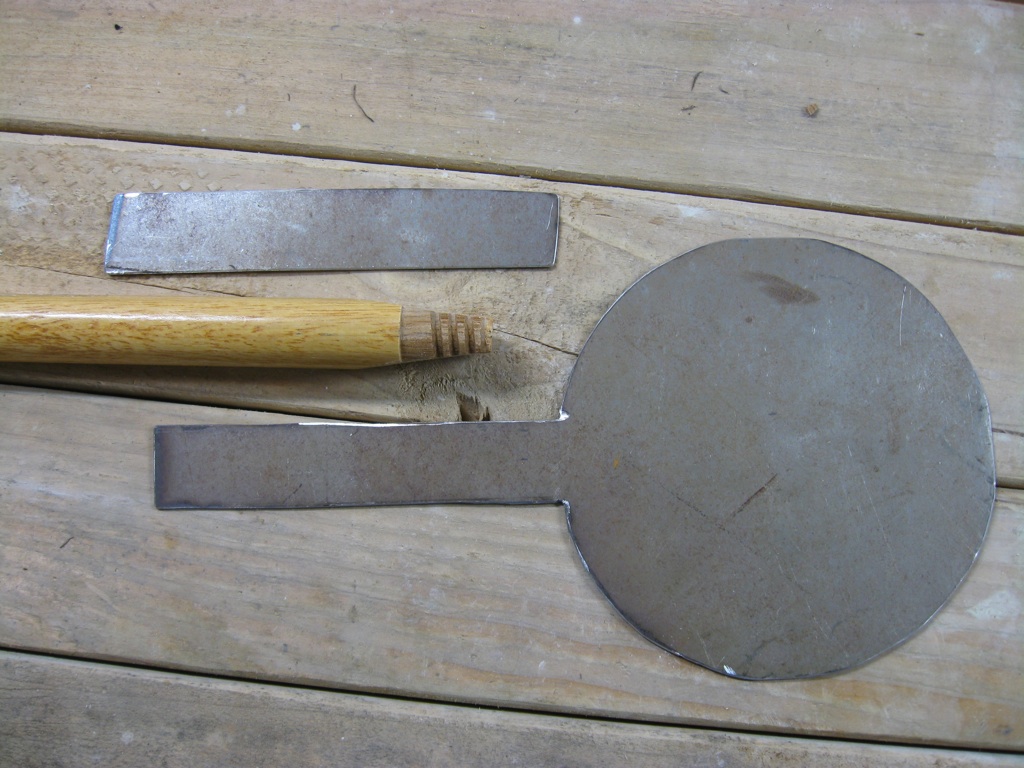
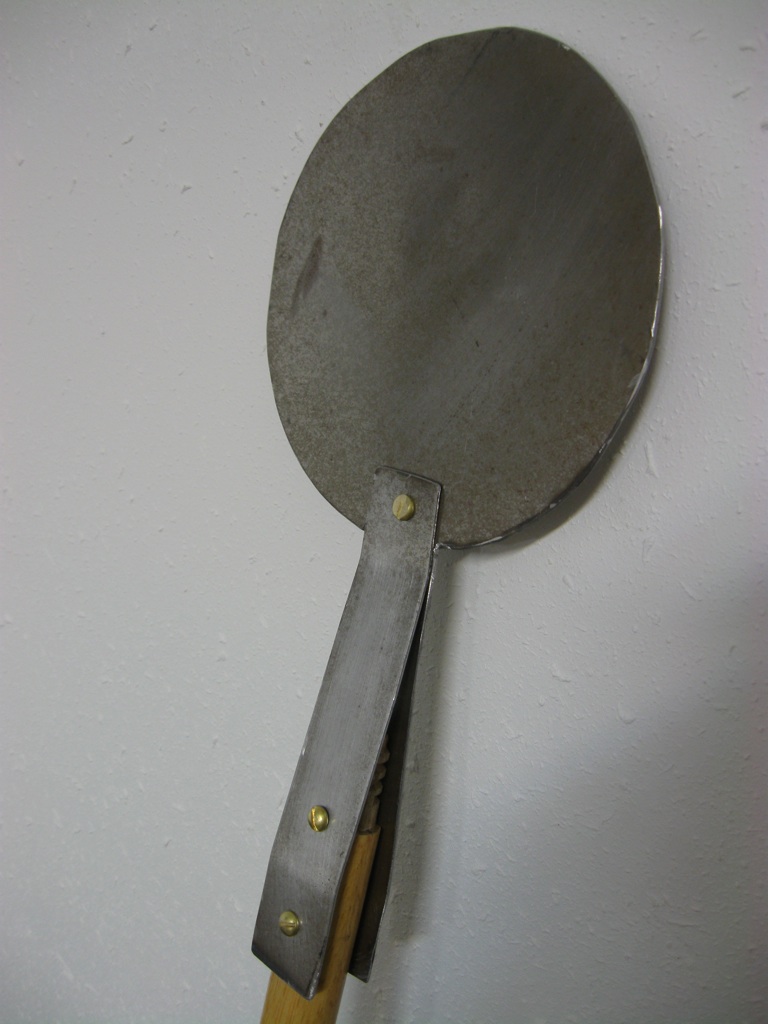
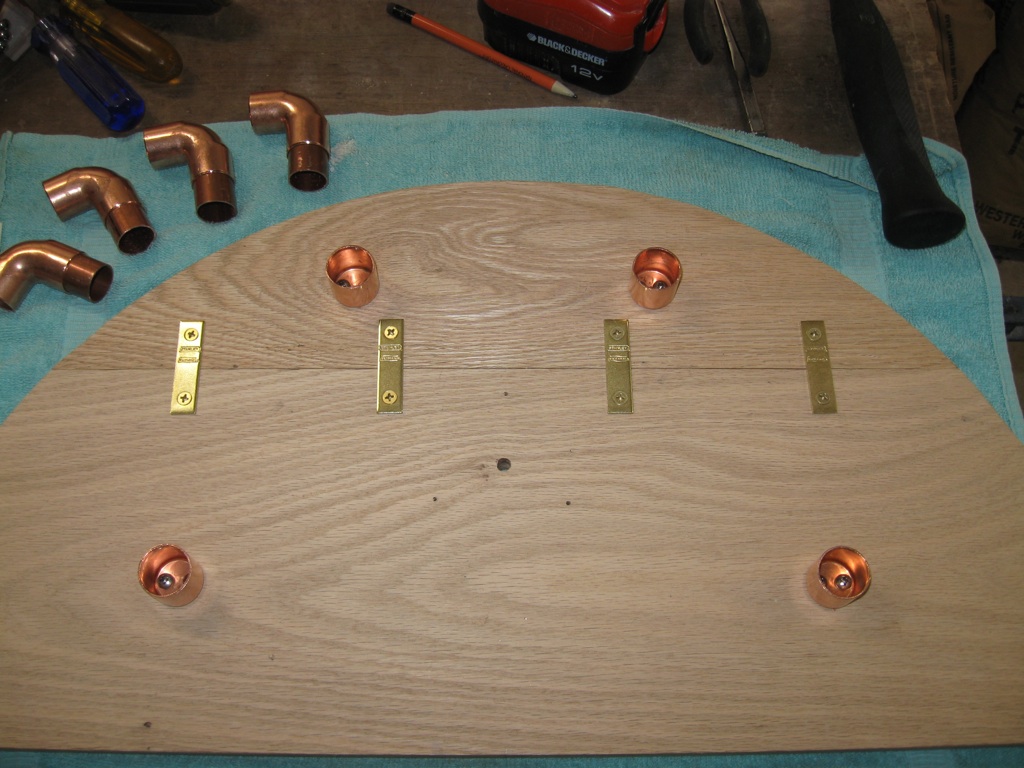
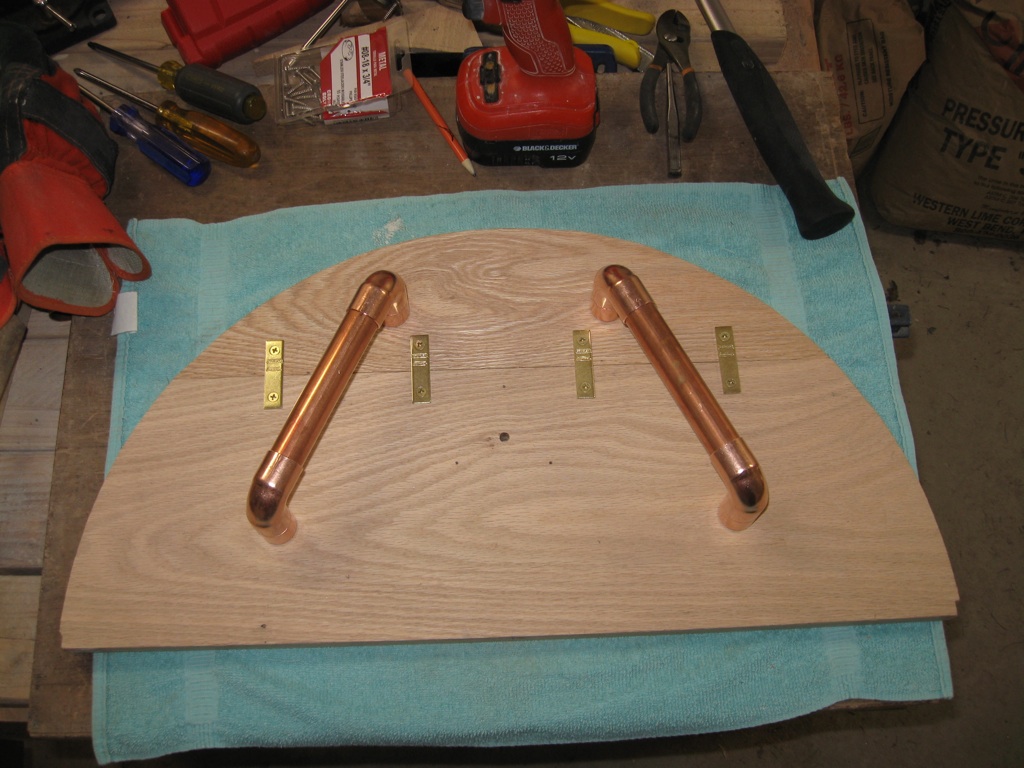
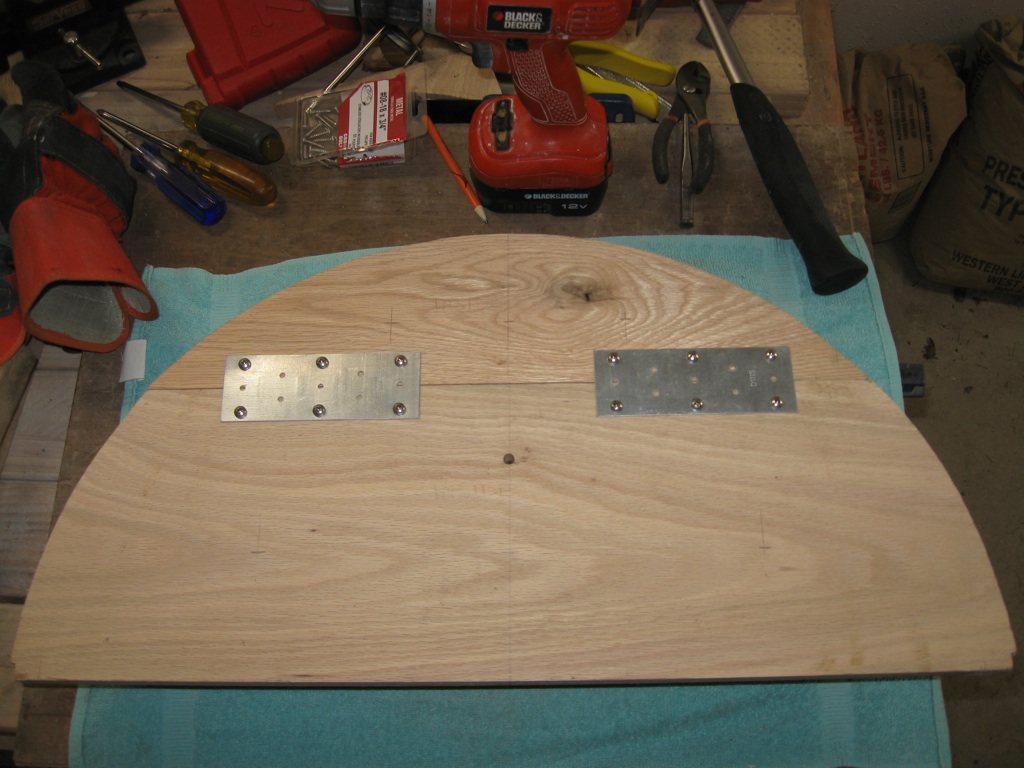
 Construction of a 6" 16 gauge steel round pizza peel for manipulating pizzas inside the oven.
 Construction of a 6" 16 gauge steel round pizza peel for manipulating pizzas inside the oven.
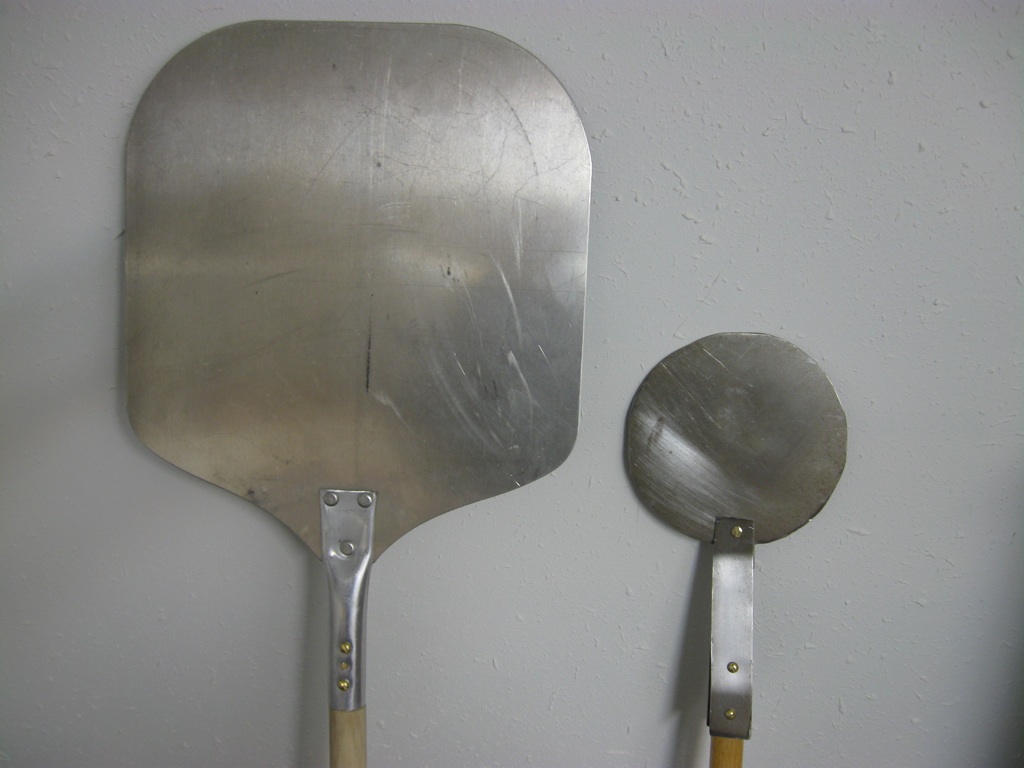
 Conversion of a 12" aluminum rectangular pizza peel from a ridiculously short handle to a long handle.
 After the first curing fire I decided to fill the holes in the dome-arch merges. Here are some 'before' shots.
 After the first curing fire I decided to fill the holes in the dome-arch merges. Here are some 'in-construction' shots.
 After the first curing fire I decided to fill the holes in the dome-arch merges. Here are some 'after' shots.
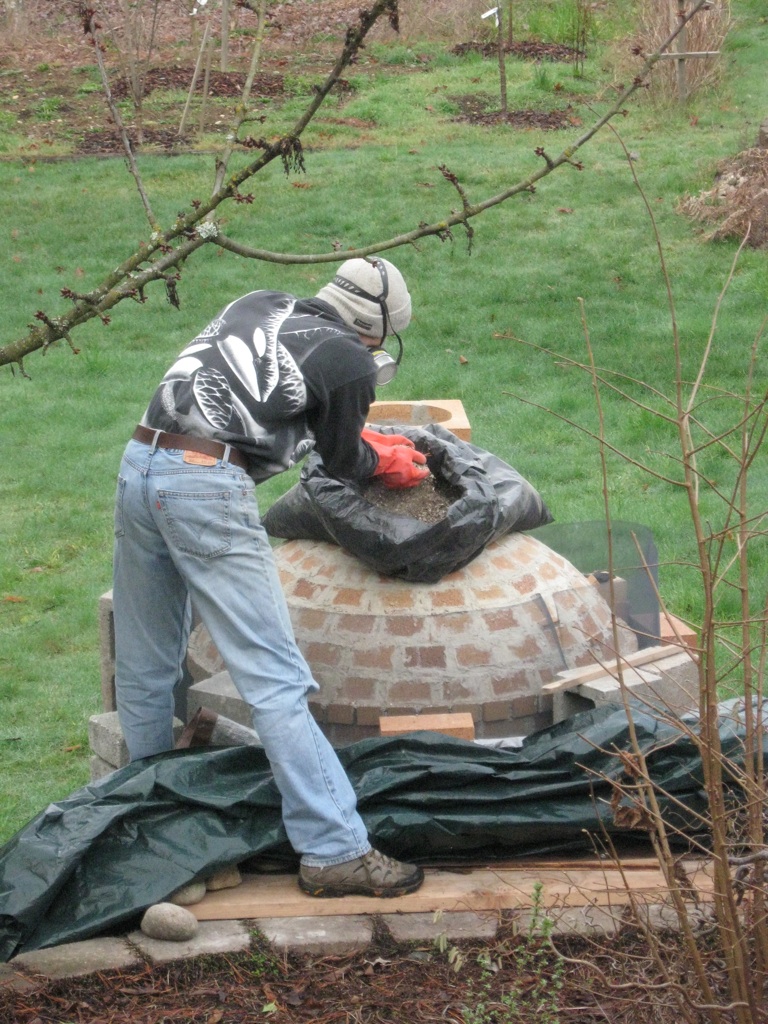
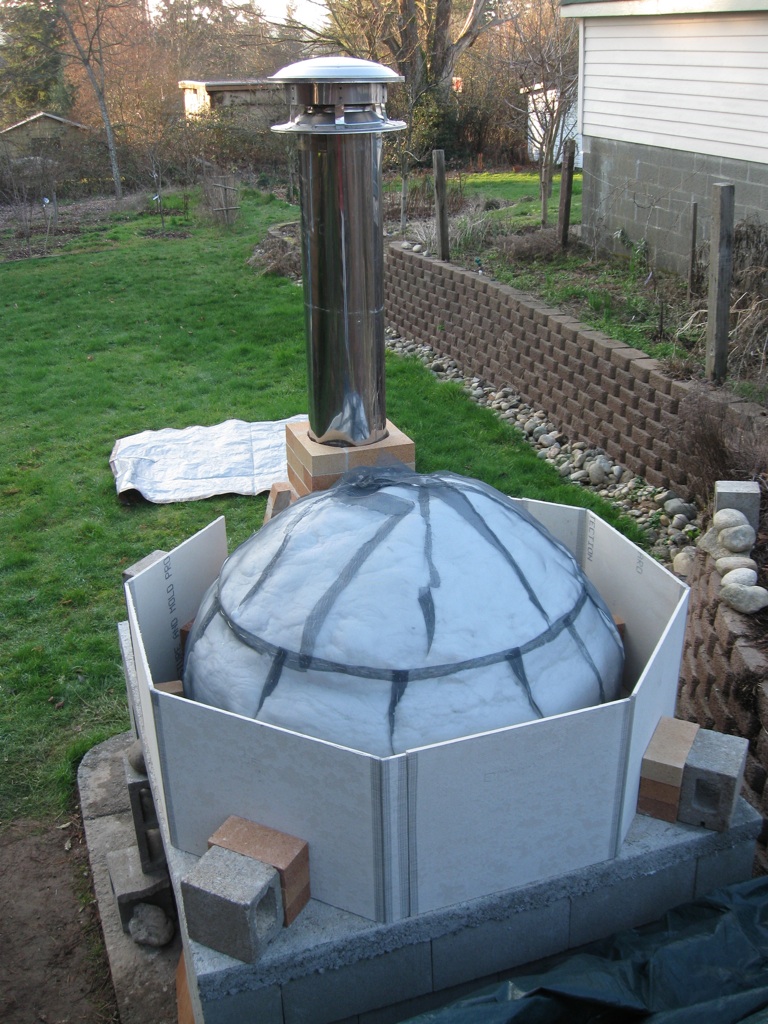
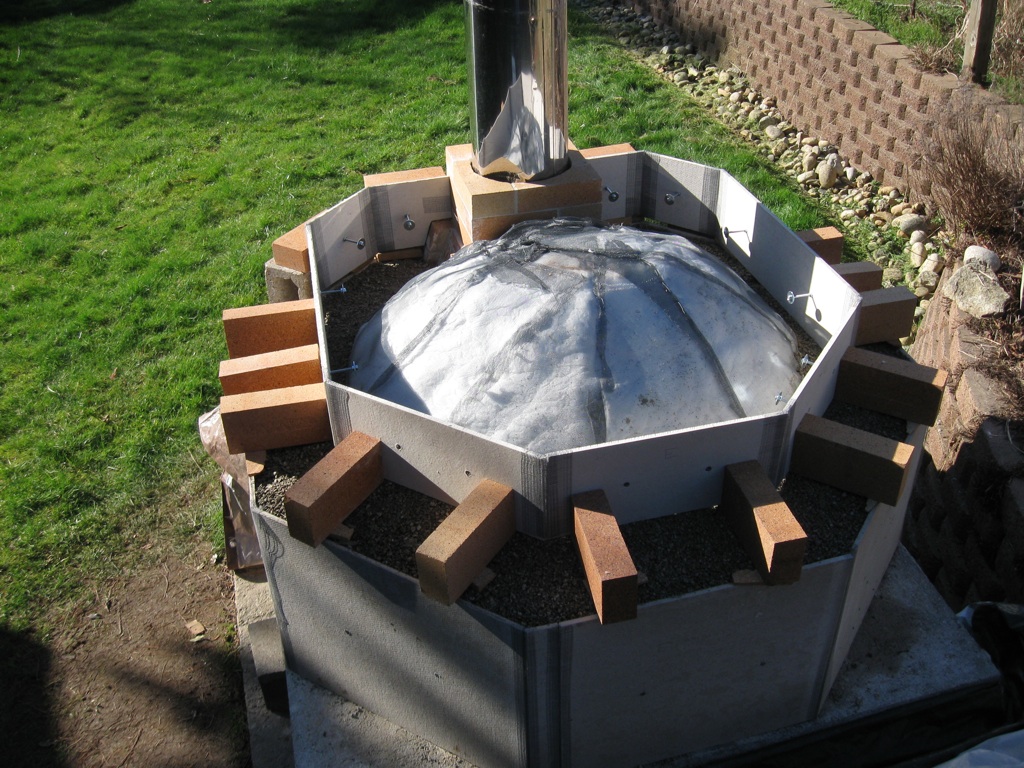
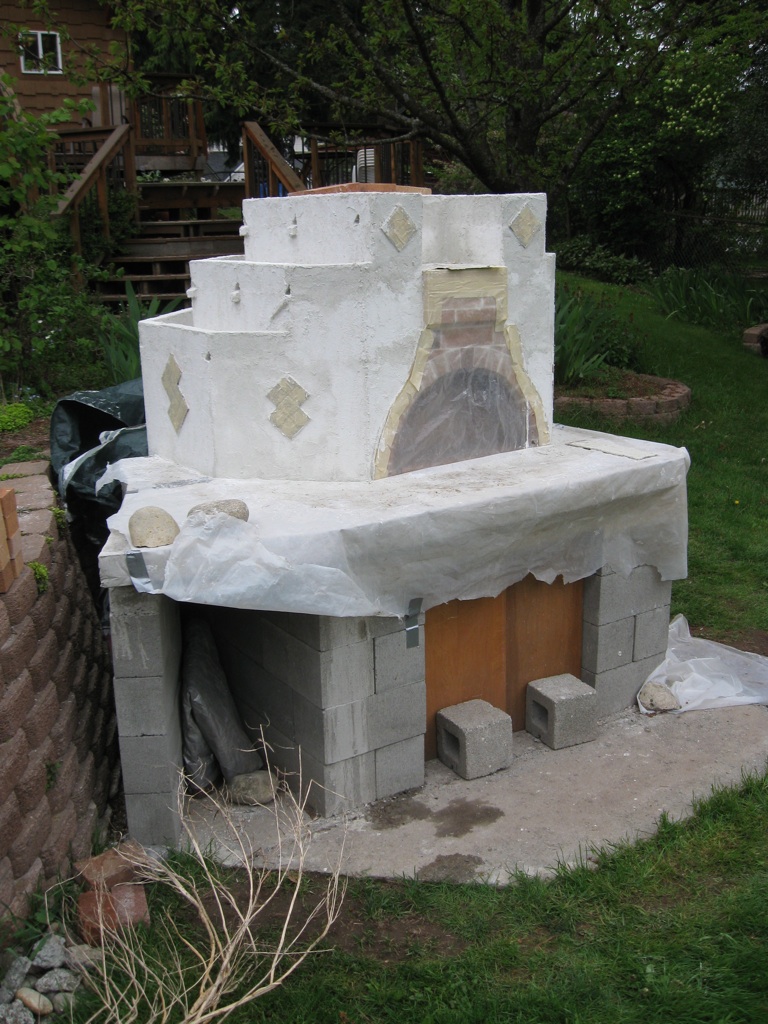
 The terraced enclosure will consist of poured vermicrete. These hardibacker boards will comprise both the form for pouring the vermicrete and the permanent exterior wall to shore up the vermicrete, which is pretty weak stuff.
 Construction of a 6" 16 gauge steel round pizza peel for manipulating pizzas inside the oven.
 Construction of a 6" 16 gauge steel round pizza peel for manipulating pizzas inside the oven.
 My growing collection of oven tools. The large peel was purchased as-is but with a very short handle which I replaced. The small peel was cut from 16 gauge steel. The third tool I desperately need is a "rake" (toothless) for pulling ashes out of the oven or shoving them to one side during cooking.
 My growing collection of oven tools. The large peel was purchased as-is but with a very short handle which I replaced. The small peel was cut from 16 gauge steel.
 A 6" 16 gauge steel round pizza peel for manipulating pizzas inside the oven.
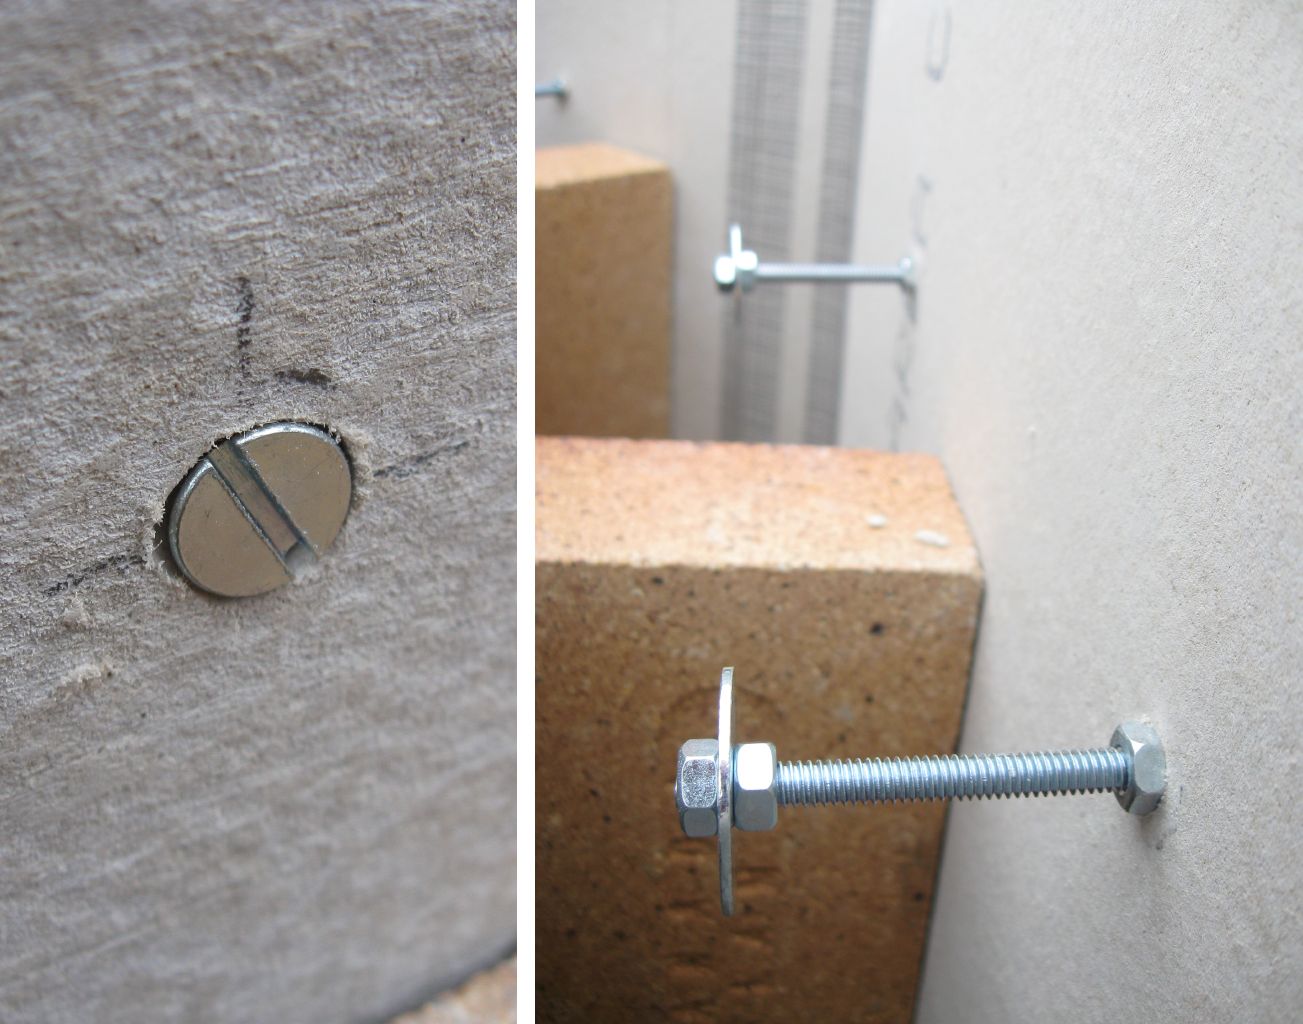
 I inserted bolts with offset washers through the hardibacker to lock inside the vermicrete. Most likely unncessary, but what the heck.
 About to fill the first terrace vermicrete.
 Mixing (shake-n-bake style) the vermicrete dry-mix 8:1 vermiculite:portland. The second terrace is 4:4:1 vermiculite:perlite:portland and the third terrace is 5:5:1.
 Dry vermicrete. Just add water.
 Wet vermicrete, approximately 3:1 vermicrete:water, gently mixed by hand up the elbows in a wheelbarrow, with a little help from a trowel. Gotta be gentle so the vermiculite doesn't break down. See the associated videos to get a better feel for this stuff.
 Wet vermicrete. See the associated videos to get a better feel for this stuff.
 Shoveling vermicrete into the hardibacker form around the dome.
 Not done yet.
 Not done yet.
 First terrace vermicrete done, 300:37.5 quarts (8:1) vermiculite:portland (~10 cubic feet vermiculite), hydrated 1/3rd.
 First terrace vermicrete done, 300:37.5 quarts (8:1) vermiculite:portland (~10 cubic feet vermiculite), hydrated 1/3rd.
 First terrace vermicrete done, 300:37.5 quarts (8:1) vermiculite:portland (~10 cubic feet vermiculite), hydrated 1/3rd.
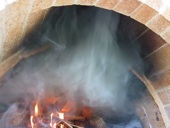
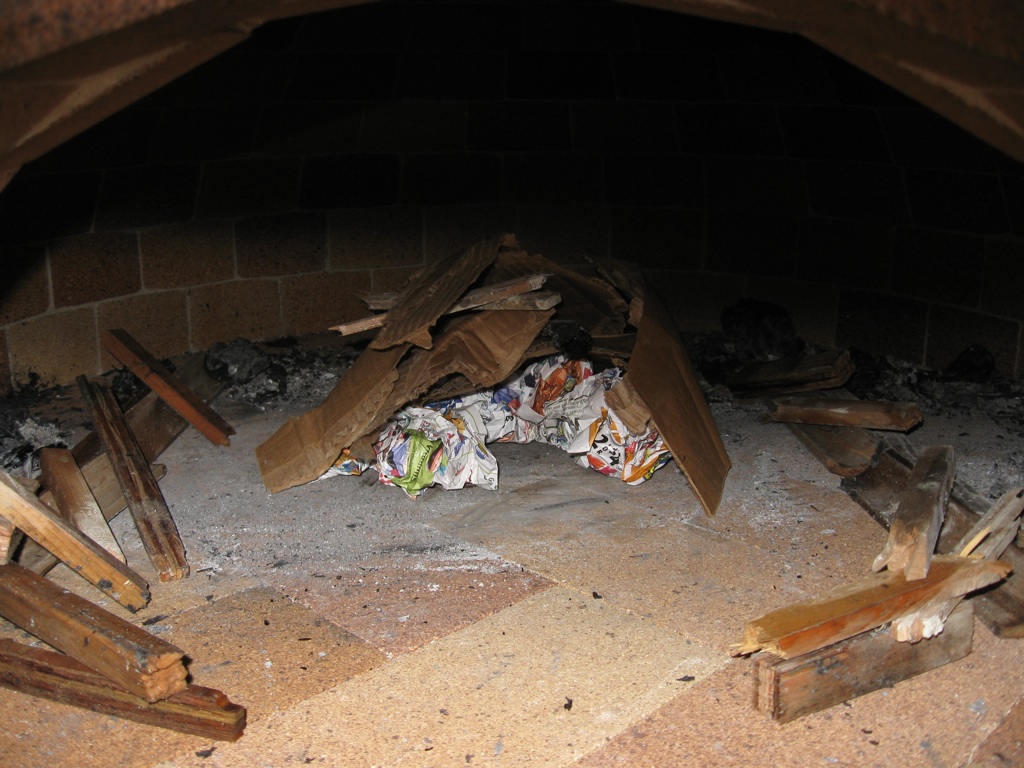
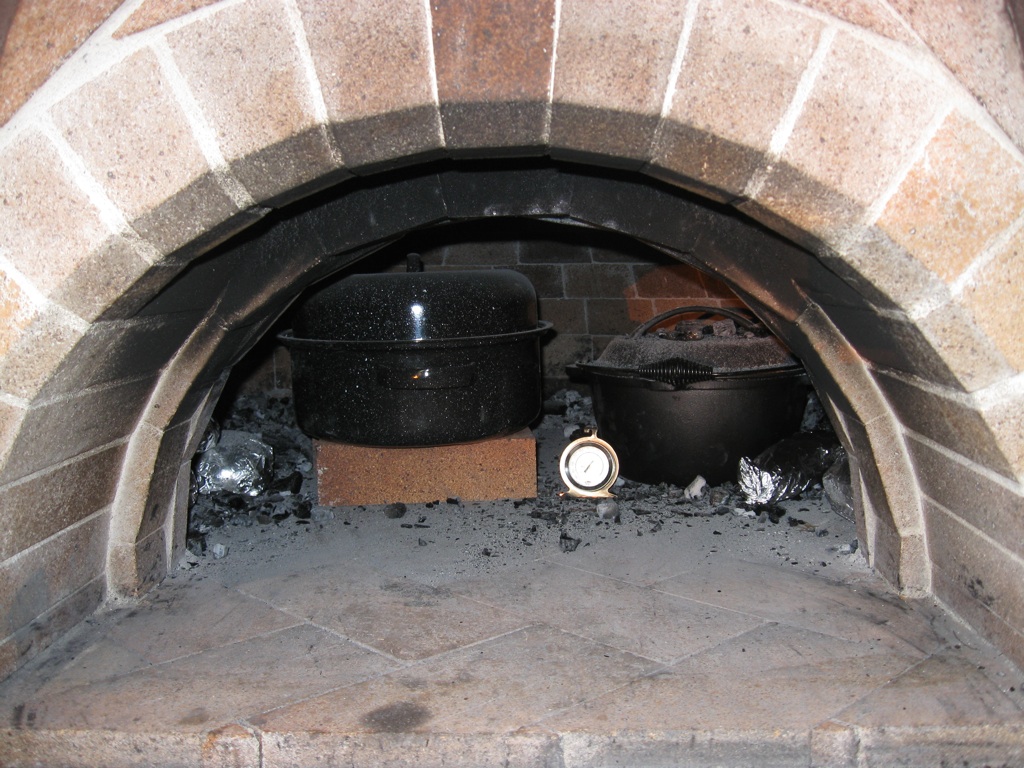
 Second curing fire. I didn't increase the intensity over the first fire, but I spread it out into two fires on either side instead of one in the center.
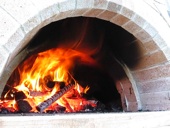
 Third curing fire. The wood around the perimeter is drying out for the next fire.
 Fourth curing fire. The wood around the perimeter is drying out for the next fire.
 Fourth curing fire. The wood around the perimeter is drying out for the next fire.
 Fifth curing fire.
 Sixth curing fire.
 Sixth curing fire.
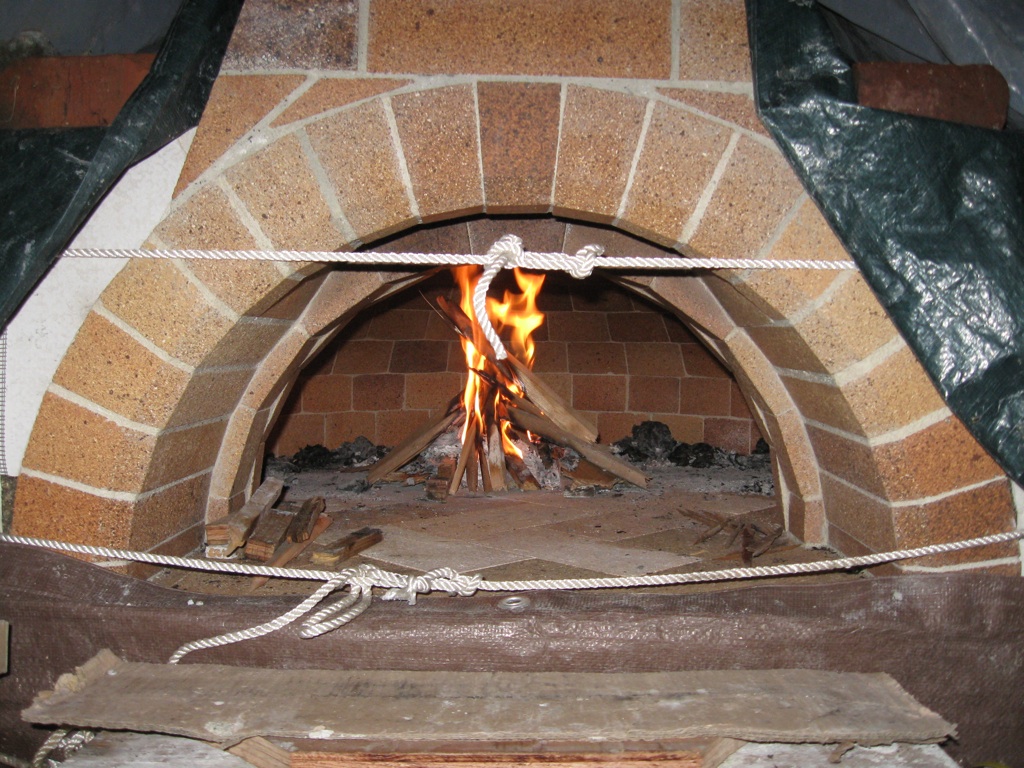
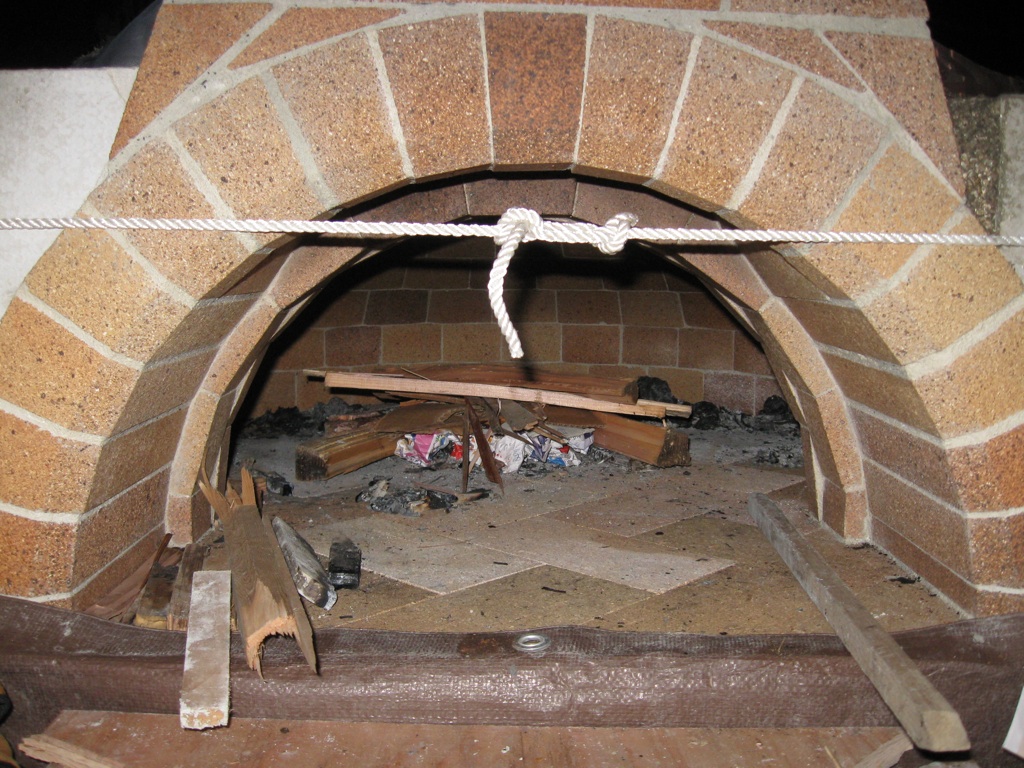
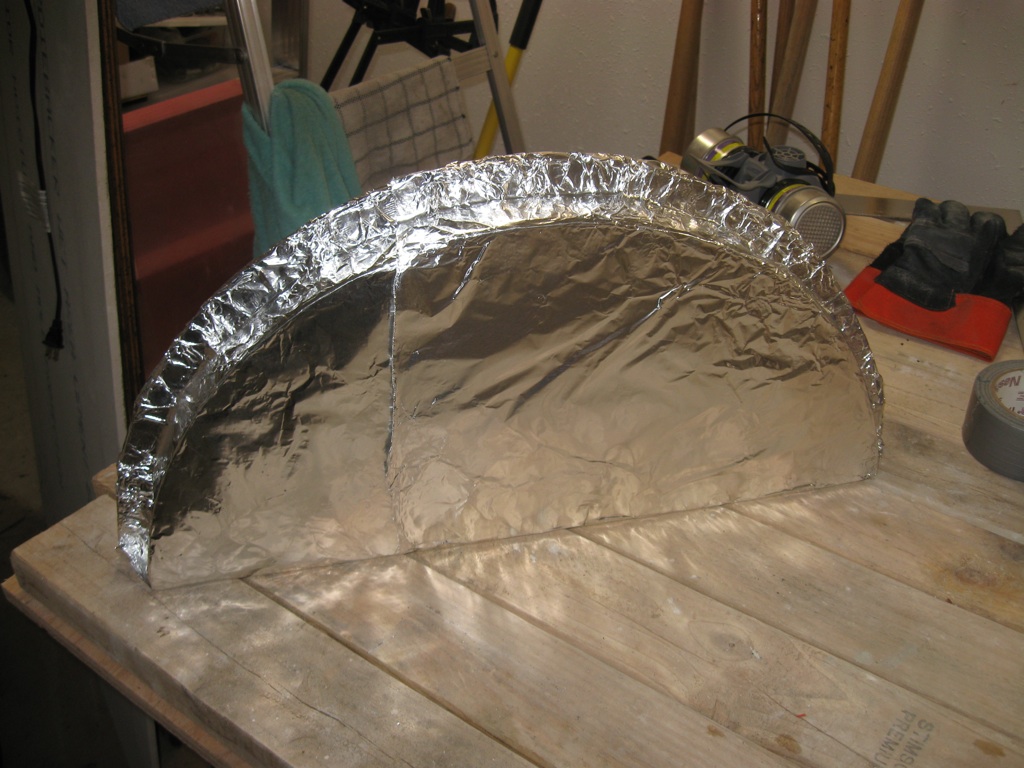
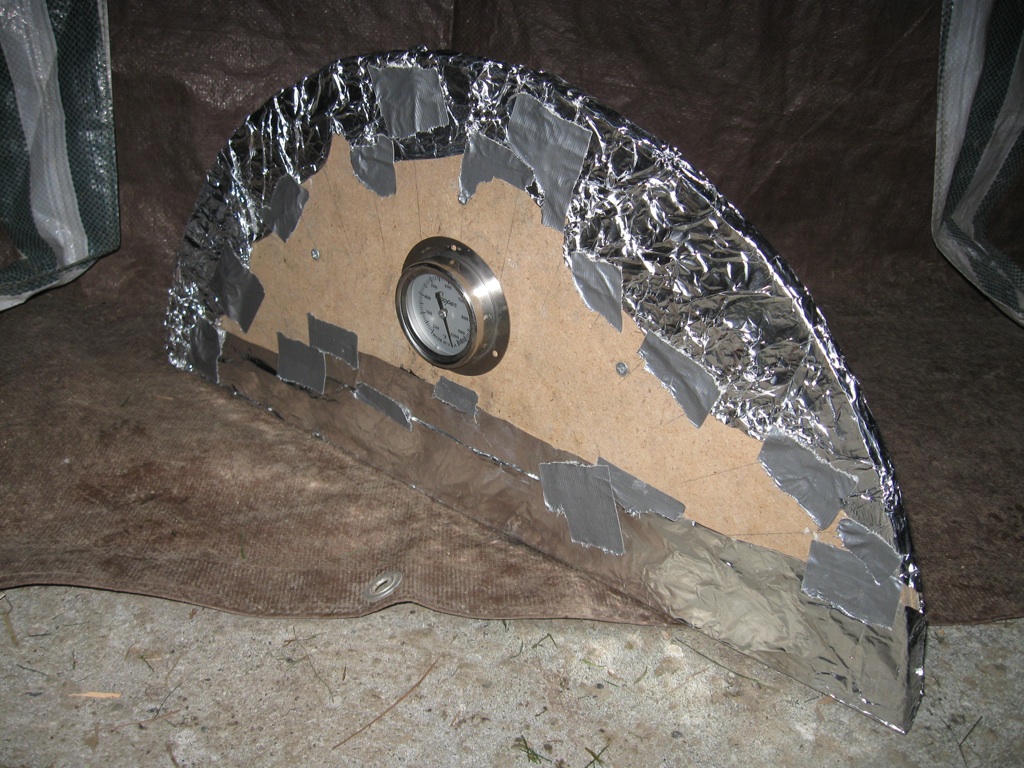
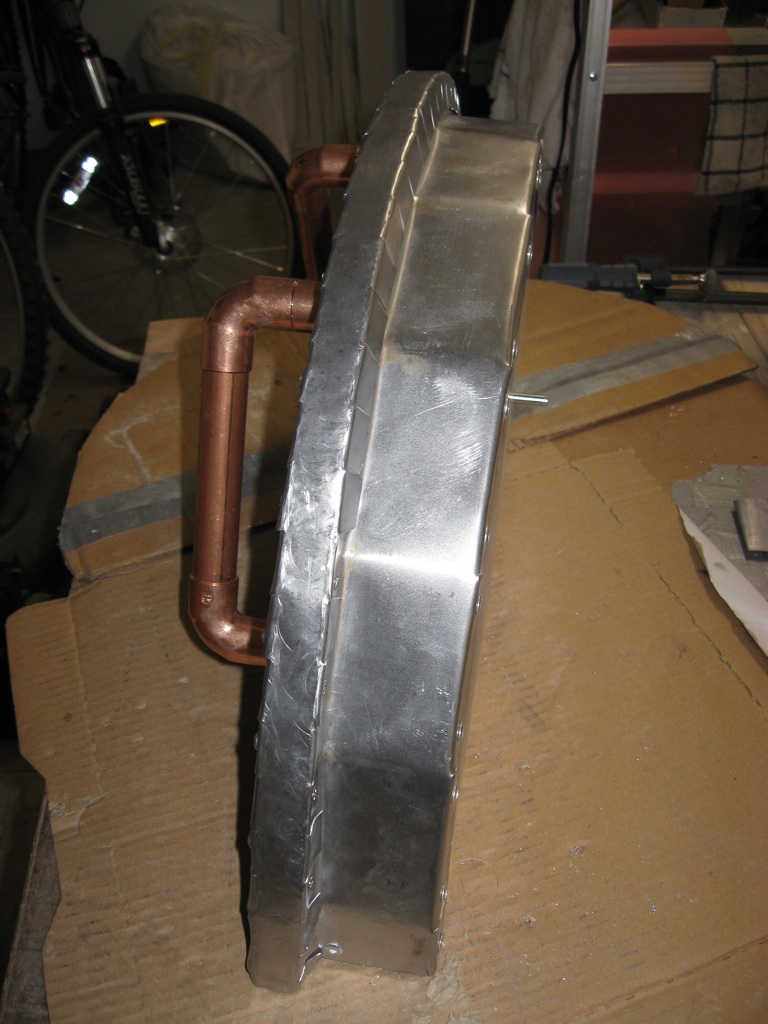
 I use the original arch form as a "door" during the curing fires to keep the heat in (I use the heat of one curing fire to dry the wood for the next fire). Therefore, I wrapped the arch form in foil to make sure it stayed safe during the later, hotter curing fires.
 The foil-wrapped arch form used as a door during the curing fires.
 Seventh curing fire.
 Eighth curing fire.
 I wasn't sure if I had enough vermiculite to fill the second and third terraces so I bought two bags of perlite (four cubic feet each). The second and third terraces will be a 50/50 vermiculite/perlite blend.
 About to fill the second terrace vermiperlcrete.
 Shoveling vermiperlcrete into the hardibacker form of the second terrace.
 Not done yet.
 Second terrace vermiperlcrete done, 70:70:17.5 quarts (4:4:1) vermiculite:perlite:portland or 8:1 insulation:portland (~4.7 cubic feet vermiculite/perlite), hydrated 1/3rd.
 Eighth curing fire.
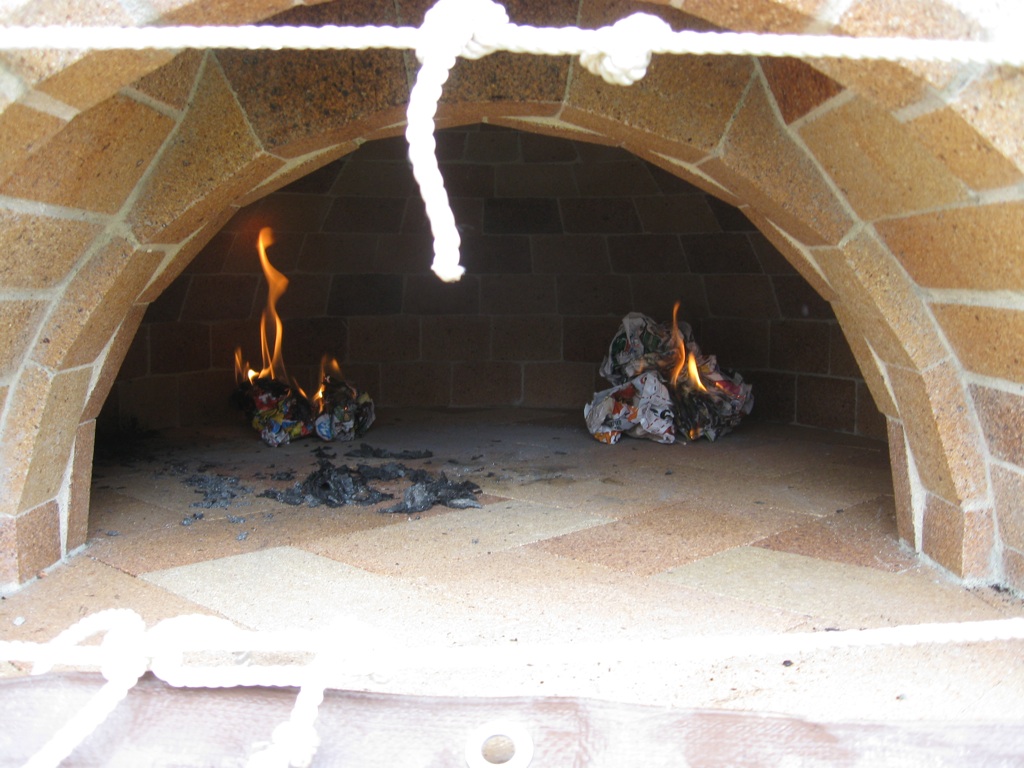
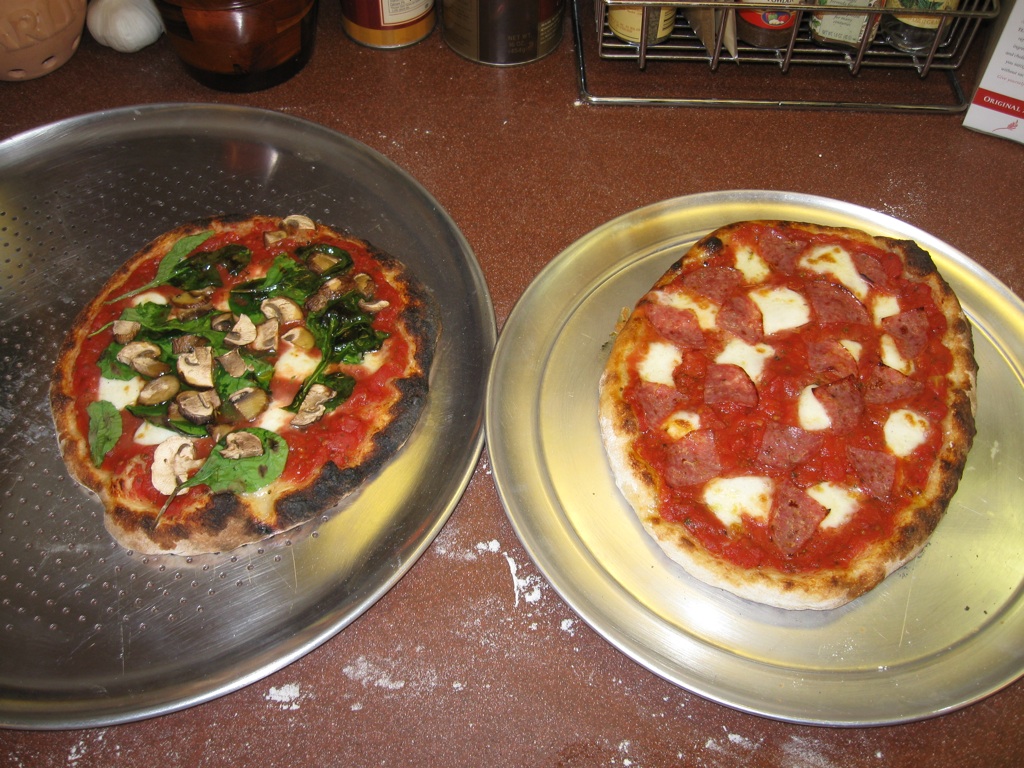
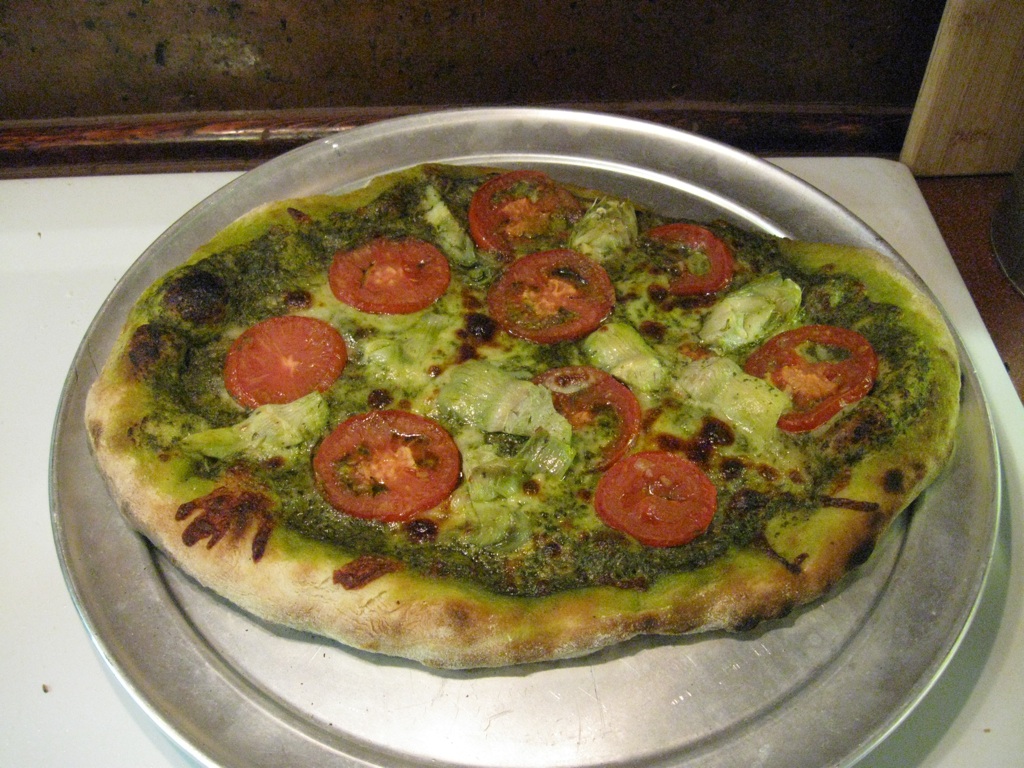
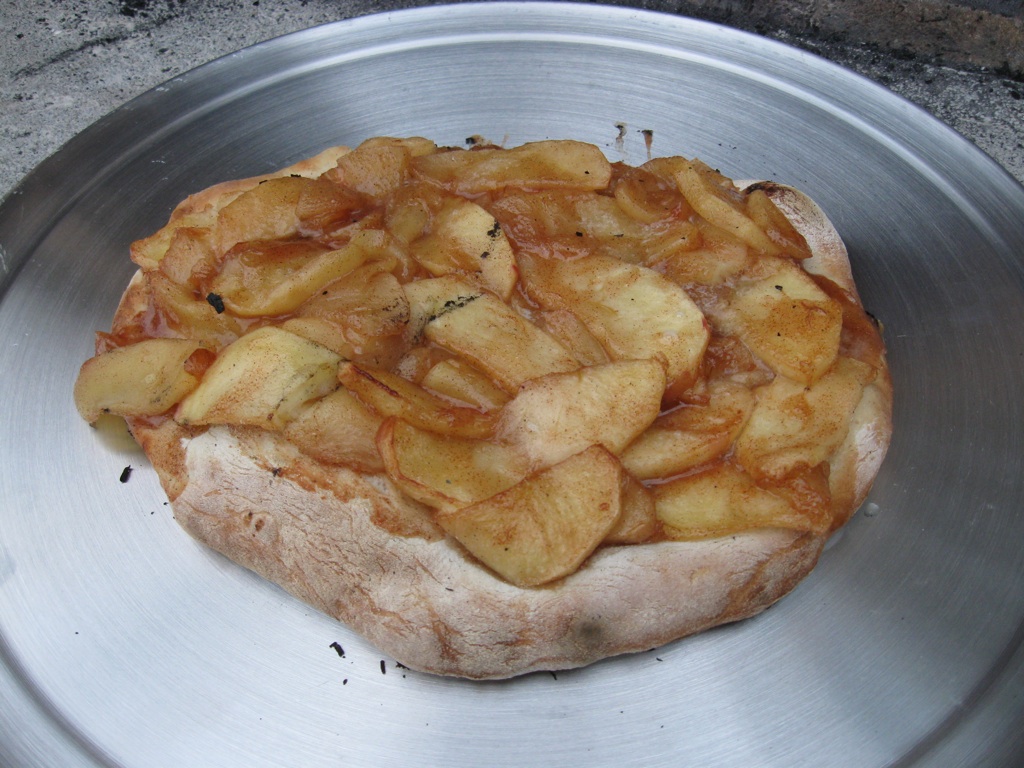
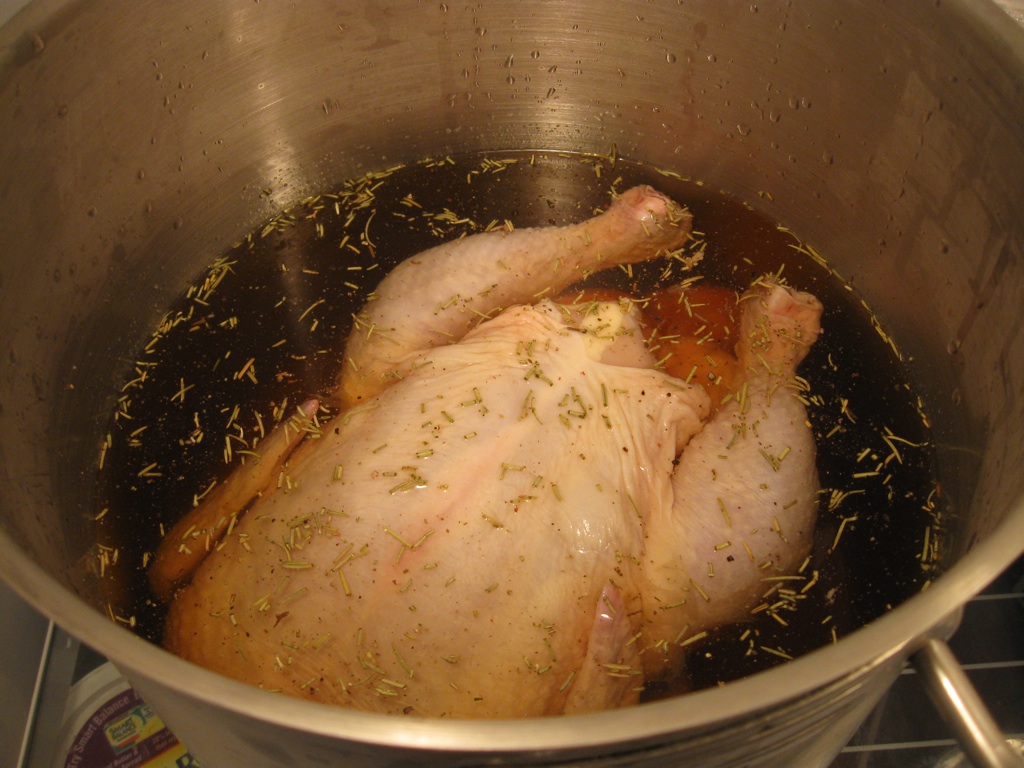
 Ninth curing fire. I had been trying desperately to make some use of the curing fires. I made an earlier attempt at cinnamon toast and failed. I also attempted chicken-pot pies but abandoned the idea before even putting them in the oven. This represents my second toast attempt, which met with mild success.
 Tenth curing fire.
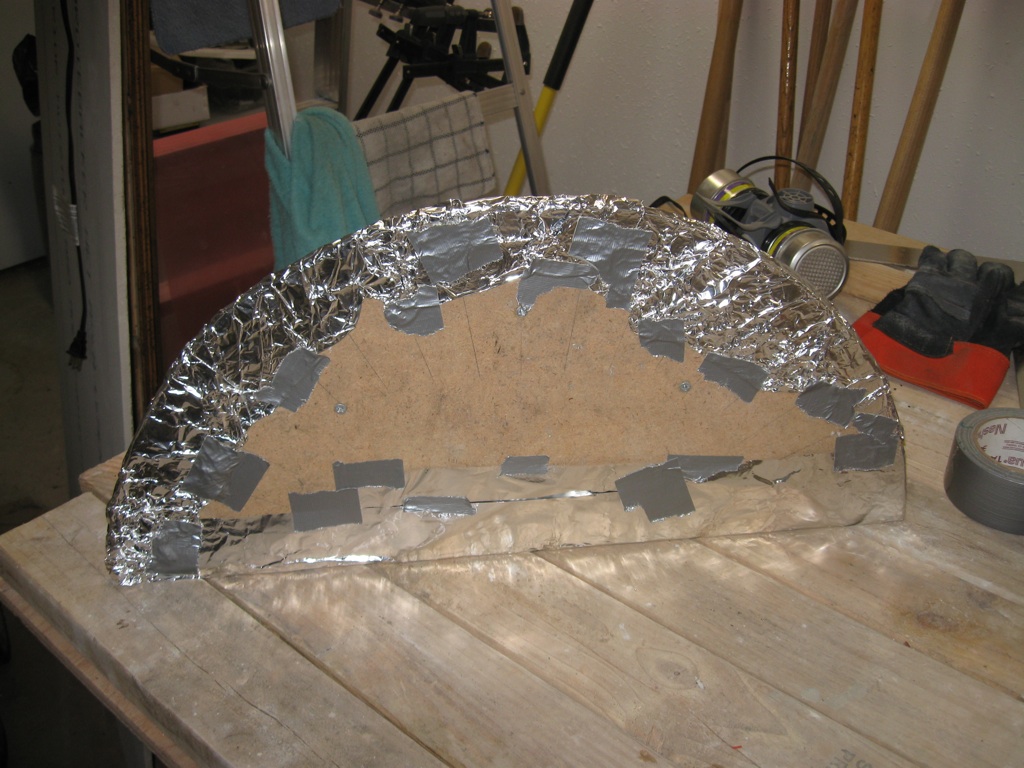
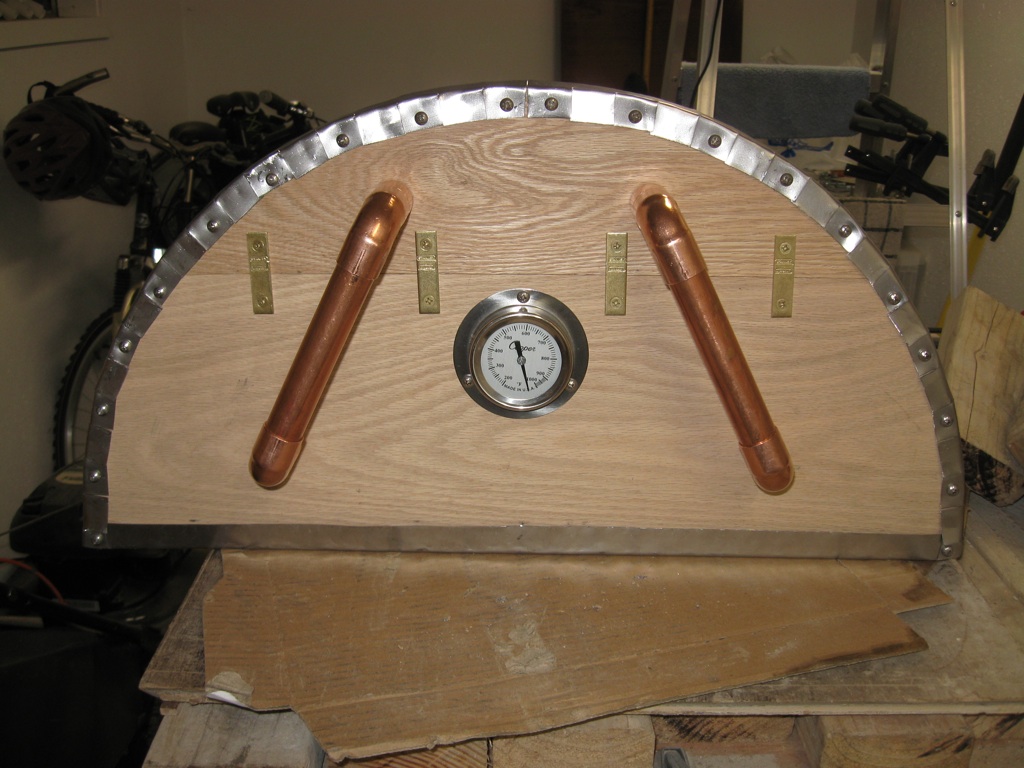
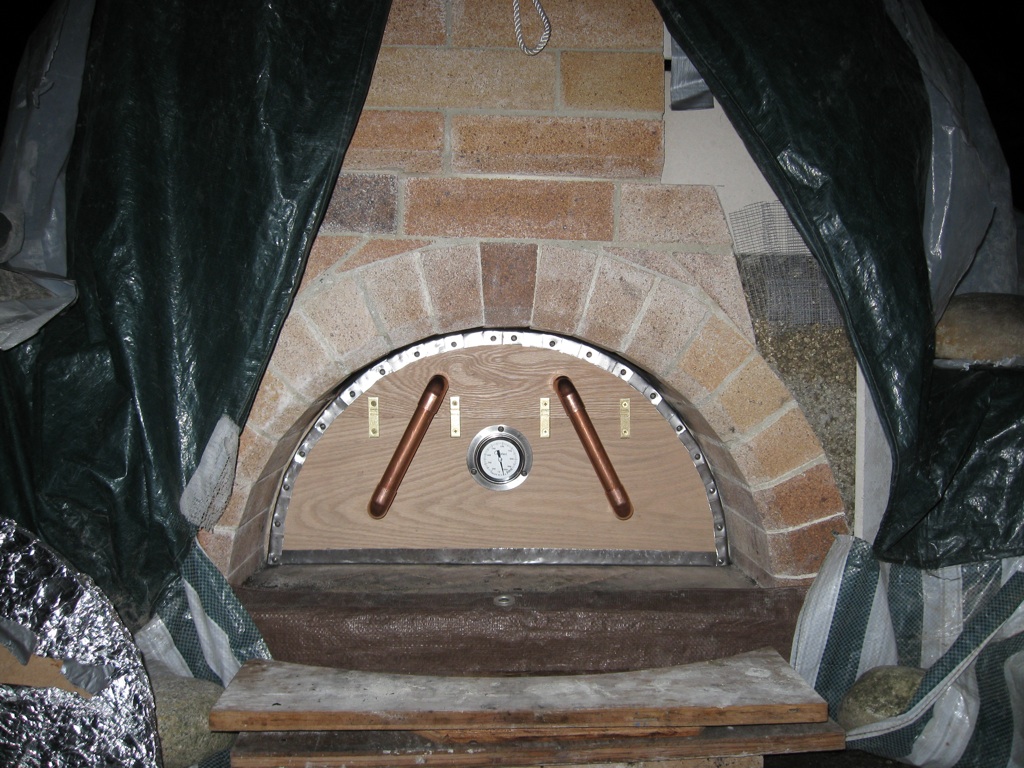
 Temporary door constructed by wrapping the arch forms in foil. I went ahead and installed the 1000F thermometer as well. I wanted this door for the later curing fires, which I was concerned might be hot enough to represent a risk to the arch-form door in its non-foil-wrapped state.
 Construction of the door.
 Construction of the door.
 Construction of the door.
 Construction of the door.
 Construction of the door.
 Construction of the door.
 Construction of the door.
 Construction of the door.
 Construction of the door.
 Construction of the door.
 Construction of the door.
 Construction of the door.
 Construction of the door.
 Construction of the door.
 About to pour the third terrace vermiperlcrete.
 Third terrace vermiperlcrete done, 65:65:13 quarts (5:5:1) vermiculite:perlite:portland or 10:1 insulation:portland (~4.3 cubic feet vermiculite/perlite), hydrated 1/3rd.
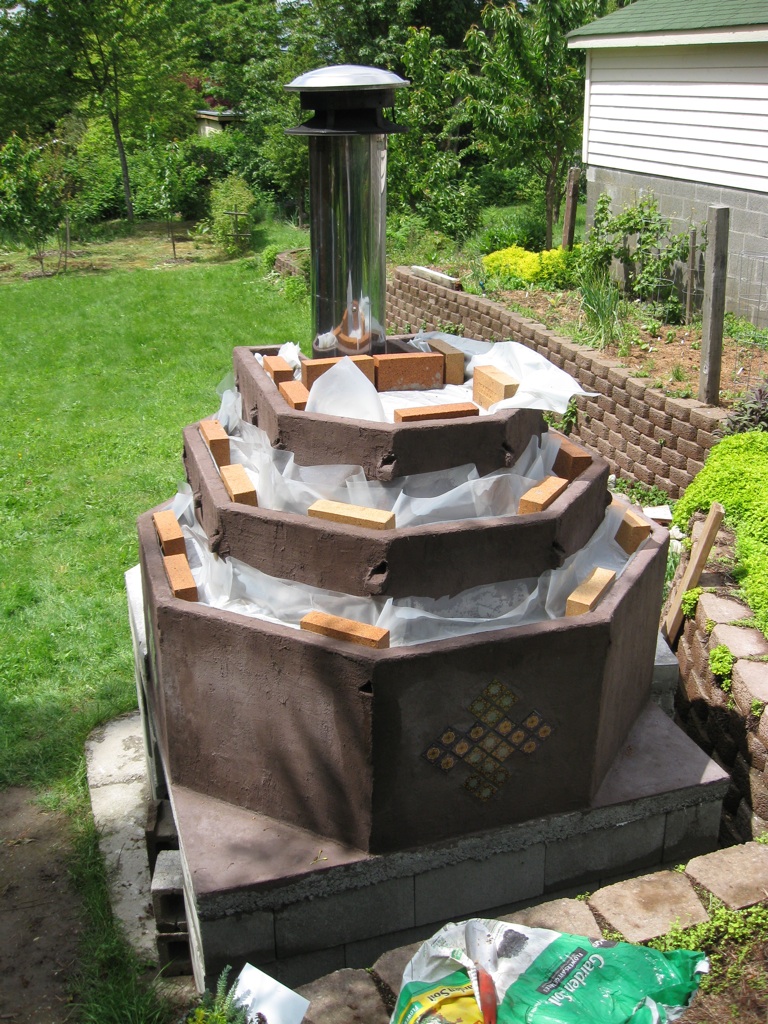
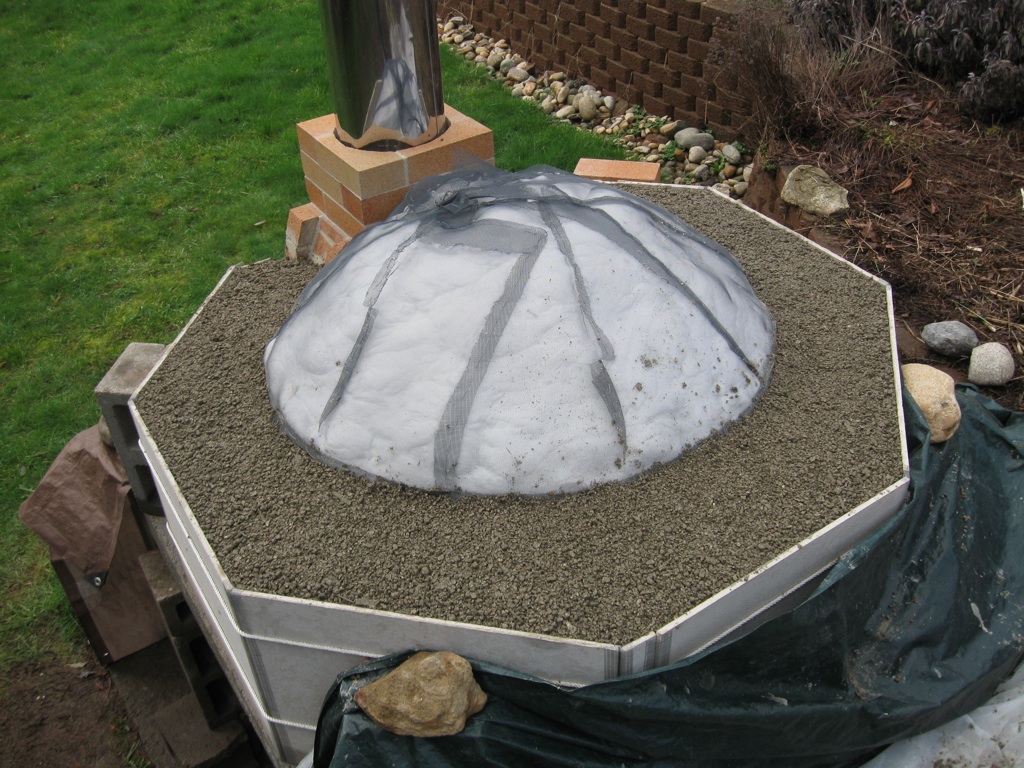
 Third terrace vermiperlcrete done, 65:65:13 quarts (5:5:1) vermiculite:perlite:portland or 10:1 insulation:portland (~4.3 cubic feet vermiculite/perlite), hydrated 1/3rd. Note that the fill isn't flat. Rather, there is a rise toward the center. The lower two terraces also rise toward the center. This will assist water in running off the oven.
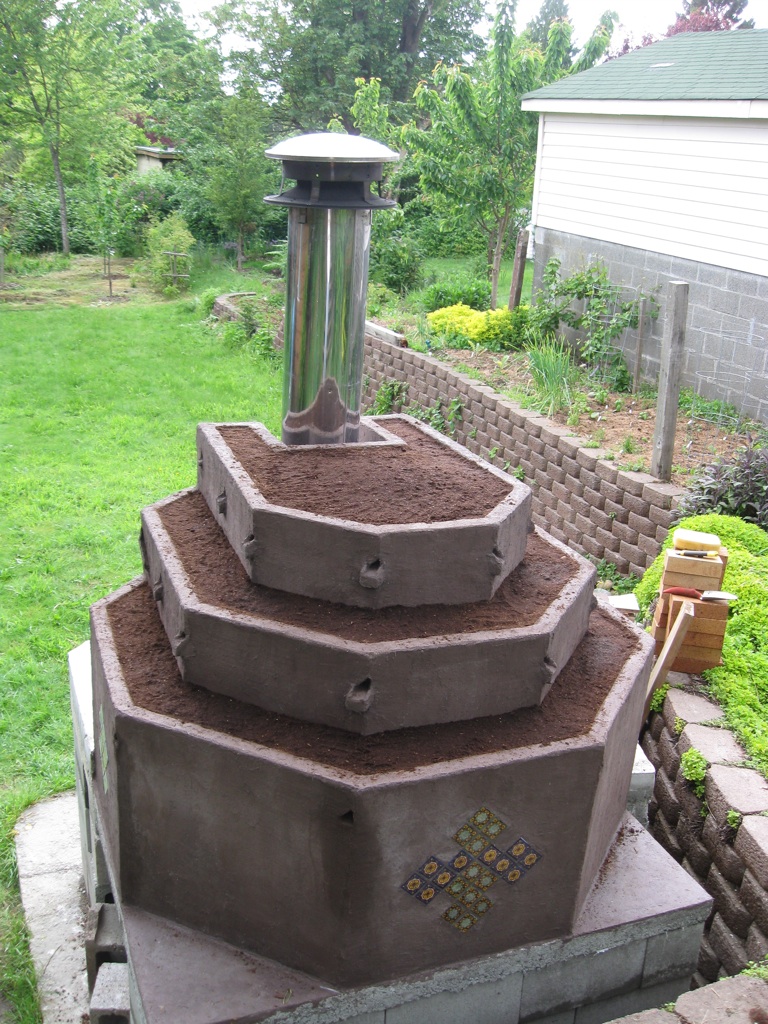
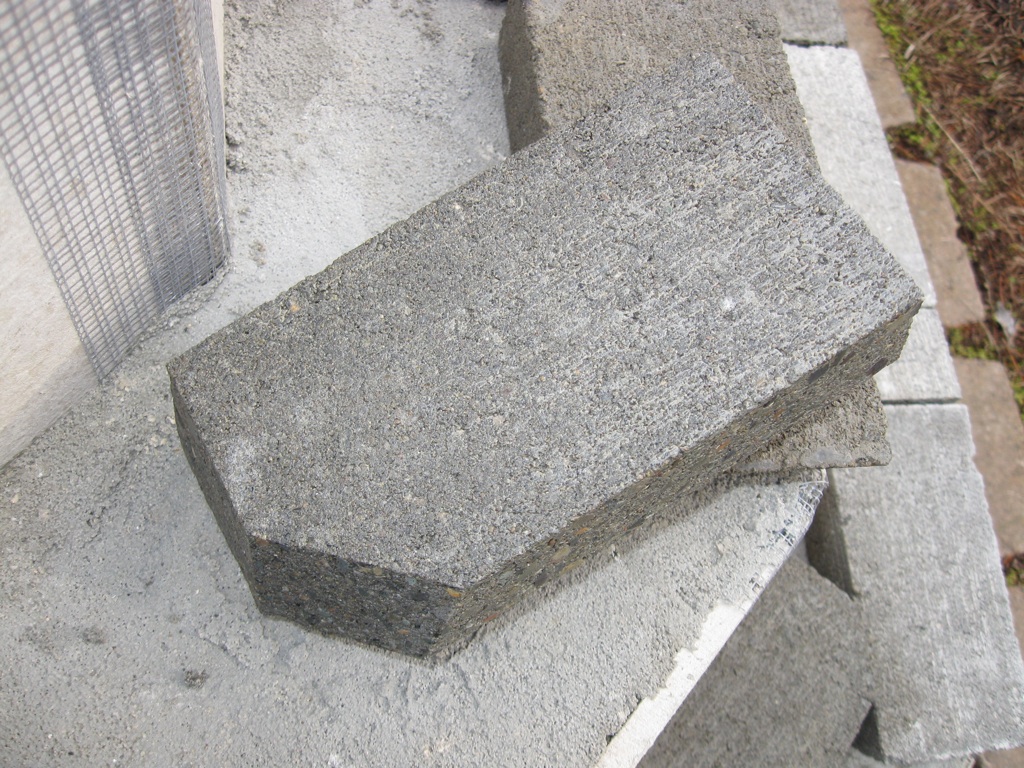
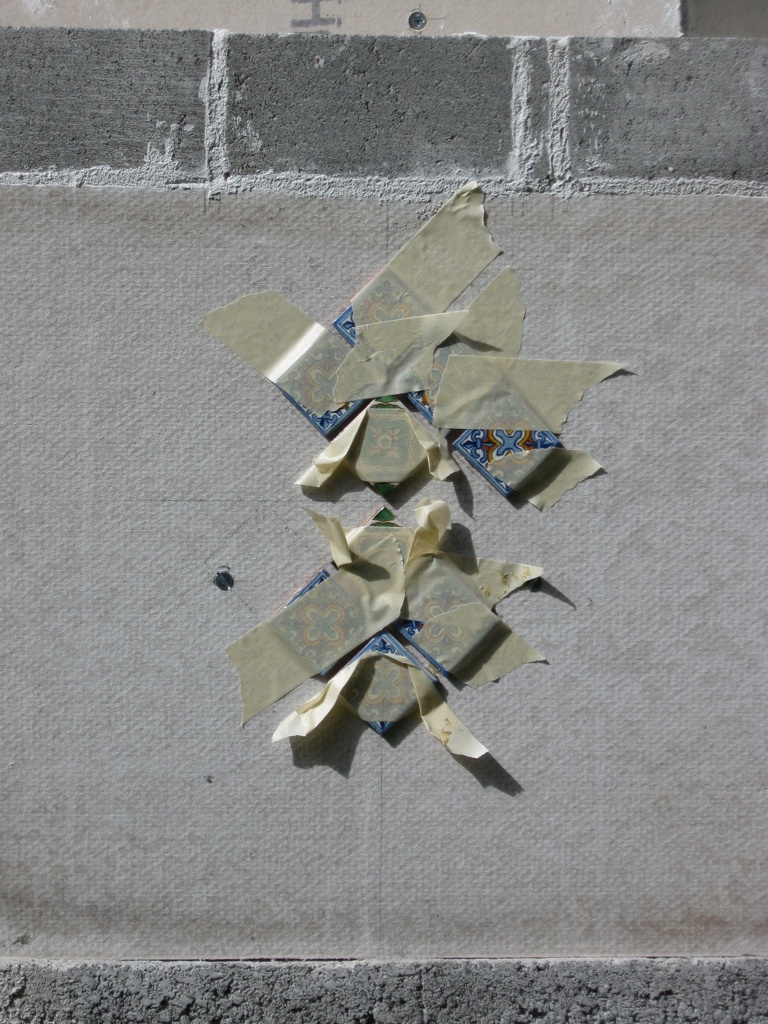
 The walls of the planter beds will be made up of small bricks. Unfortunately, ordinary pavers are too thick, so I will slice these super-thin slabs up instead (see next photo).
 Bricks (cut one-fourth from larger slabs, see previous photo) that will comprise the walls of the planter beds.
 I parged the terraces with 4:1:1 sand:portland:lime (lower two terraces done in this photo) to solidify to loose vermiculite/perlite aggregate and otherwise prep for the planter walls and stucco (surface bonding cement).
 I parged the terraces with 4:1:1 sand:portland:lime to solidify to loose vermiculite/perlite aggregate and otherwise prep for the planter walls and stucco (surface bonding cement).
 Virtually all brick ovens develop a few hairline cracks along various mortar lines once they get fired up a few times. Seems mine was no exception (right side of the keystone).
 Virtually all brick ovens develop a few hairline cracks along various mortar lines once they get fired up a few times. Seems mine was no exception (two cracks in this photo).
 Ready to build the planter walls.
 The planter walls will have weep holes to drain the rain water away. This was a tricky cut, two axes to ensure the hole is a constant width while occuring at a corner in the wall.
 Planter walls under construction.
 Planter walls done.
 Ready to fill the cores of the extended counter support wall.
 Extended counter support wall poured.
 Extended counter support wall poured.
 Ready to pour the counter.
 Ready to pour the counter.
 Packing, leveling, and sort of screeding the counter. Following this stage I floated it with a wooden float (see related photo of the hearth pour).
 Detail of the counter concrete. Having mixed all previous concrete for this project way too dry, I mixed this concrete much wetter. I did the same the previous week when I filled the cores of the extended support wall.
 Counter poured, 8x80lbs Sakrete.
 Counter poured, 8x80lbs Sakrete.
 Counter with forms removed.
 Applying stucco (surface bonding cement with acrylic fortifier). This photo also shows that I added drain-offs under the weep holes so they will drip into the planter beds instead of running down the wall under the plastic.
 The surface bonding cement has a strange consistency, oweing primarily to the fibers that permeate it.
 Applying surface bonding cement. This photo also shows that I added drain-offs under the weep holes so they will drip into the planter beds instead of running down the wall under the plastic.
 Applying talavera terracotta tiles (with Liquid Nails).
 Applying talavera terracotta tiles (with Liquid Nails).
 Applying talavera terracotta tiles (with Liquid Nails).
 First stucco coat done (43.75lbs of Quikrete Quikwall Surface Bonding Cement with Quikrete Acrylic Fortifier).
 First stucco coat done (43.75lbs of Quikrete Quikwall Surface Bonding Cement with Quikrete Acrylic Fortifier).
 Second stucco coat incomplete.
 Third stucco coat done. The oven is done!!!
 Third stucco coat done. The oven is done!!!
 Third stucco coat done. The oven is done!!!
 Third finished oven as seen from across the yard. Despite having completed construction of the oven itself, clearly much work remains on the counter and the stand to achieve a desirable final appearance.
 The back of the completed oven.
 Detail of the planter beds.
 Detail of the weep-hole run-offs.
 Some of the weep-holes would not drain into the level below, they would drain onto the wall instead, so I ran a trough to help the water find its way.
 Ready to fill the planter beds.
 Planter beds filled with soil.
 Planter beds filled with ground covers. They will eventually fill in and drape over the sides.
 Planter beds filled with ground covers. They will eventually fill in and drape over the sides.
 The stand (the concrete block walls below the counter) fully stuccoed.
Cooking, Oven Use, Food, etc.
Click individual images to see larger versions.
 San Marzano tomatoes.
 Antimo Caputo 00 pizza flour, local hand-spun mozzarella, fresh basil.
 Shaping the dough.
 Inaugural pizza number one, a true Neopolitan pizza margherita, i.e., tomatoes, mozzarella, olive oil and basil.
 Inaugural pizza number two: tomatoes, mozzarella, olive oil, basil, black olives and red onions.
 Firing the oven for the very first pizzas.
 Firing the oven for the very first pizzas.
 Firing the oven for the very first pizzas. See how the dome starts "self-cleaning" (called clearing) when it gets hot enough? That's the soot (carbon) burning off. That effect is supposed to reach all the way down the walls, but my first pizza fire didn't last long enough.
 Firing the oven for the very first pizzas.
 Cooking the first pizza.
 Cooking the first pizza.
 One (of two) inaugural pizzas, a true Neopolitan pizza margherita, i.e., tomatoes, mozzarella, olive oil and basil.
 One (of two) inaugural pizzas: tomatoes, mozzarella, olive oil, basil, black olives and red onions.
 55lb bag of Antimo Caputo pizza flour.
 A very hot oven. See how the dome has cleared the black carbon almost all the way down the sides? That's how you know when it's time to cook pizza.
 Third pizza attempt, pizzas five and six. A success! The second attempt, pizzas three and four, was a disaster. They sat made and ready, waiting on the wood peels to go in the oven, for too long. Consequently, they stuck to the peels and had to be forced into the oven in lumps that "became" calzones. Pizza five is spinach and criminis, pizza six is salami.
 Cooking pizzas seven and eight: thai chicken and hawaiian. Notice that I cleared the entire dome for the first time (the soot burned off all the way down the sides).
 Pizzas seven and eight: thai chicken and hawaiian.
 Cooking bread, an Outback Steakhouse copycat recipe. Notice that I cleared the entire dome for the first time (the soot burned off all the way down the sides).
 Outback Steakhouse copycat bread. Yum, looks fantastic.
 Making pizza for our first party (six people, four pizzas). The ace bandage is for the tennis elbow I got pipe-bending and hammering rebar for the concrete counter a week earlier.
 Pizzas nine and ten (the first two of four for a six person party): one margherita, one pepperoni.
 Pizza eleven (third of four for a party): spinach and goat cheese.
 Pizza twelve (four of four for a party): pesto, mushroom, and tomato.
 Our first party, a mere four pizzas, all very well received.
 Pizzas thirteen and forteen: margherita and pepperoni.
 Pizzas thirteen and forteen: margherita and pepperoni.
 French bread.
 Dessert pizza one: tiramisu-mascarpone, strawberries, chocolate.
 Pizza fifteen: barbeque-chicken.
 Pizza sixteen: pesto, tomato, and artichoke-hearts.
 Dessert pizza two: apple "pie".
 First roasted chicken, Thanksgiving practice. This is the brine, 1gal water, 1cup salt, 1/2cup brown sugar, ground pepper, rosemary.
 First roasted chicken, Thanksgiving practice. There's bread in the dutch oven on the right and potatoes and corn in foil around the sides.
 First roasted chicken, Thanksgiving practice. Stuffed with onions, garlic, and rosemary. Brushed with olive oil. White wine in the pan.
 Thanksgiving in the snow, so pretty.
 Thanksgiving. I didn't fully saturate the oven with heat, then had to relight a fire around the turkey. In an effort to keep the heat in while the letting the fire breath, I lifted the door up to create an intake vent at the bottom.
 Thanksgiving. I didn't fully saturate the oven with heat, then had to relight a fire around the turkey. In an effort to keep the heat in while the letting the fire breath, I lifted the door up to create an intake vent at the bottom.
 Thanksgiving. One of two turkeys. We did two small turkeys instead of one big one, so as to have a backup should one go belly up.
Videos
Mixing Vermicrete
Here are some videos showing how I mixed the vermicrete. It gives some indication of what the stuff is like, how it behaves, and how wet I made it. I can't really vouch as to whether I made it right on the other hand, so take that as you will. Note that in the videos I am mixing the vermicrete with a garden rake but after a few tries I quickly altered my approach, mixing either with a trowel, or even better, bare-handed (bare-gloved) up to the elbows, in order to avoid tearing the vermicrete up and also to thoroughly mix the "mud" from the bottom of the wheelbarrow into the mixture.
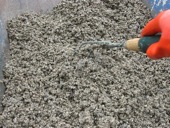
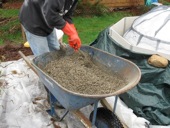
Vent/Flue Smoke-Draw
Here are some videos showing how nicely the vent/flue/chimney/stove-pipe draws. Almost no smoke escapes out the entrance of the oven. Check out the flames whipping up the flue. Sweet!