Modifying Servos for Full Rotation
The following is a detailed description of how to modify a Tower Hobbies TS-53 S3K Standard Servo U for full rotation. It turned out to be a little trickier than the simplest descriptions I had found on the web for other servos due to the fact that this particular servo doesn't have a separate ring inside the main drive gear that attaches to the pot-handle. Still, it's pretty easy.
Please forgive the low-quality pictures all over this webpage. I took them with the Eye Module I for the Handspring Visor. This digital camera takes 320x240 pictures but they tend to be so low-quality that reducing some of them to 160x120 sharpens them up a bit. It sucks all around. Incidently, the graph paper that most of these pictures are taken on is a quarter inch per square.
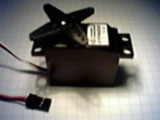 |
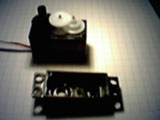
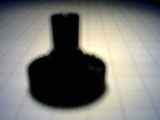
Begin by removing the cross-shaped horn that is attached to the servo-axle. There is a single screw in the end of the axle holding it in place. Once the screw has been removed, the horn comes straight off, but it fits the axle very tightly. Some wiggling will be necessary to get it off.
|
 |
 |
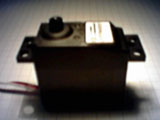
Turn the servo over and remove the four corner screws. There is a bottom plate on the servo case which will be loose after removing the screws and can come right off, but this isn't necessary. Removing it would expose a circuit board so after removing the screws I fit the plate back on (it will fit snuggly even without the screws) before continuing. Be careful as you turn the servo back over since removing the screws will allow the top half of the servo case to fall right off.
|
 |
 |
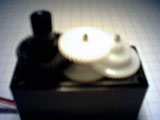
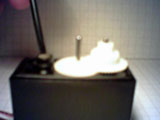
Turn the servo back over (holding it together so it doesn't fall apart). The top covering of the servo case will come right off now. Do this carefully and slowly. Some of the gears may be prone to stick inside the top of the case and could fall out spuriously. Assuming none of the gears stuck to the top covering, you will see an arrangement of gears like those pictured here. In this particular servo the main drive gear (the gear with the axle that sticks out of the servo) is black and all the other gears are white. Not all servos are like this however. There are four gears in all.
|
 |
 |
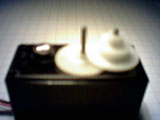
First remove the top center gear (the axle-pin of this gear may stick to the gear as you pull it off, essentially freeing the gear below it. Be careful.). Second remove the main drive gear. This will expose the brass pot-handle which projects into the main drive gear. When removing, replacing, or otherwise handling the gears, try to touch parts that don't have lubricant on them. You want to leave the lubricant in place when you put the servo back together.
|
 |
The next step I did is different from other servo modification descriptions. Some descriptions go inside the circuitry of the servo, solder off the pot, and replace it with resistors. Other descriptions simply remove the ring inside the main drive gear that locks onto the pot. I couldn't do this however because this particular servo doesn't have a ring inside the main drive gear. What I had to do is take a hacksaw and saw the pot-handle off flush with the plastic housing that it projects through. To do this I removed the other two gears (both to get them out of the saw's way and to avoid getting brass dust all over them) and held the servo against the edge of a table. This allowed me to saw vertically instead of horizontally. The advantage of this is that brass dust won't fall down through the pot's projection hole into the internal part of the servo case. Once the pot-handle has been cleaved, file it down nice and smooth so it won't catch on the inside of the main drive gear. Brush or blow any brass dust off the servo housing. Leave it as clean as possible.
|
 |
Take the main drive gear and cut off the brake that sticks out of the axle. I did this with the hacksaw, but since the gear is plastic you could try a knife or might even be able to clip the brake off with some wire cutters. You want to do a nice job of this. If you leave a bit of plastic sticking up it may catch on the center-top gear and perform its original breaking function. When you put the gears back on the servo rotate the main drive gear with your fingers. You want to make sure that the break is totally removed. In addition, make certain that the pot-handle doesn't catch on the inside of the main-drive gear.
|
 |
 |
Plug the servo into the SV203 and provide power to the SV203 without the Visor being plugged in. Without a controlling device, the SV203's default behavior when provided power is to send all the servo outputs to the central position. Ordinarily there would be feedback from the rotation of the gears to the pot-handle and the motor inside the servo would stop turning when the servo is centered. With all the gears removed this feedback no longer occurs and the motor will turn forever. You want to set the servo to its stopping position before putting it back together. Since the pot-handle is sort of rectangular shaped (with round ends) and sticks through a round hold in the case, there is space on either side of the handle. Stick a screwdriver into the space around the pot-handle and rotate it so that the pot-handle rotates. Do this slowly and find the position where the motor stops turning. Be precise about this. The pot can be in a position where the motor is turning very slowly. Make sure the motor is completely stopped. That's it. You're done. Put all the gears back in, place the top covering back on, turn the servo over, replace the four bottom screws, turn the servo over again, and replace the horn. There are a lot of little steps, but actually it's a piece of cake.
|